Quick Start
- Connect Your Profile
- Managing Your Bots
- Build Your First Bot (Sample Bot)
- Affiliates
- Sample Bot (Booking Calls From "Likes")
- Using Messenger Filters
Connect Your Profile
In order to have your bots begin chatting with leads, you need to connect your Facebook profile to ChatBlaze.
Connection Setup Steps:
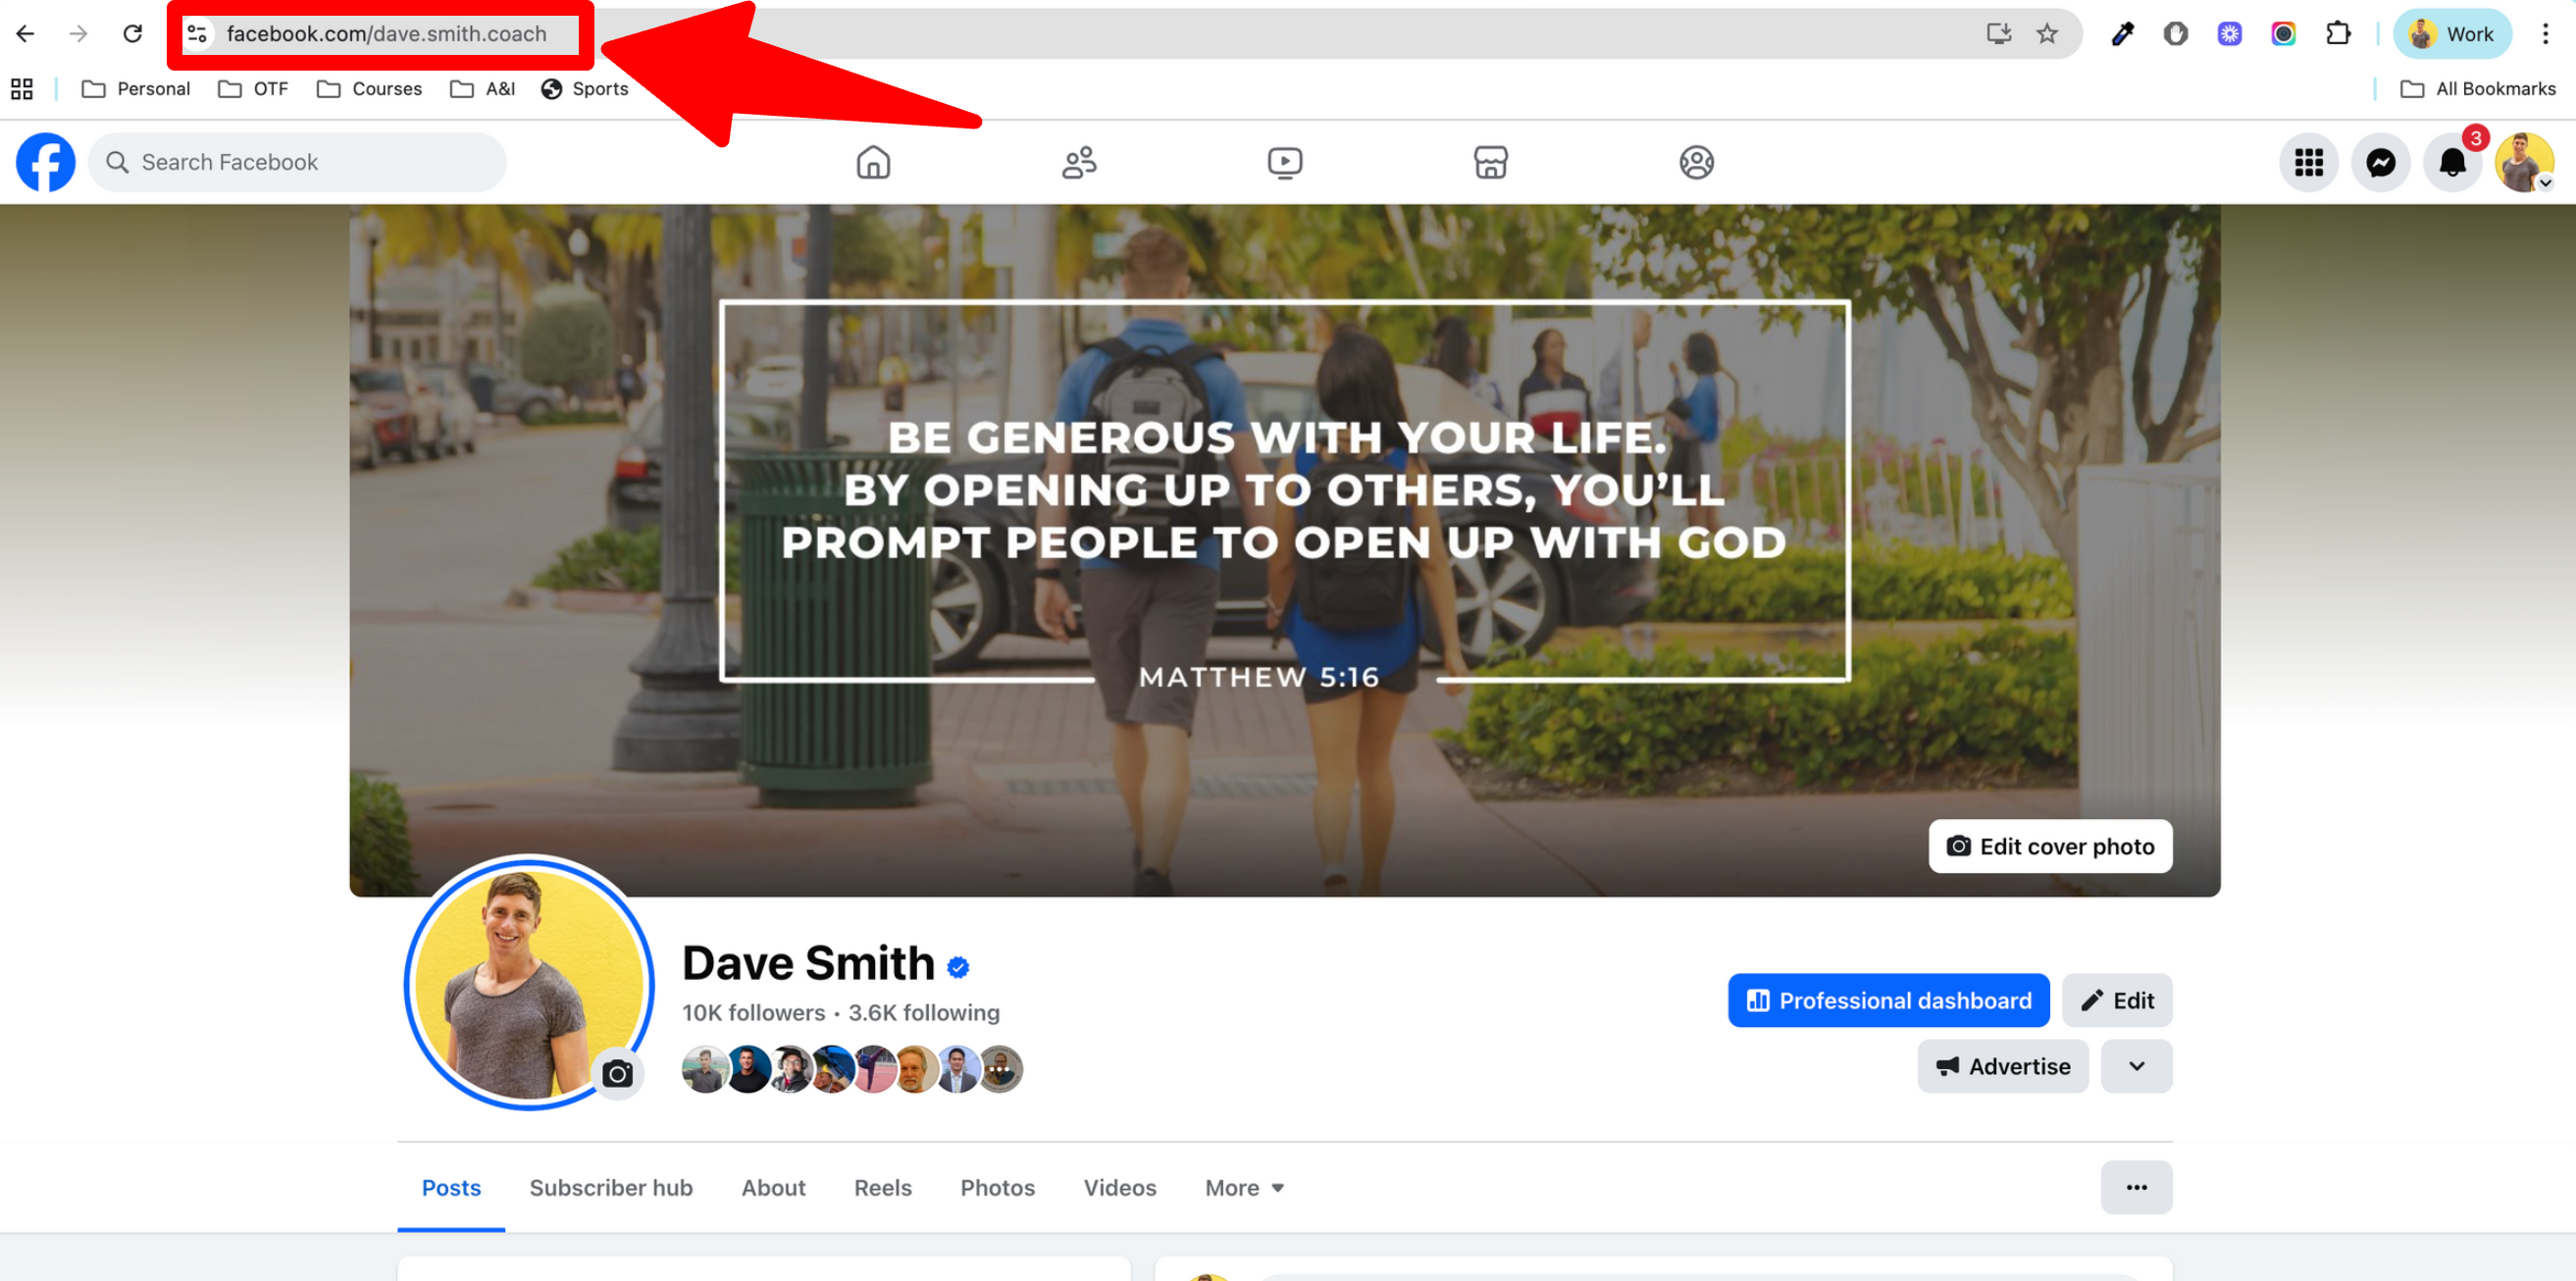
1) Open your Facebook profile and leave it open for the remaining steps.

2) Copy your Facebook profile URL.
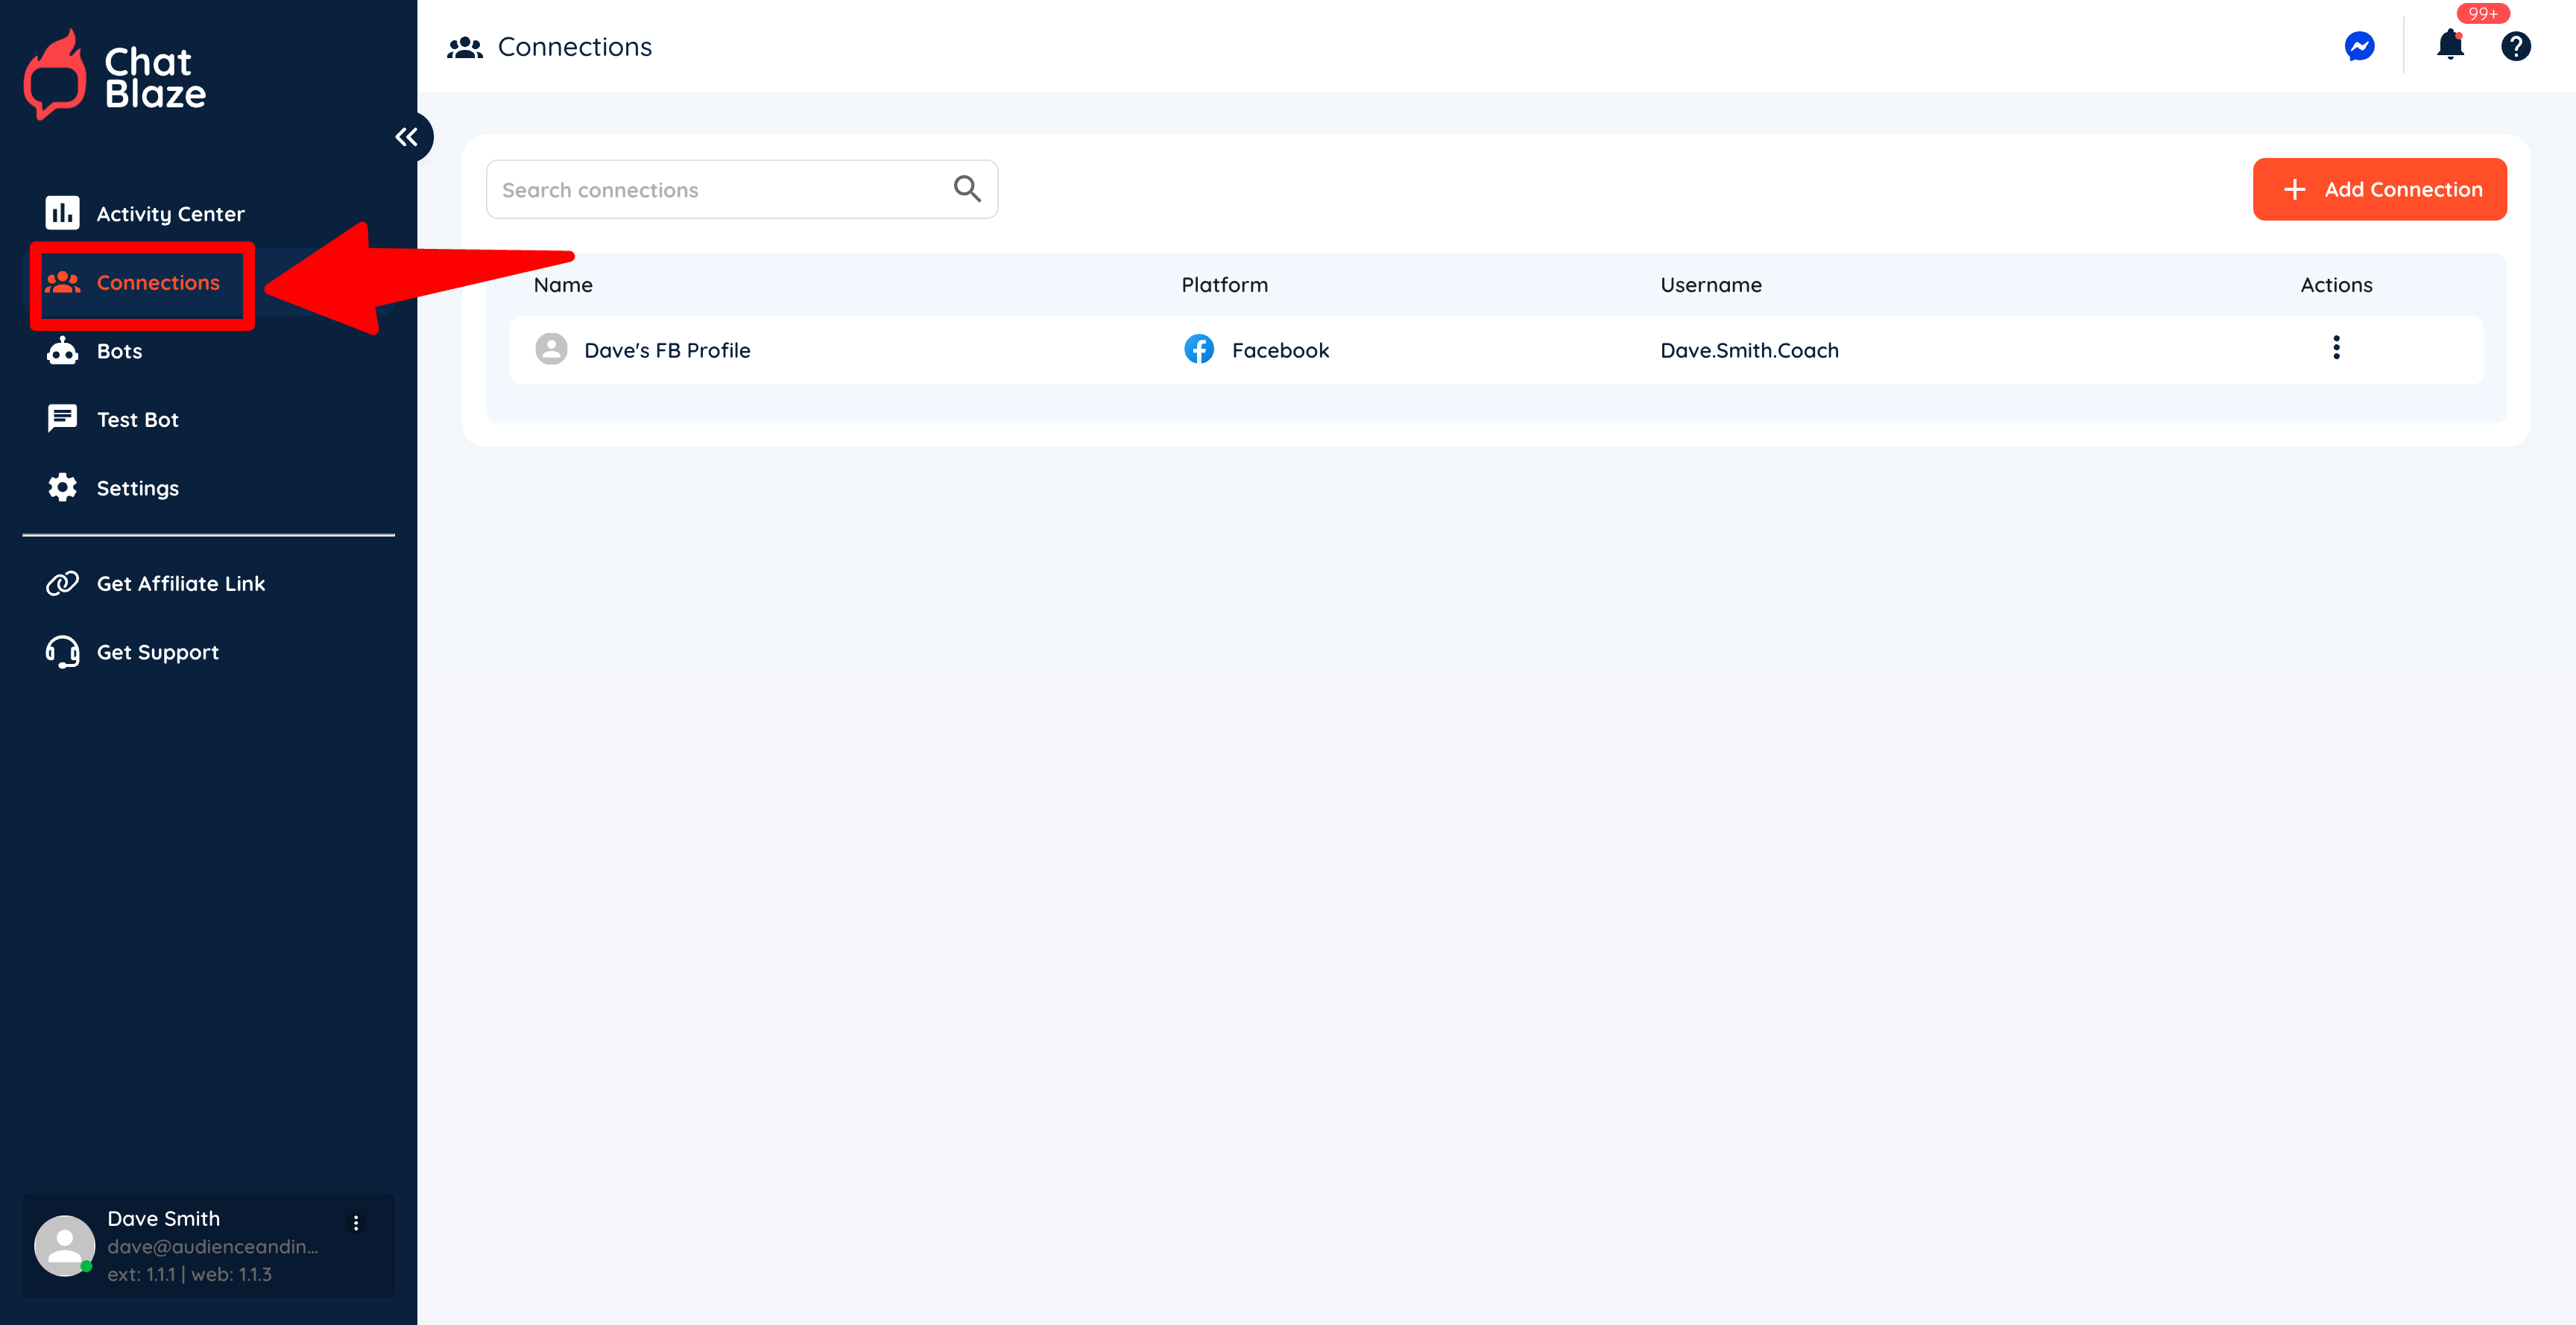
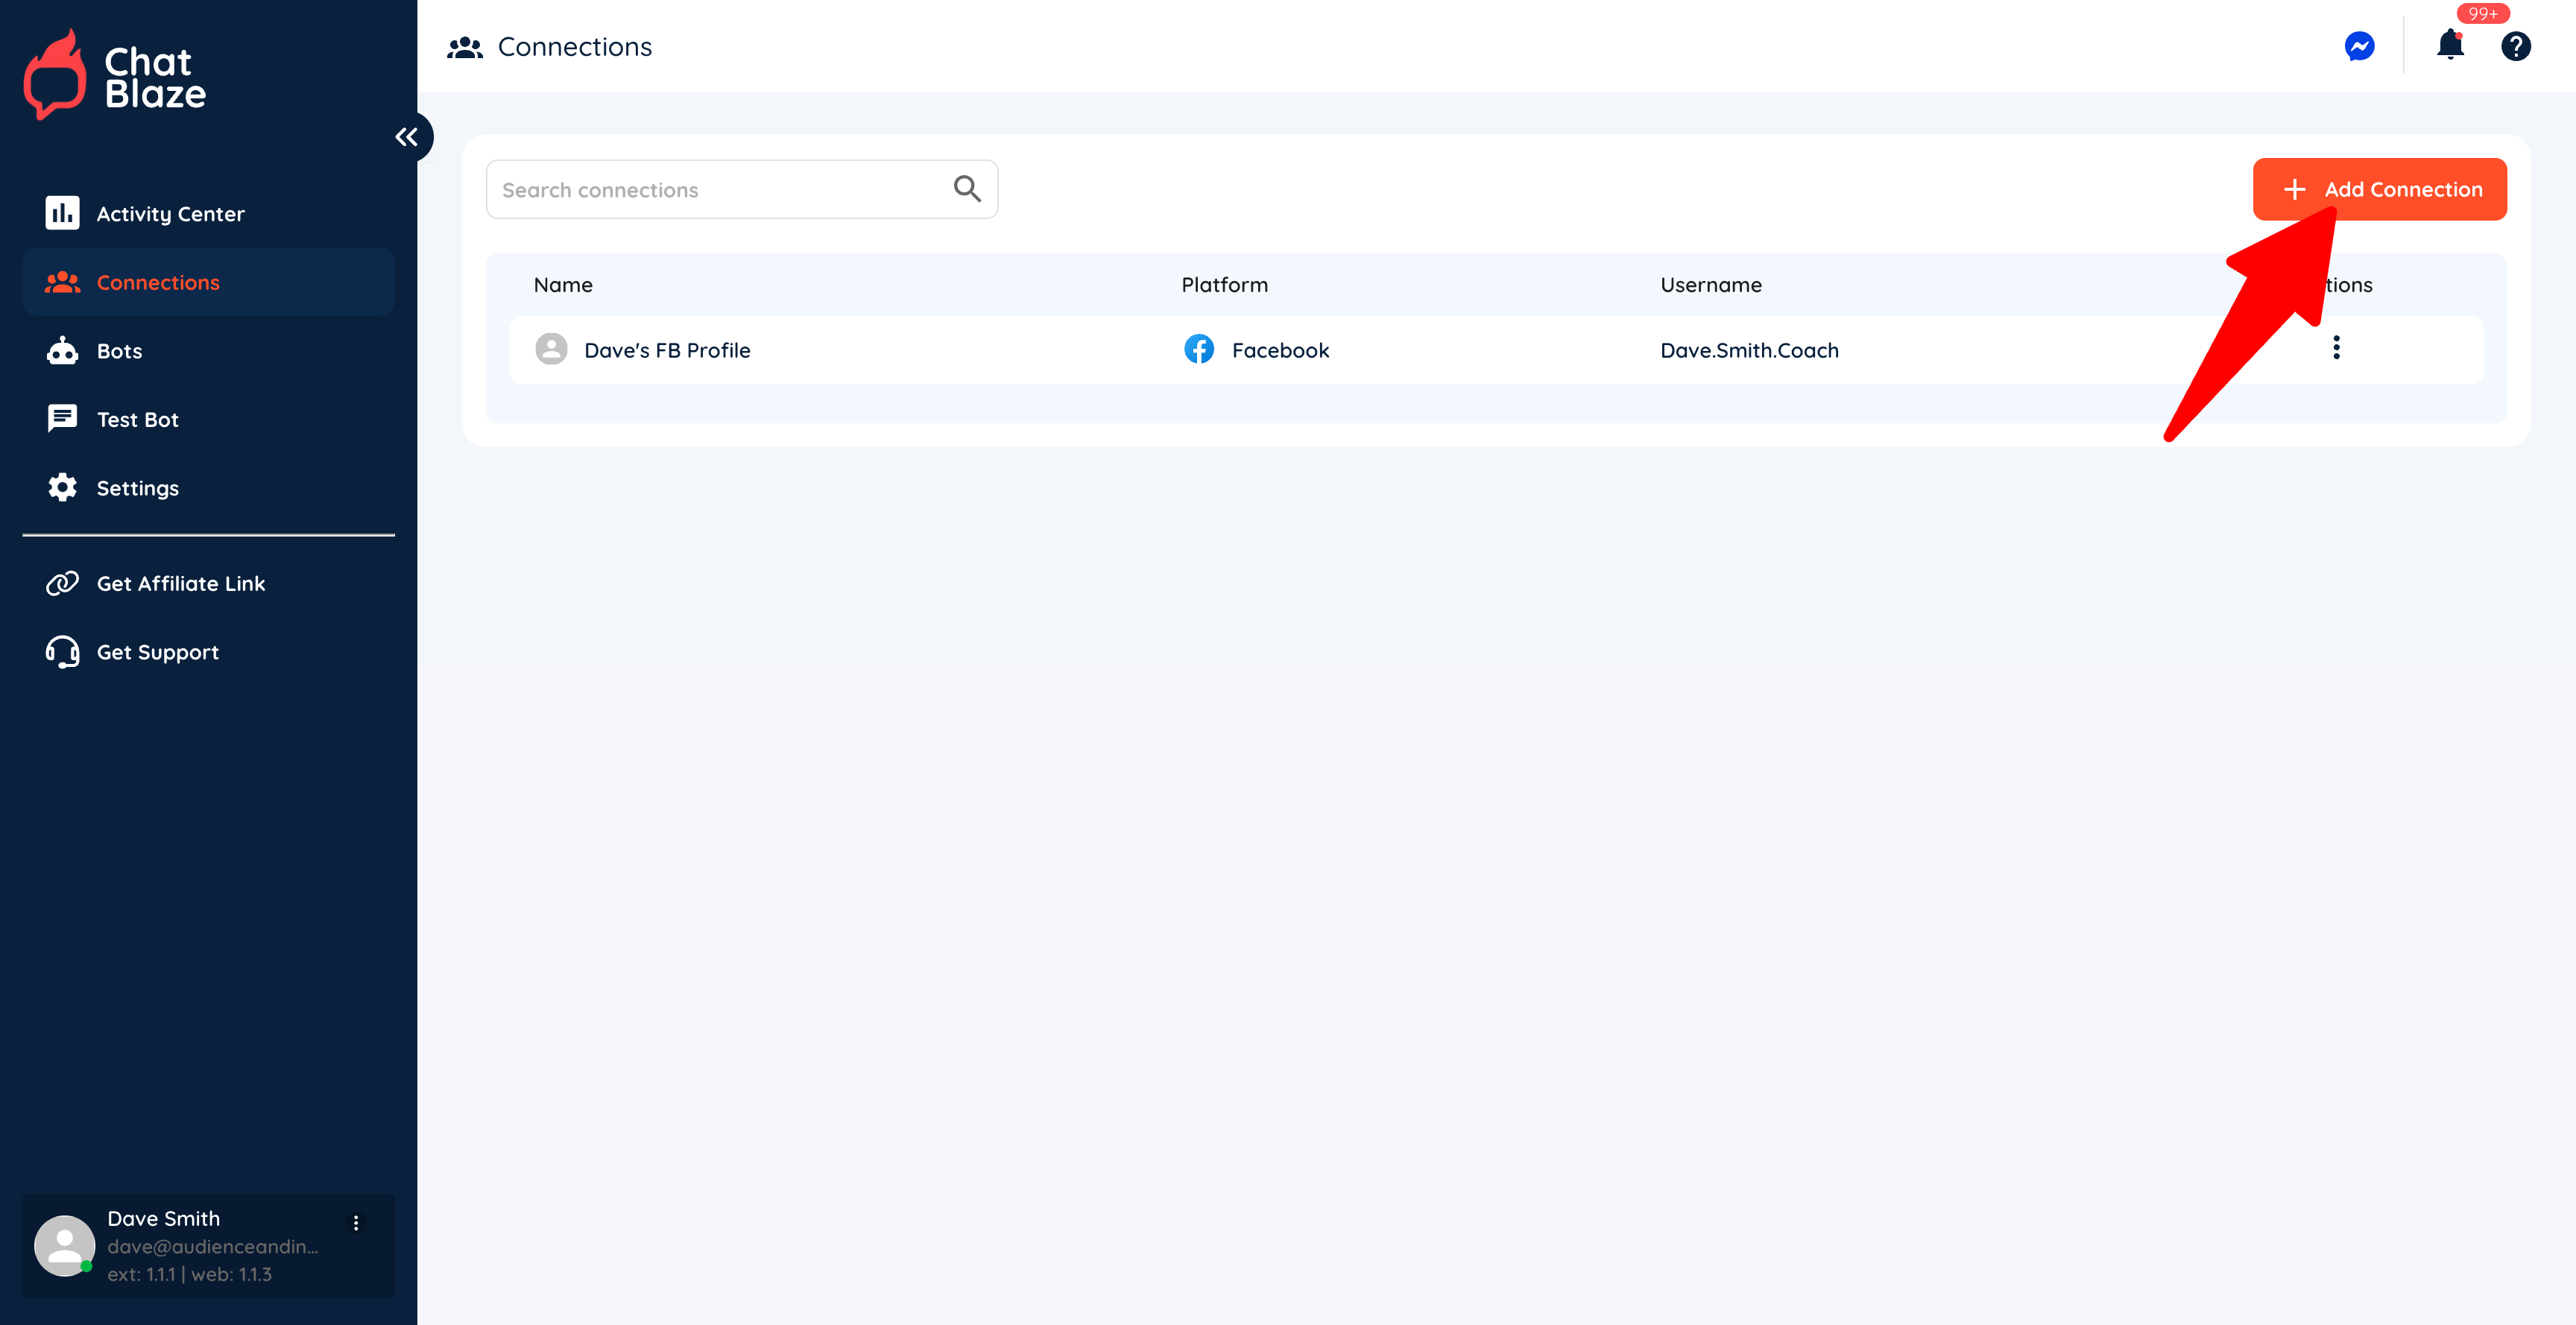
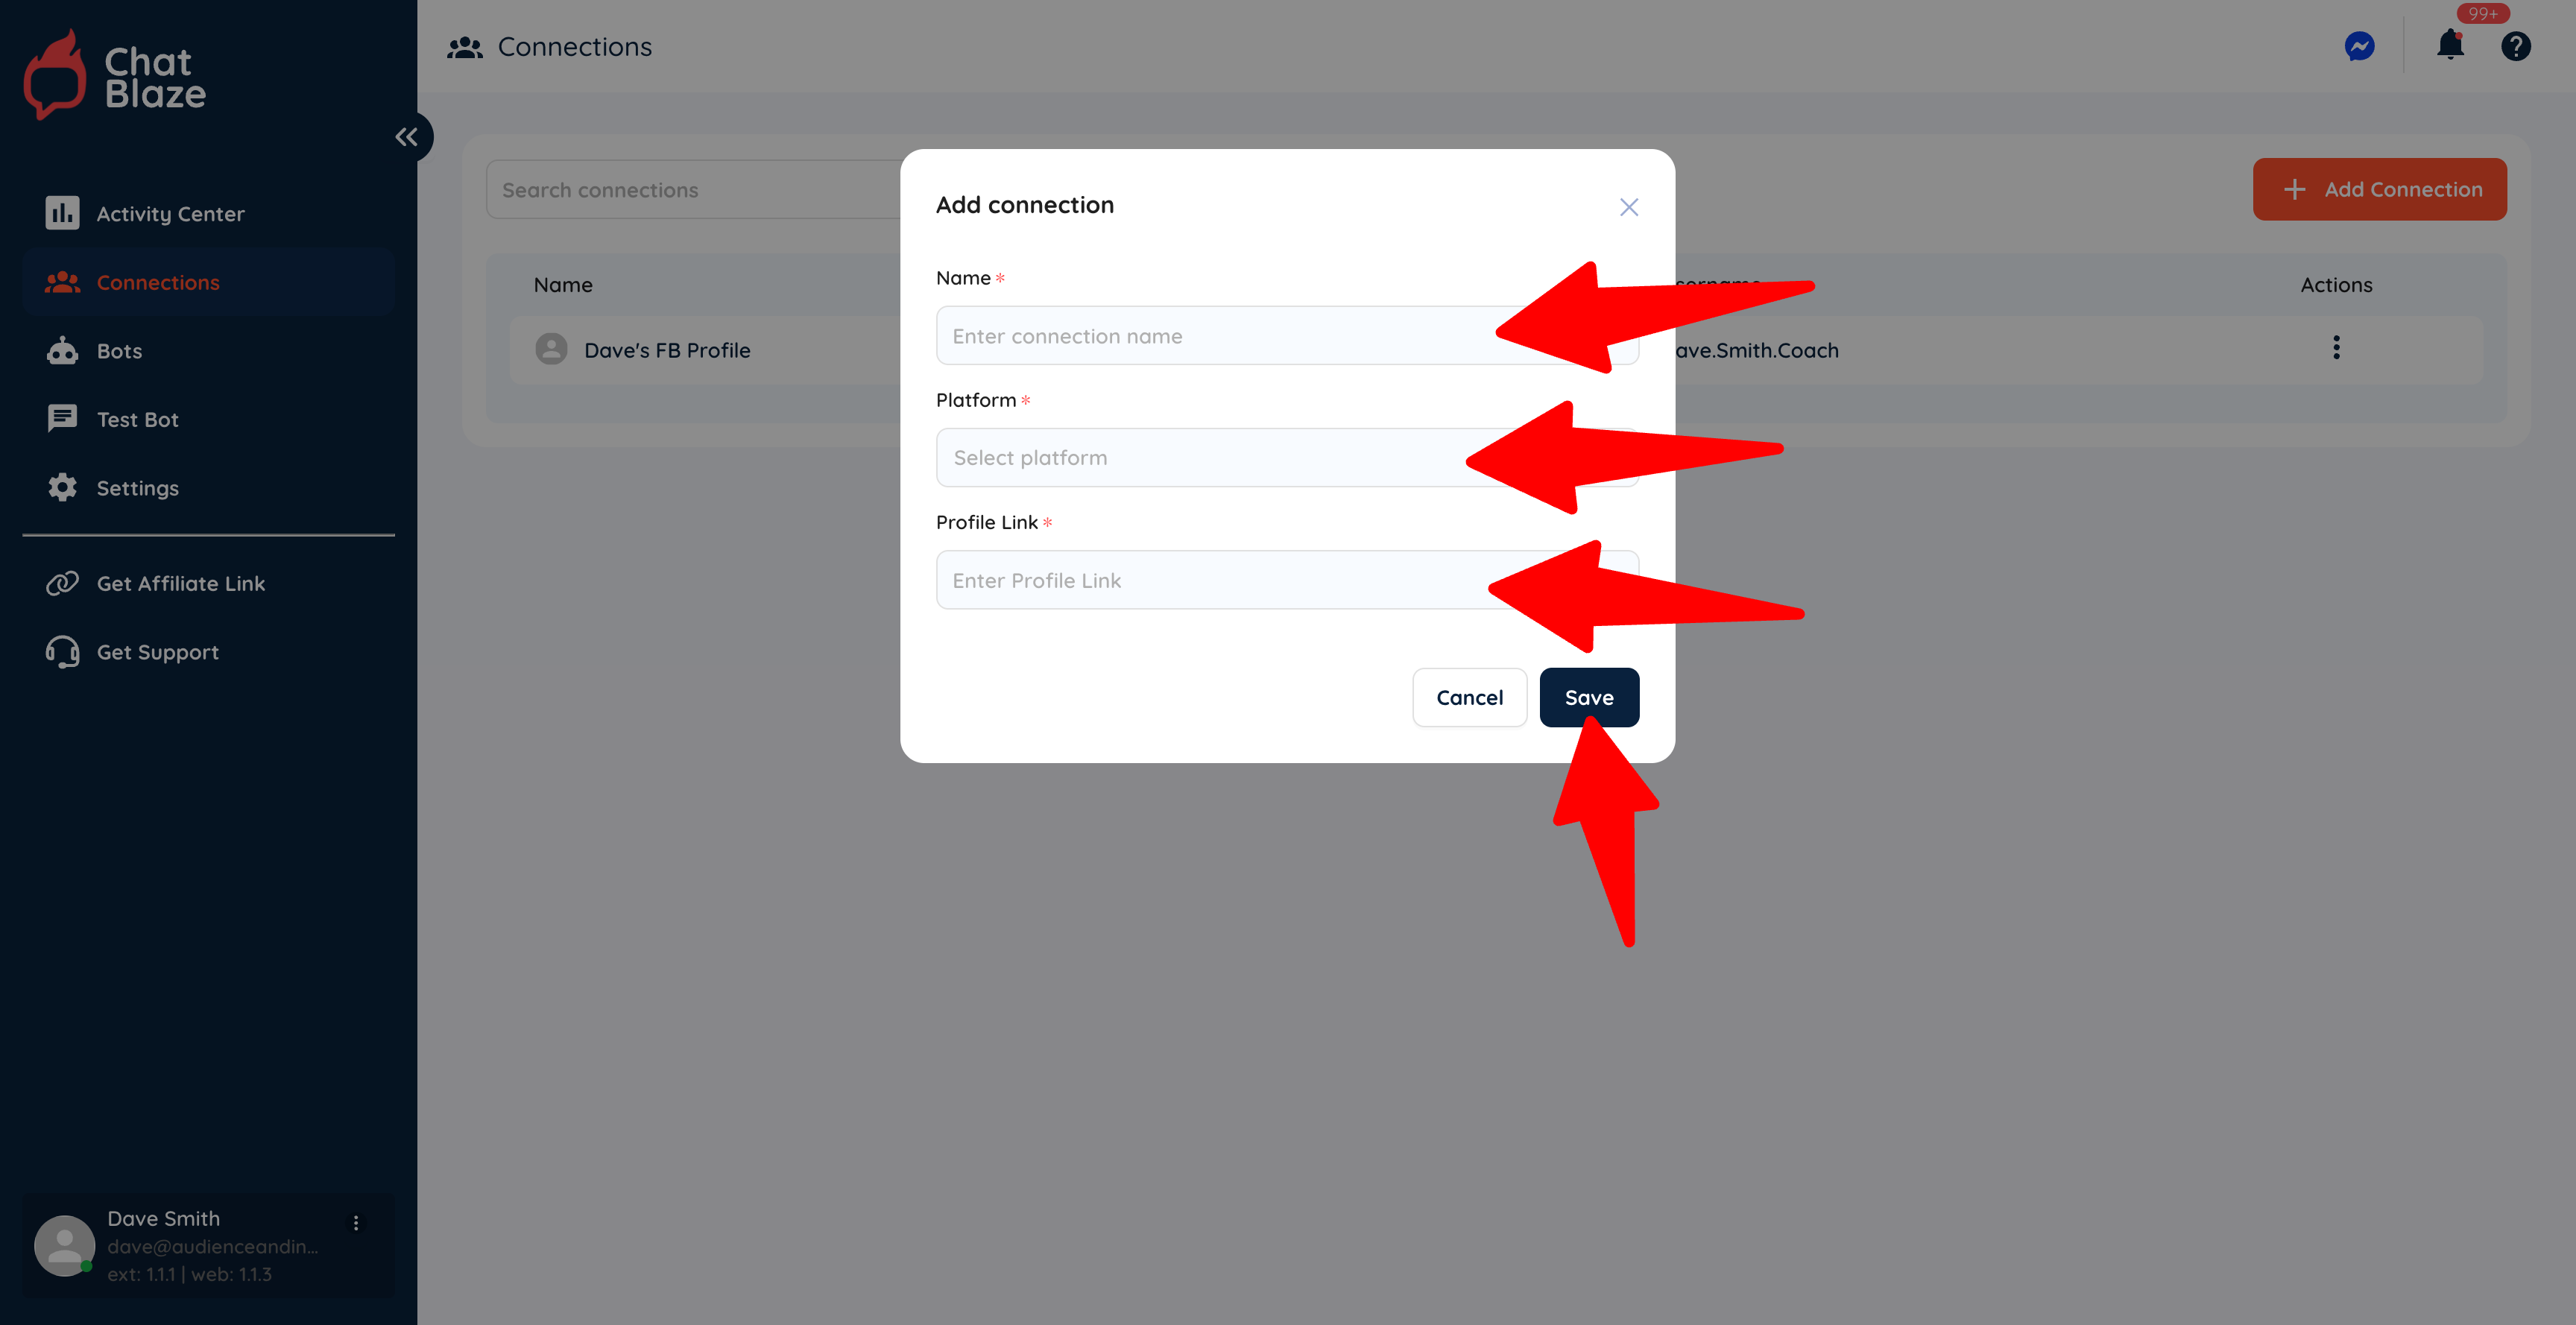
4) Click the "Add Connection" button.
5) Give your connection a name (e.g. "Dave's FB Profile"), choose "Facebook" as the platform, and then paste your profile link into the last box. Click Save.
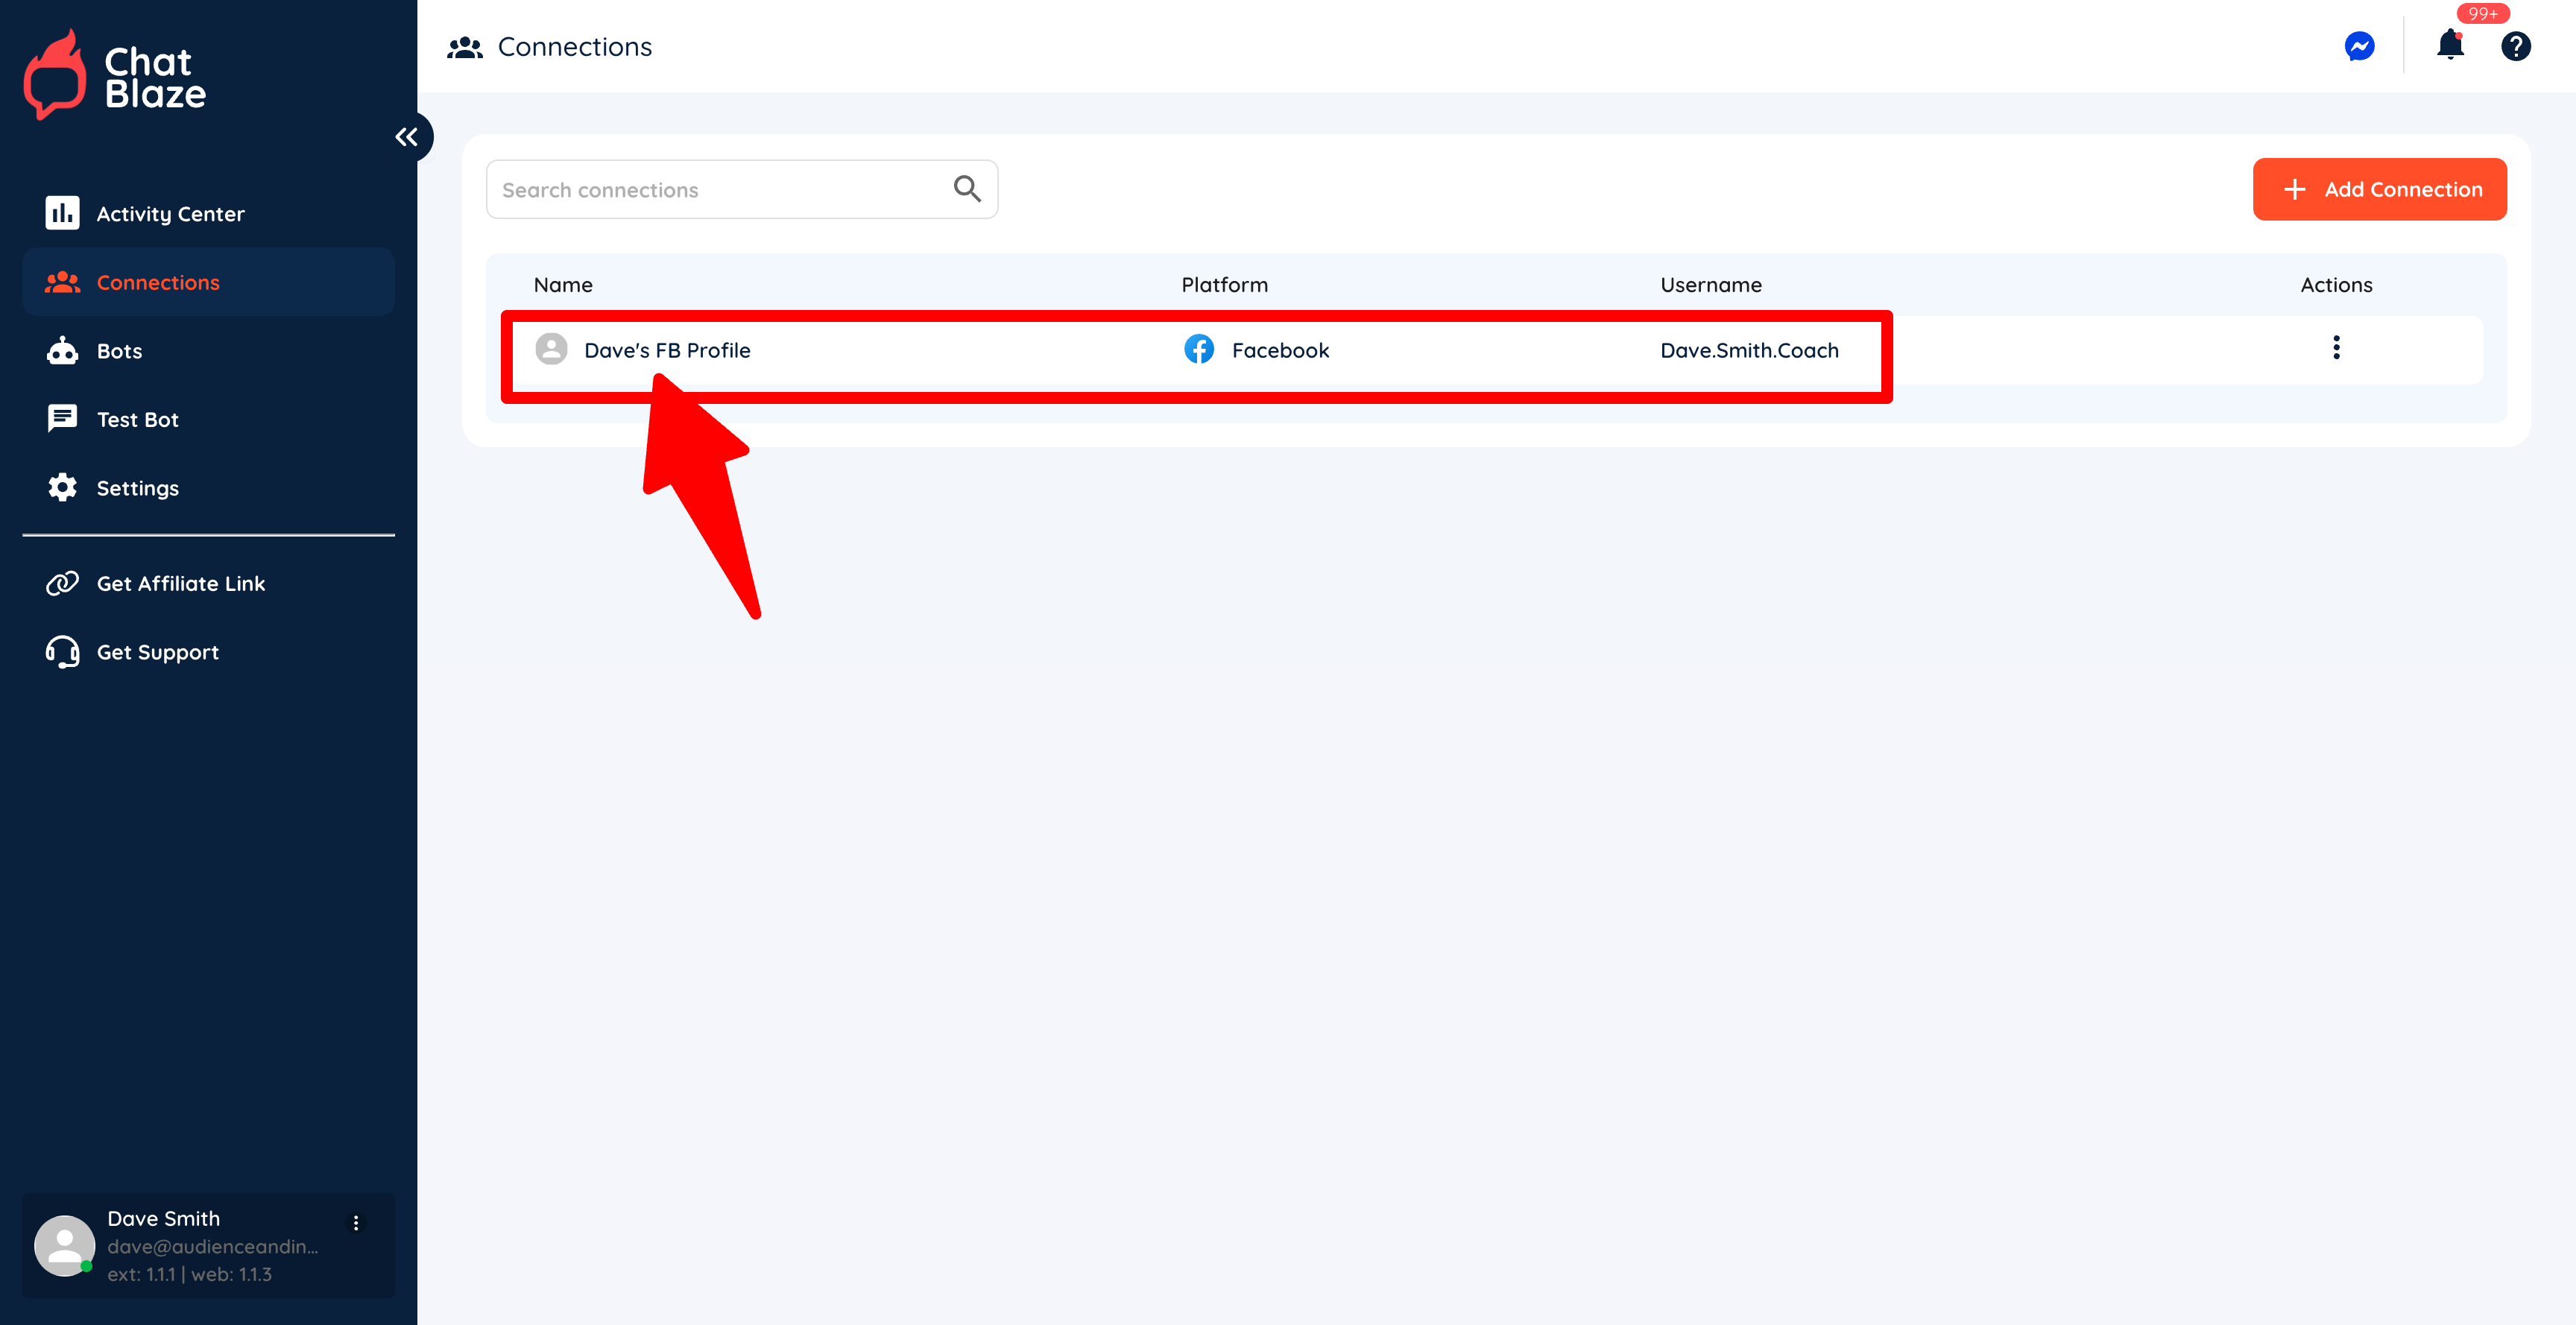
6) Your Facebook profile is now connected to ChatBlaze, which means your bots can begin chatting with leads using this profile.
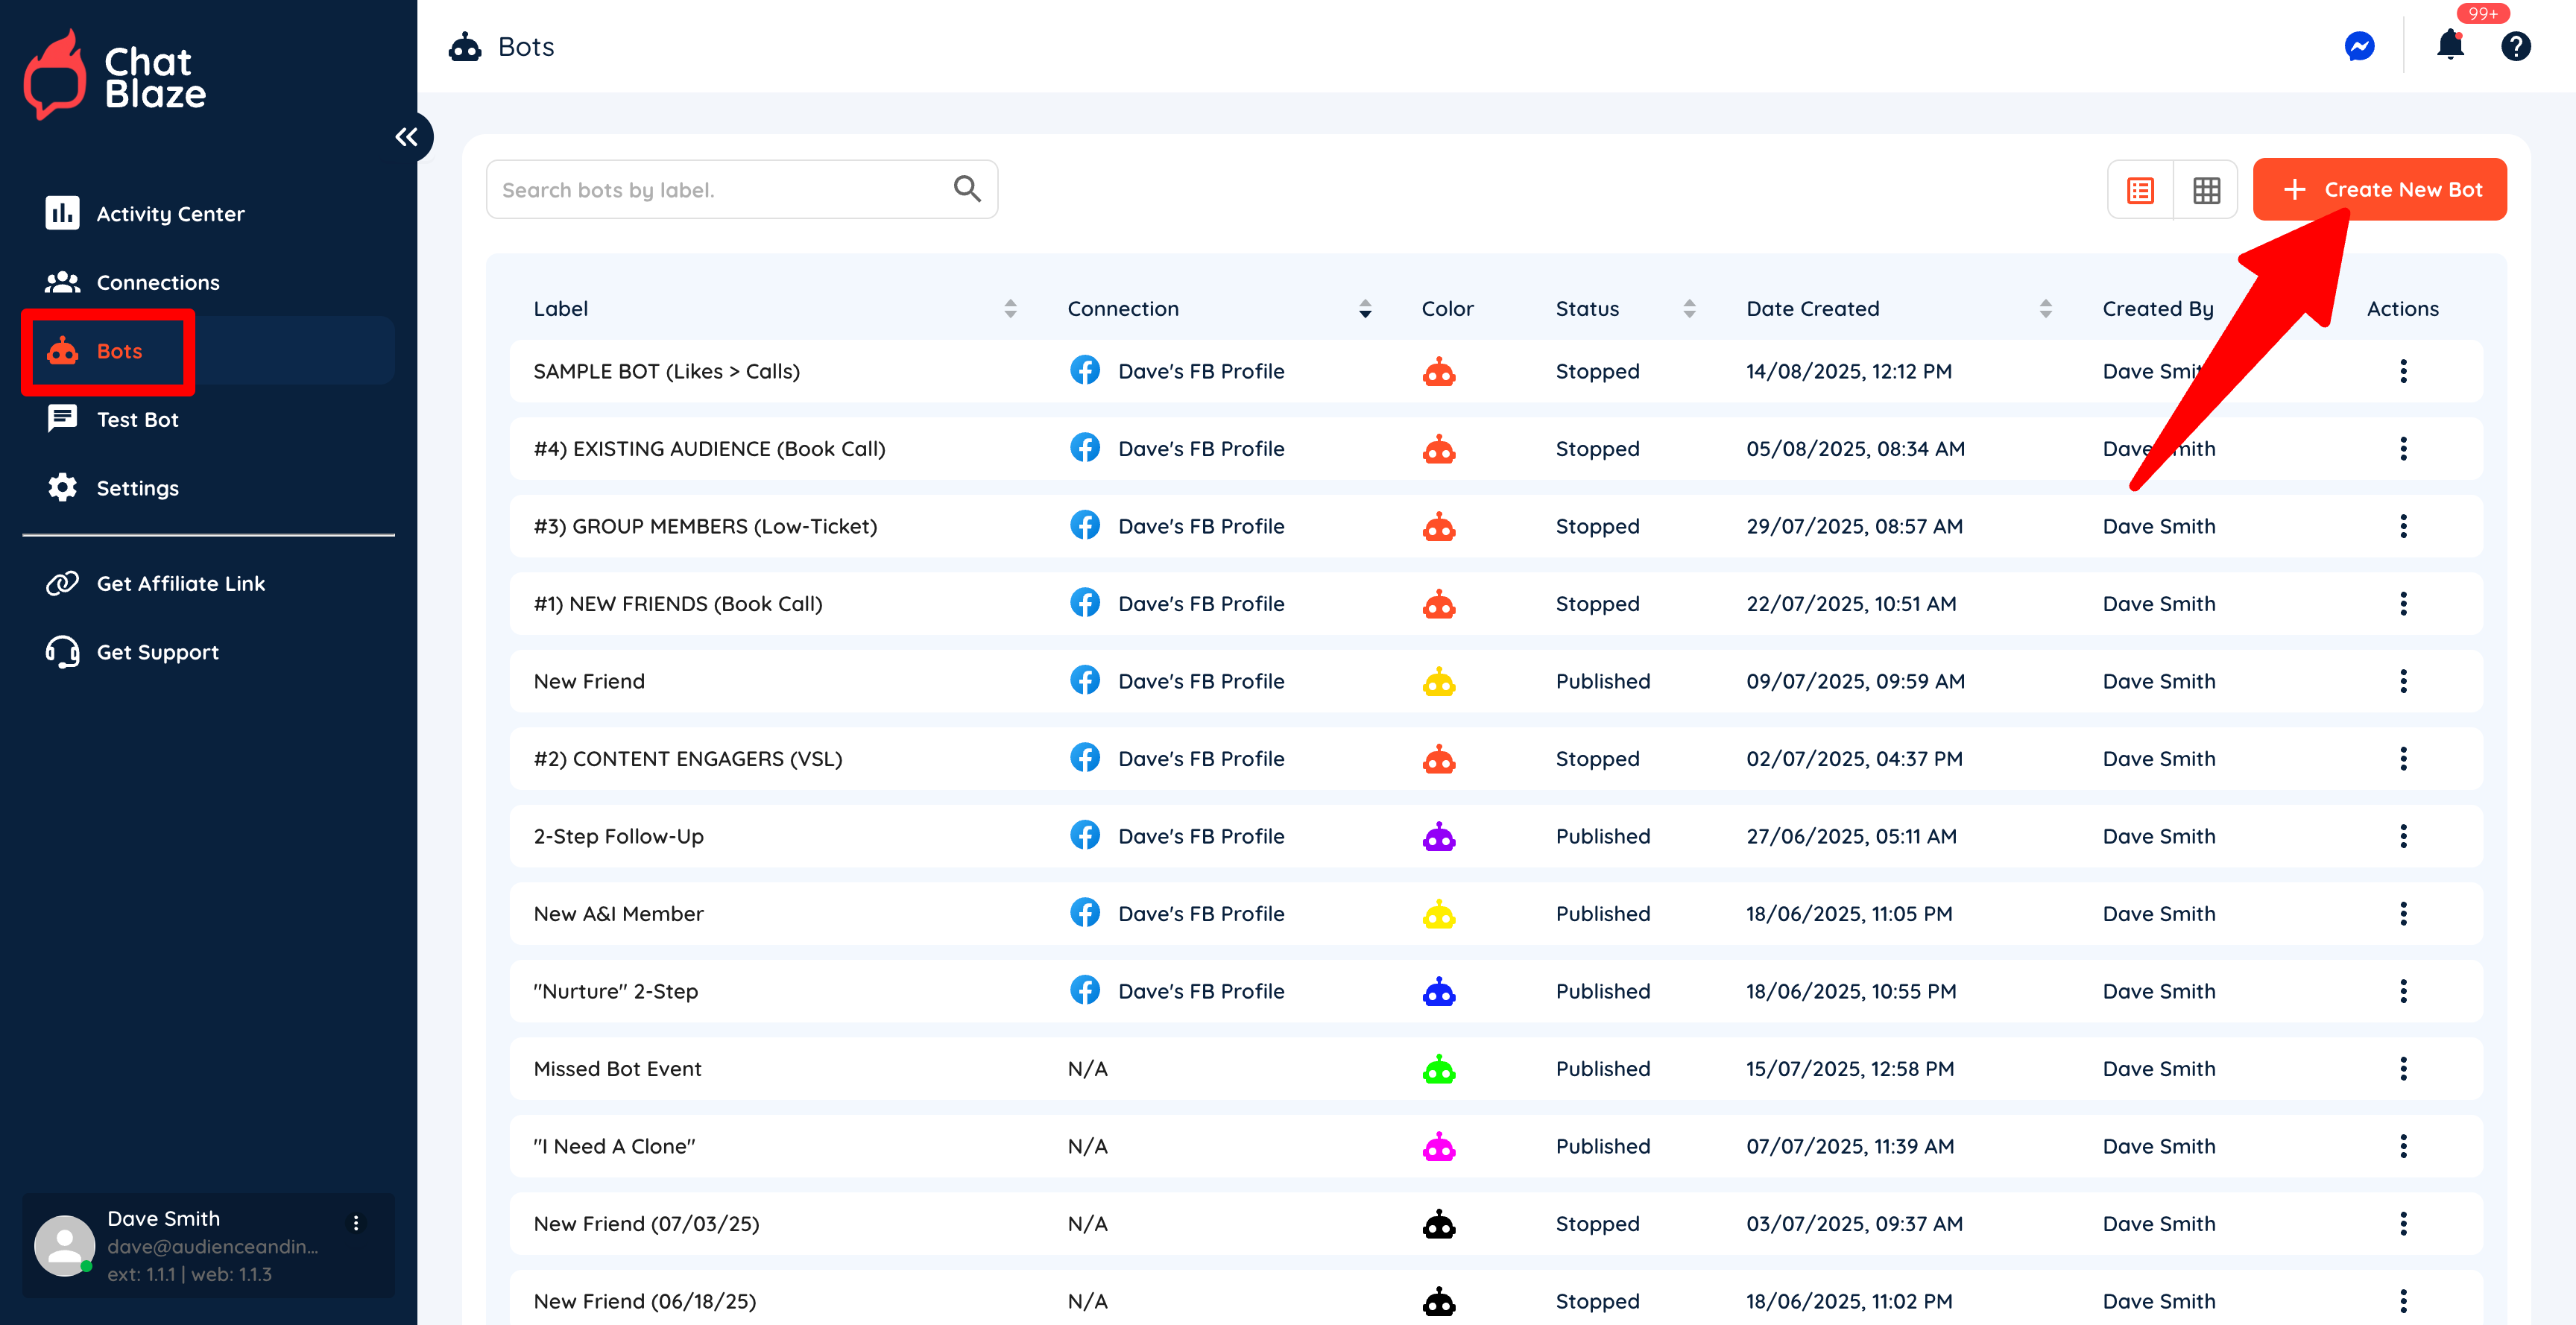
Managing Your Bots
The "status" of your bot will determine how your bot functions and whether or not it counts towards the total bot limit in your ChatBlaze account.
Bot Limit:
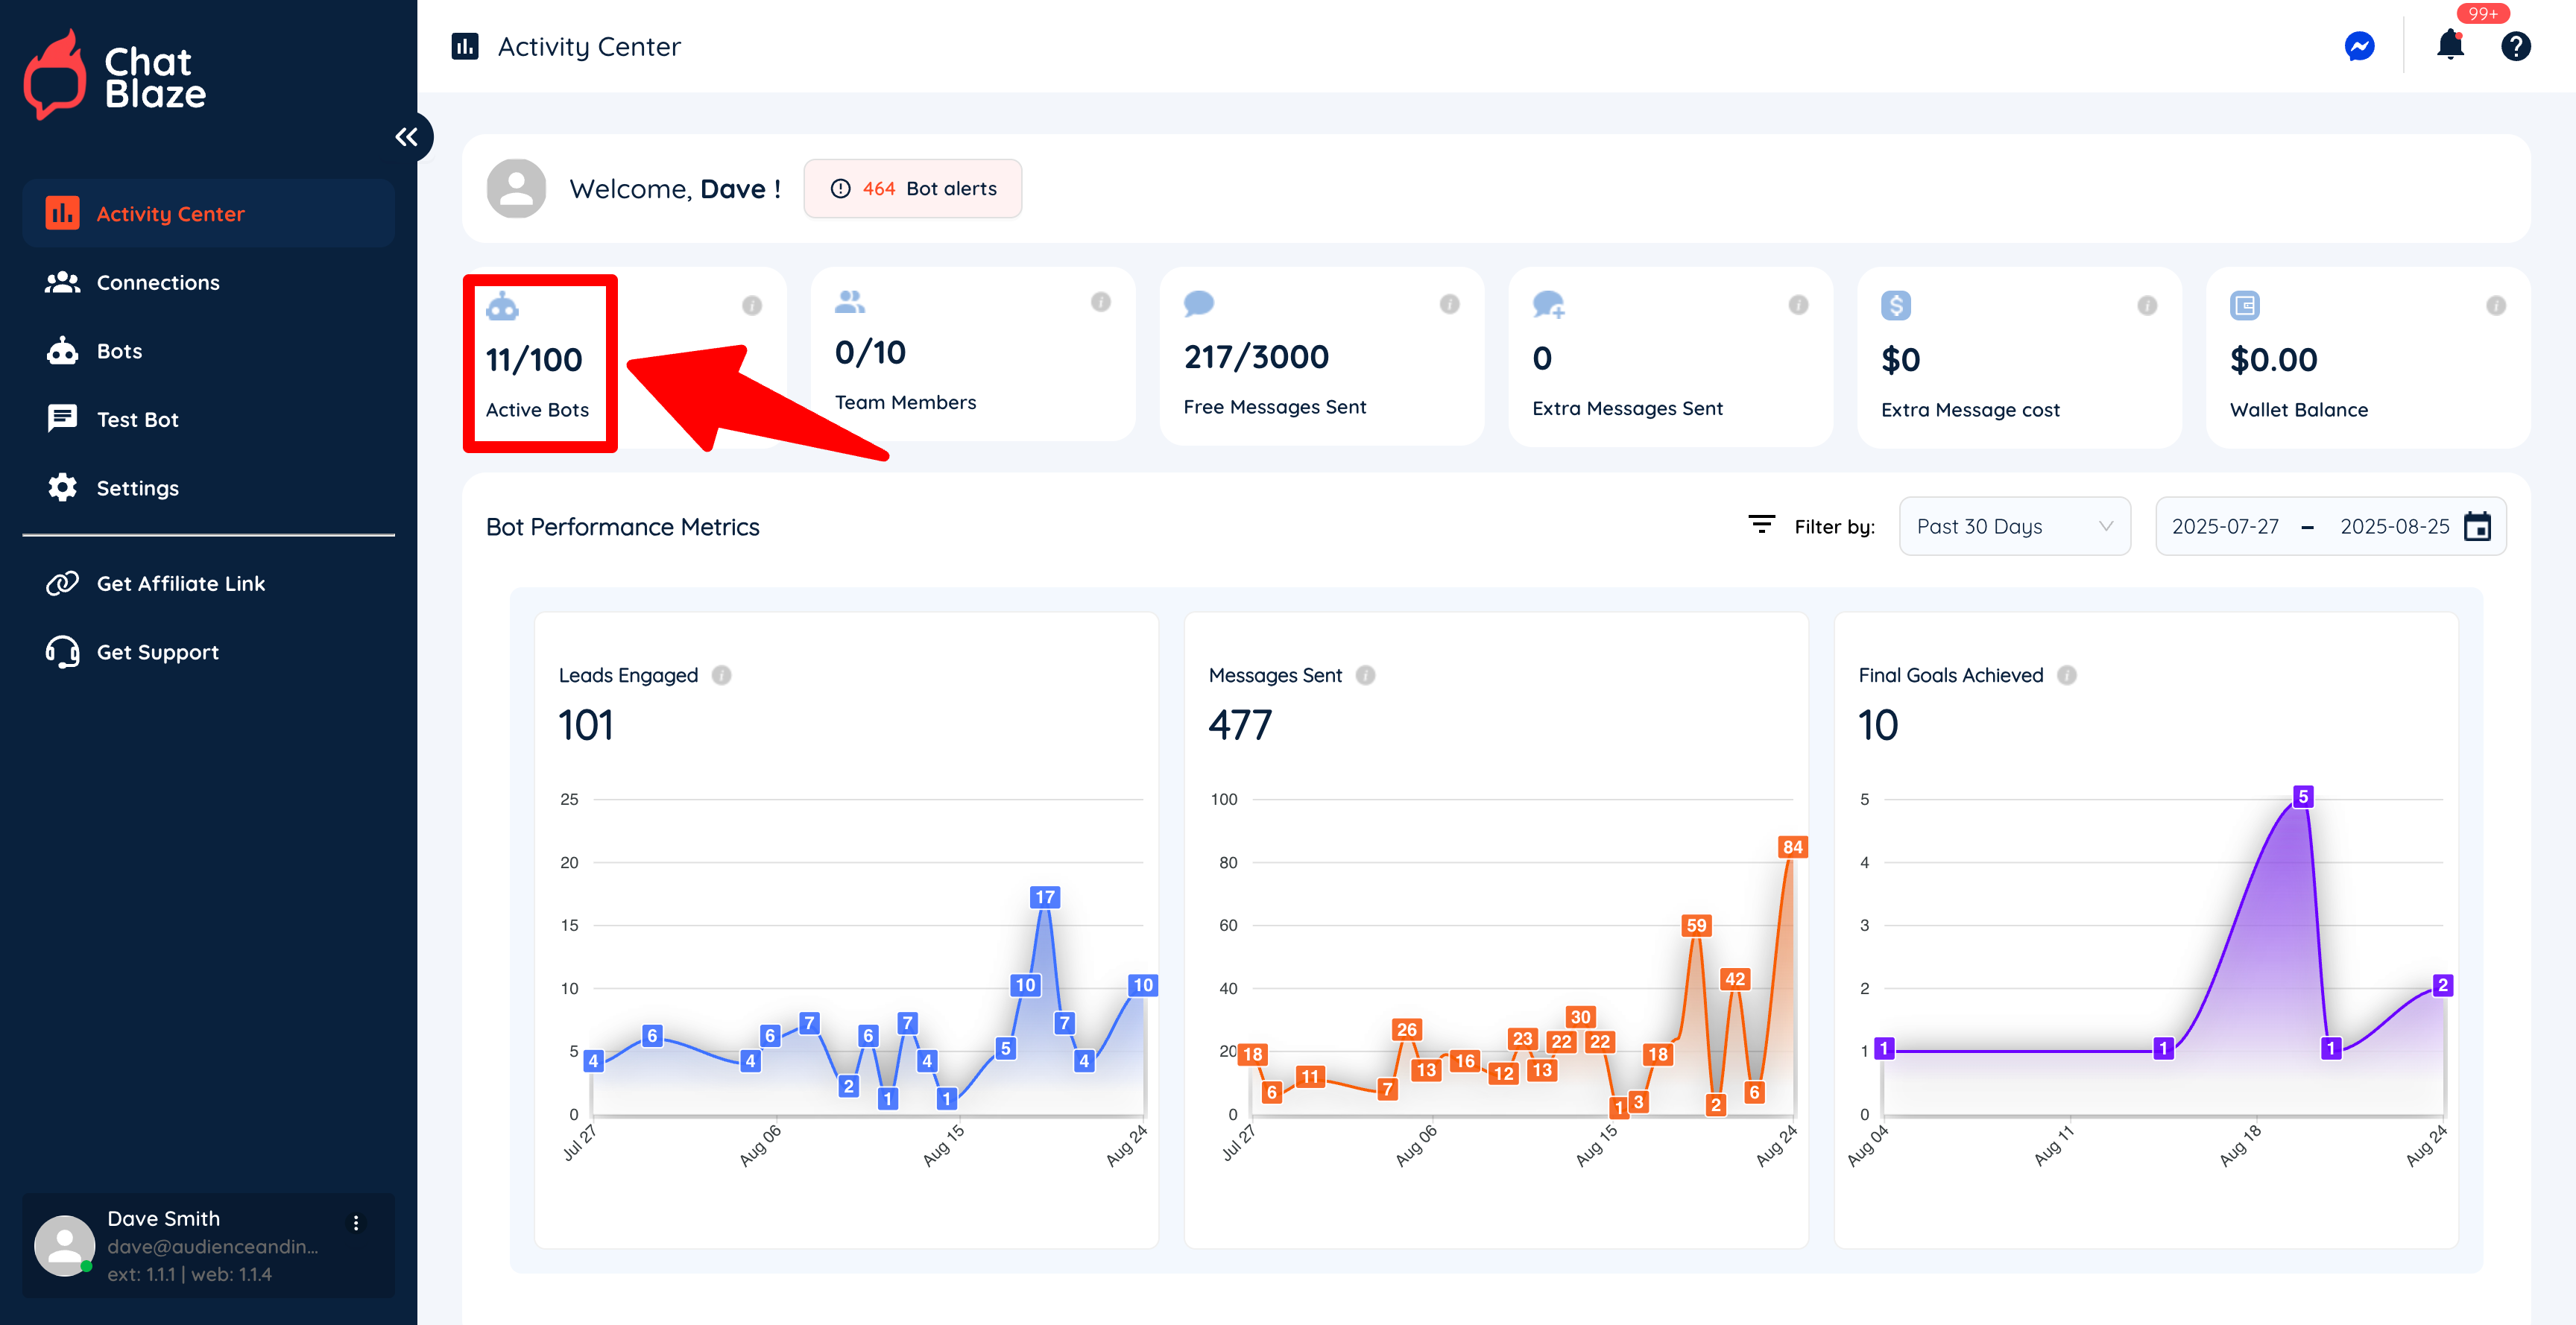
You can find your bot limit from the "Activity Center" inside ChatBlaze. In this example, the account has a limit of 100 active bots. Once you reach your bot limit, you will not be able to publish any more bots.
3 "Status" Options:
Inside your "Bots" tab you will see the status of each of your bots:
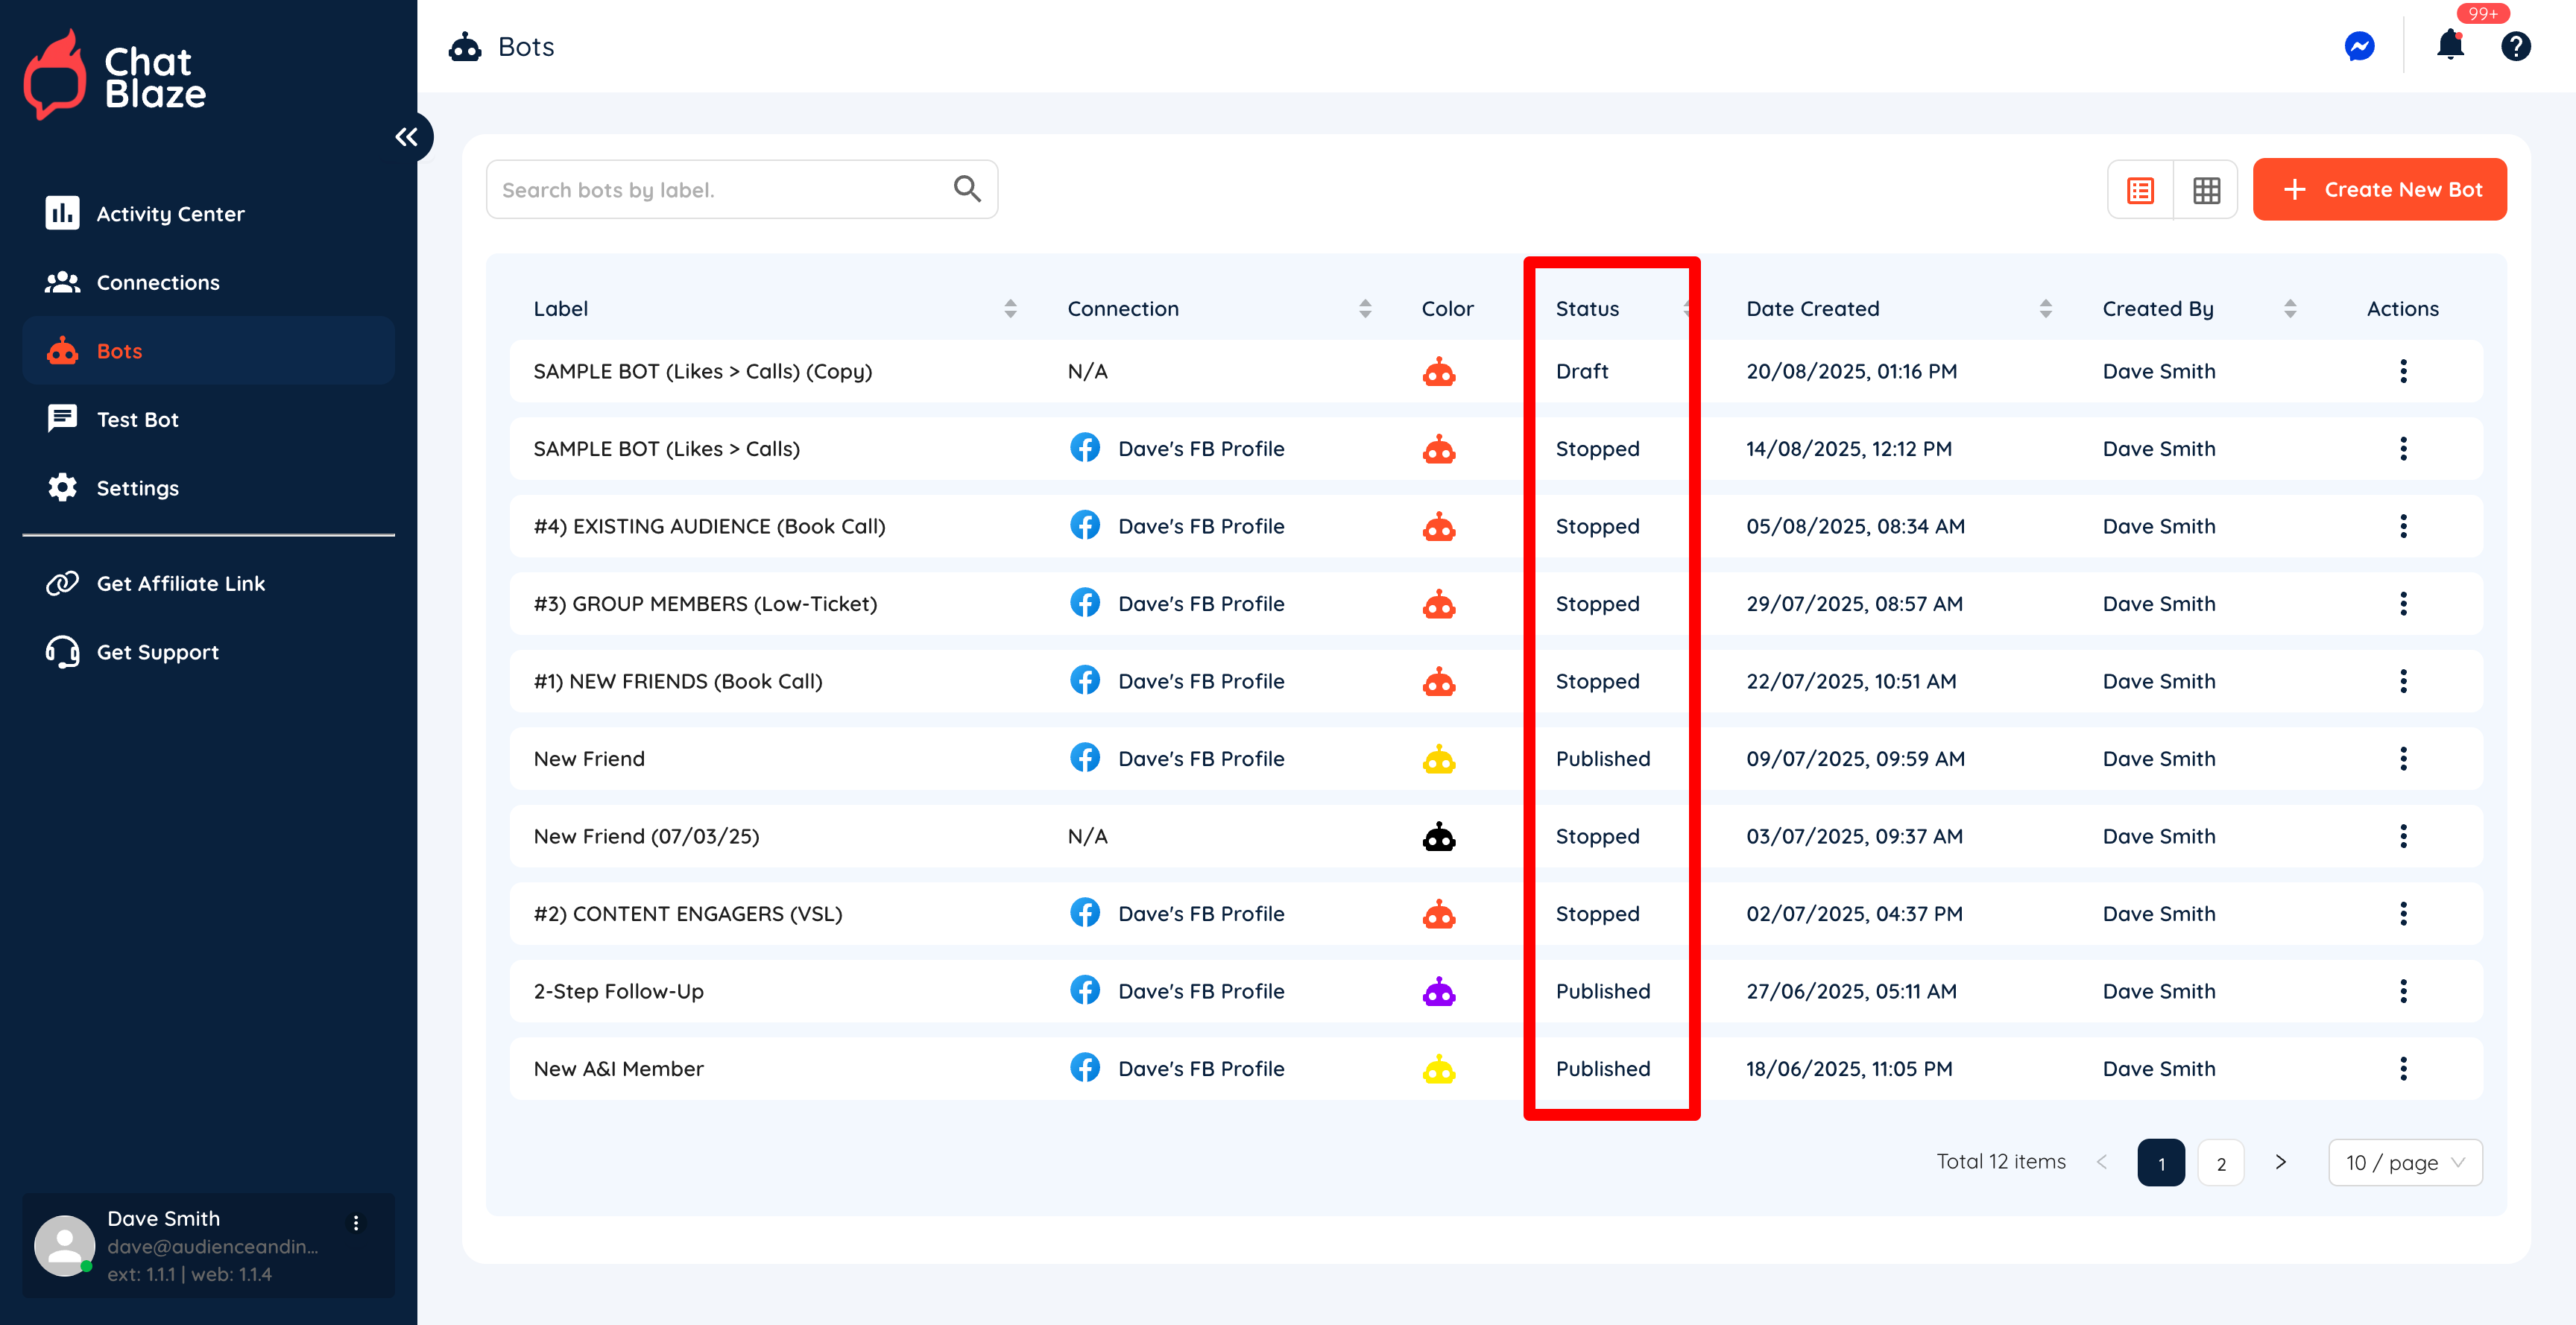
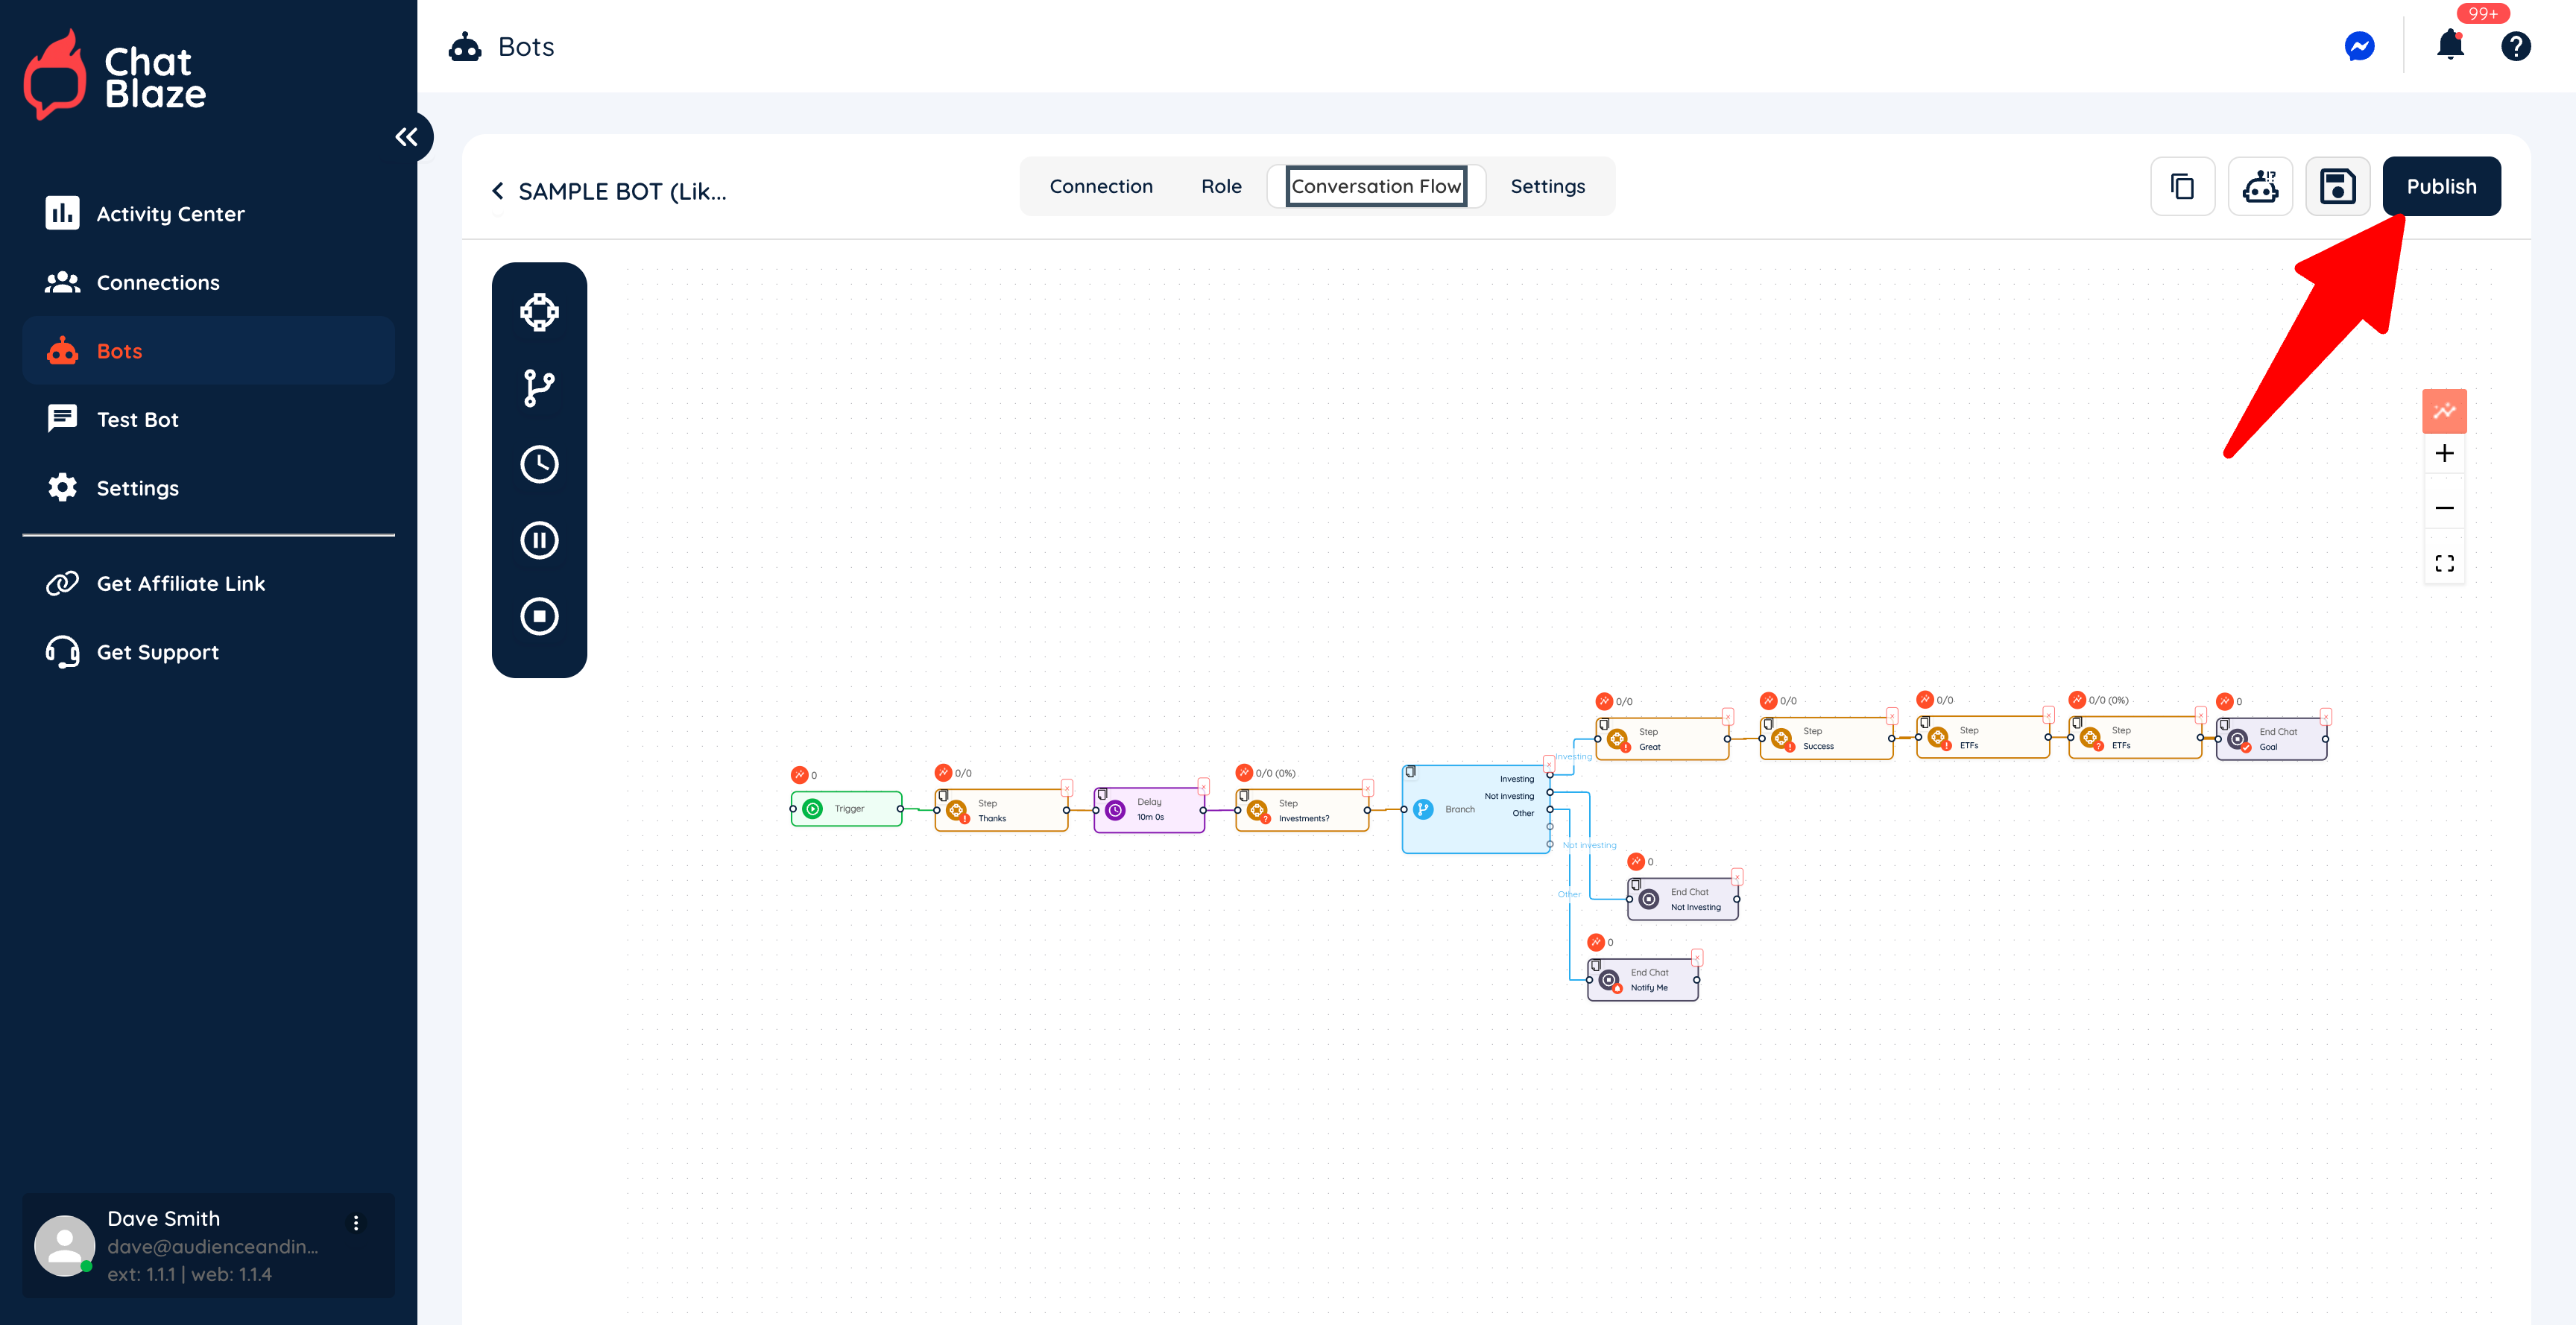
1) "Draft"
If you have never published your bot, it has a "draft" status. This means that it cannot chat with your leads, nor does it count towards the total bot limit in your account.
To activate your bot, click the "Publish" button found here:
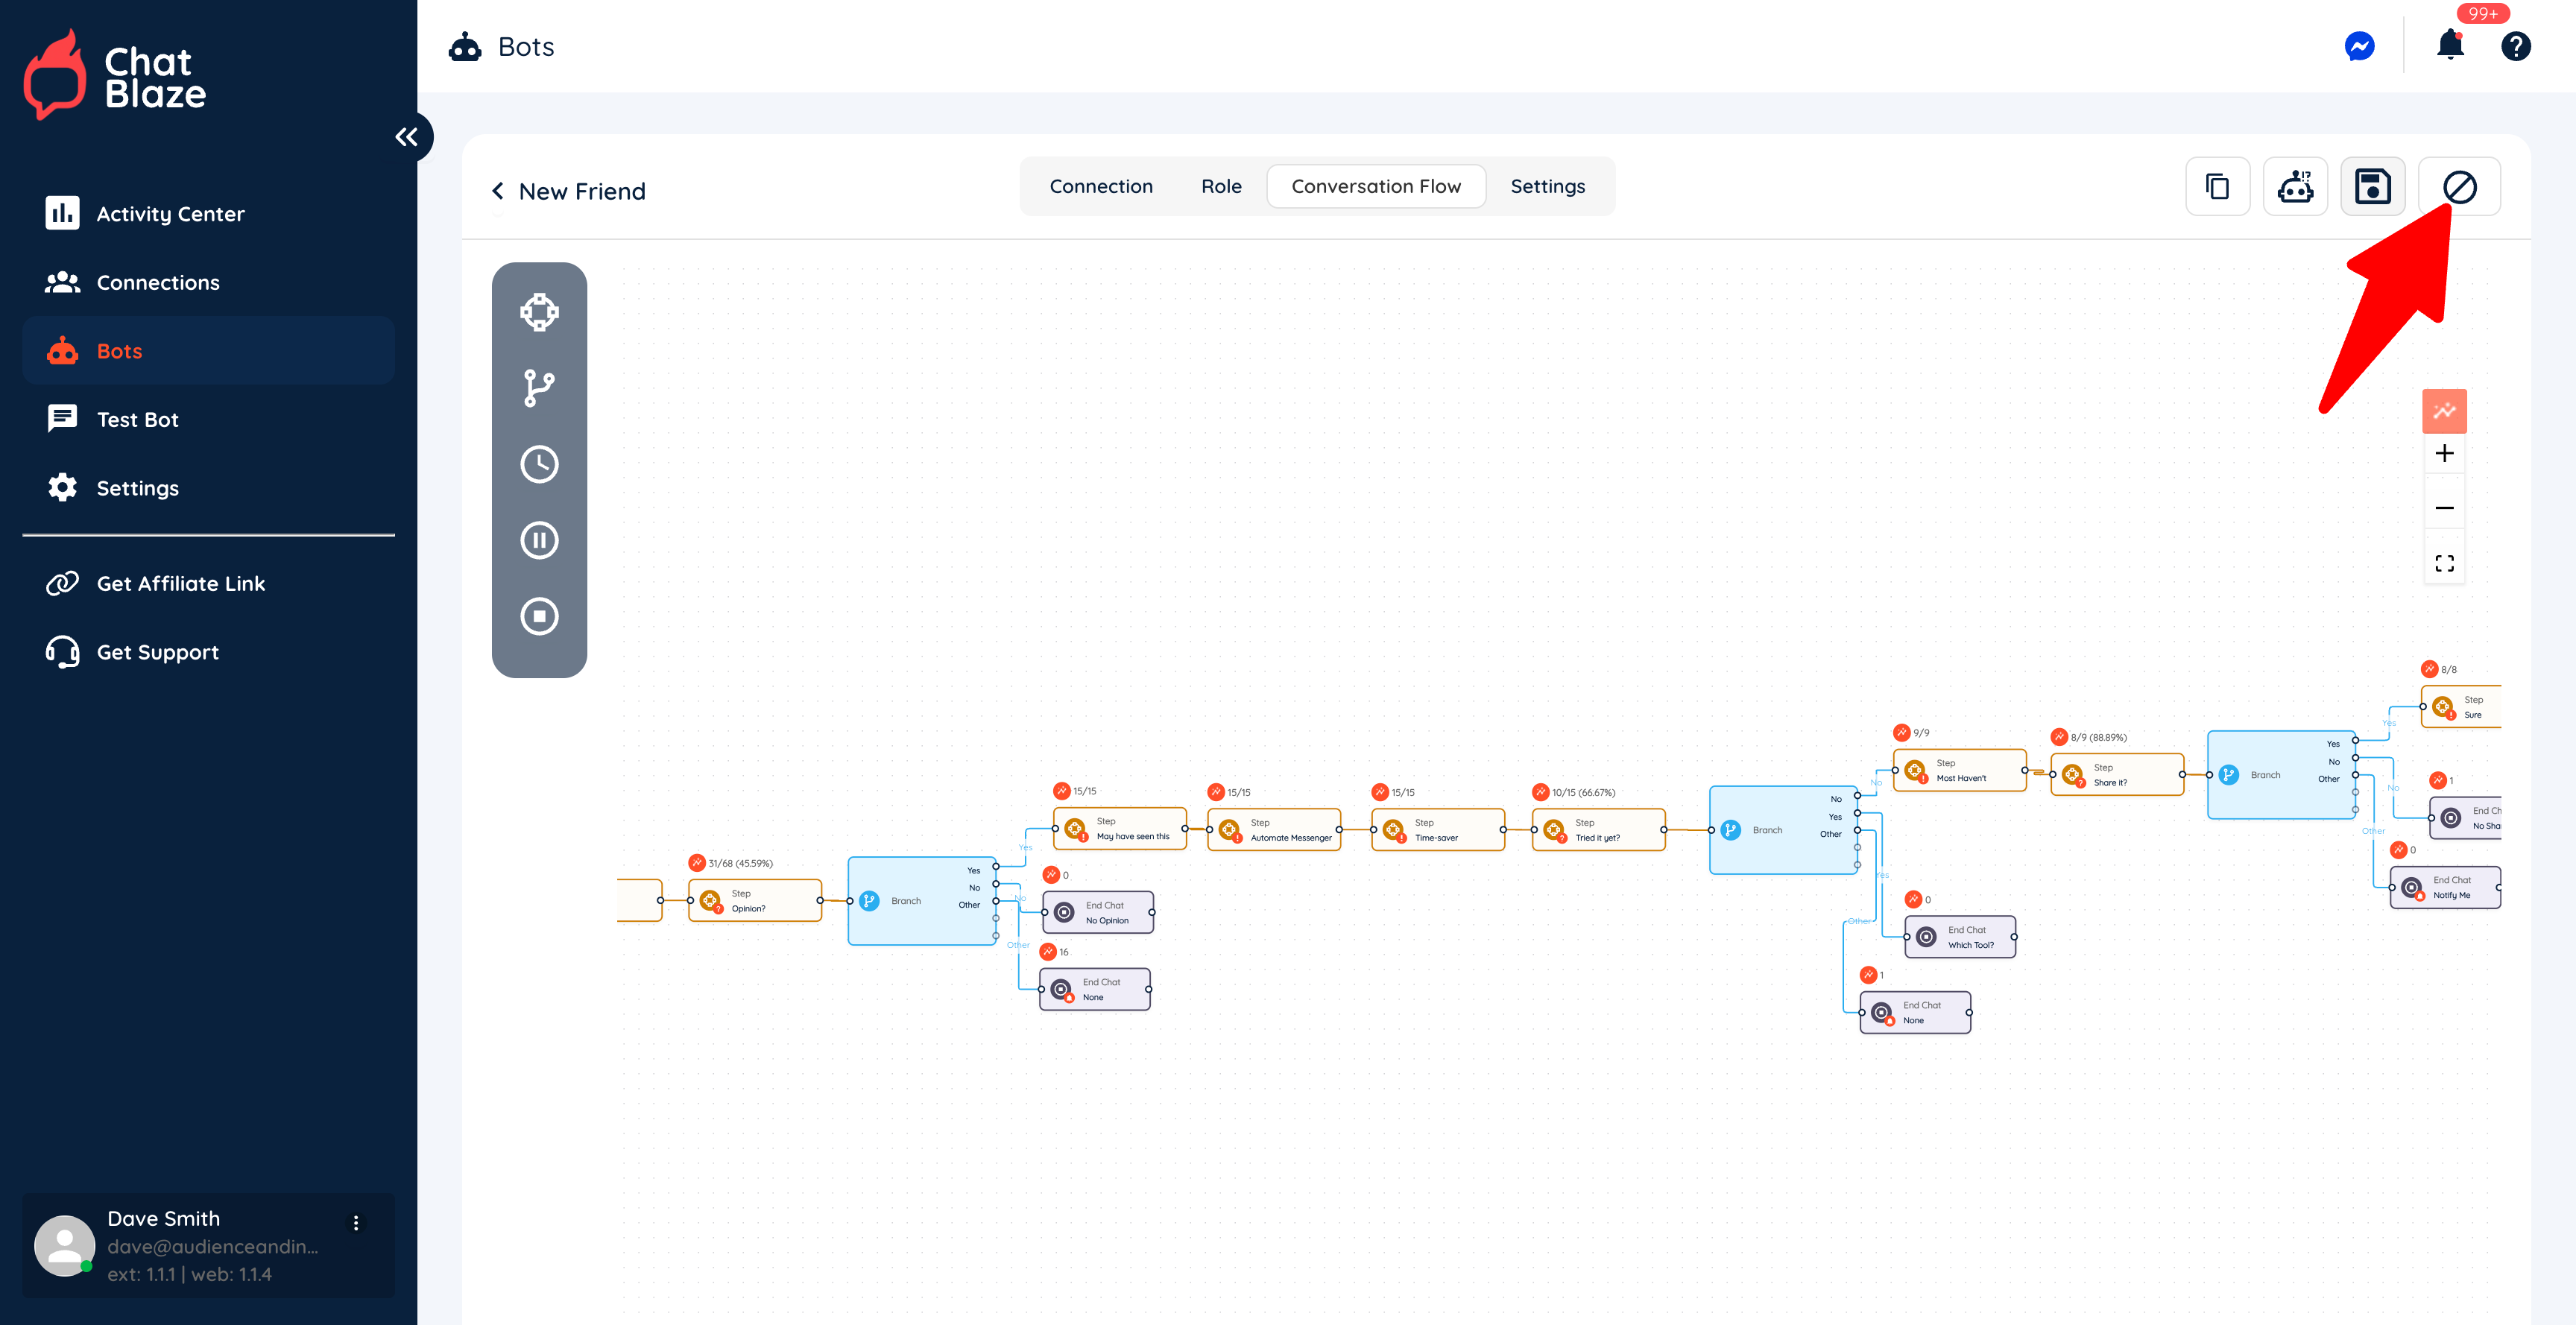
2) "Published"
Once your bot is published, it can now chat with leads and will count towards the total bot limit in your account. To stop your bot from chatting with new leads, click the stop button:
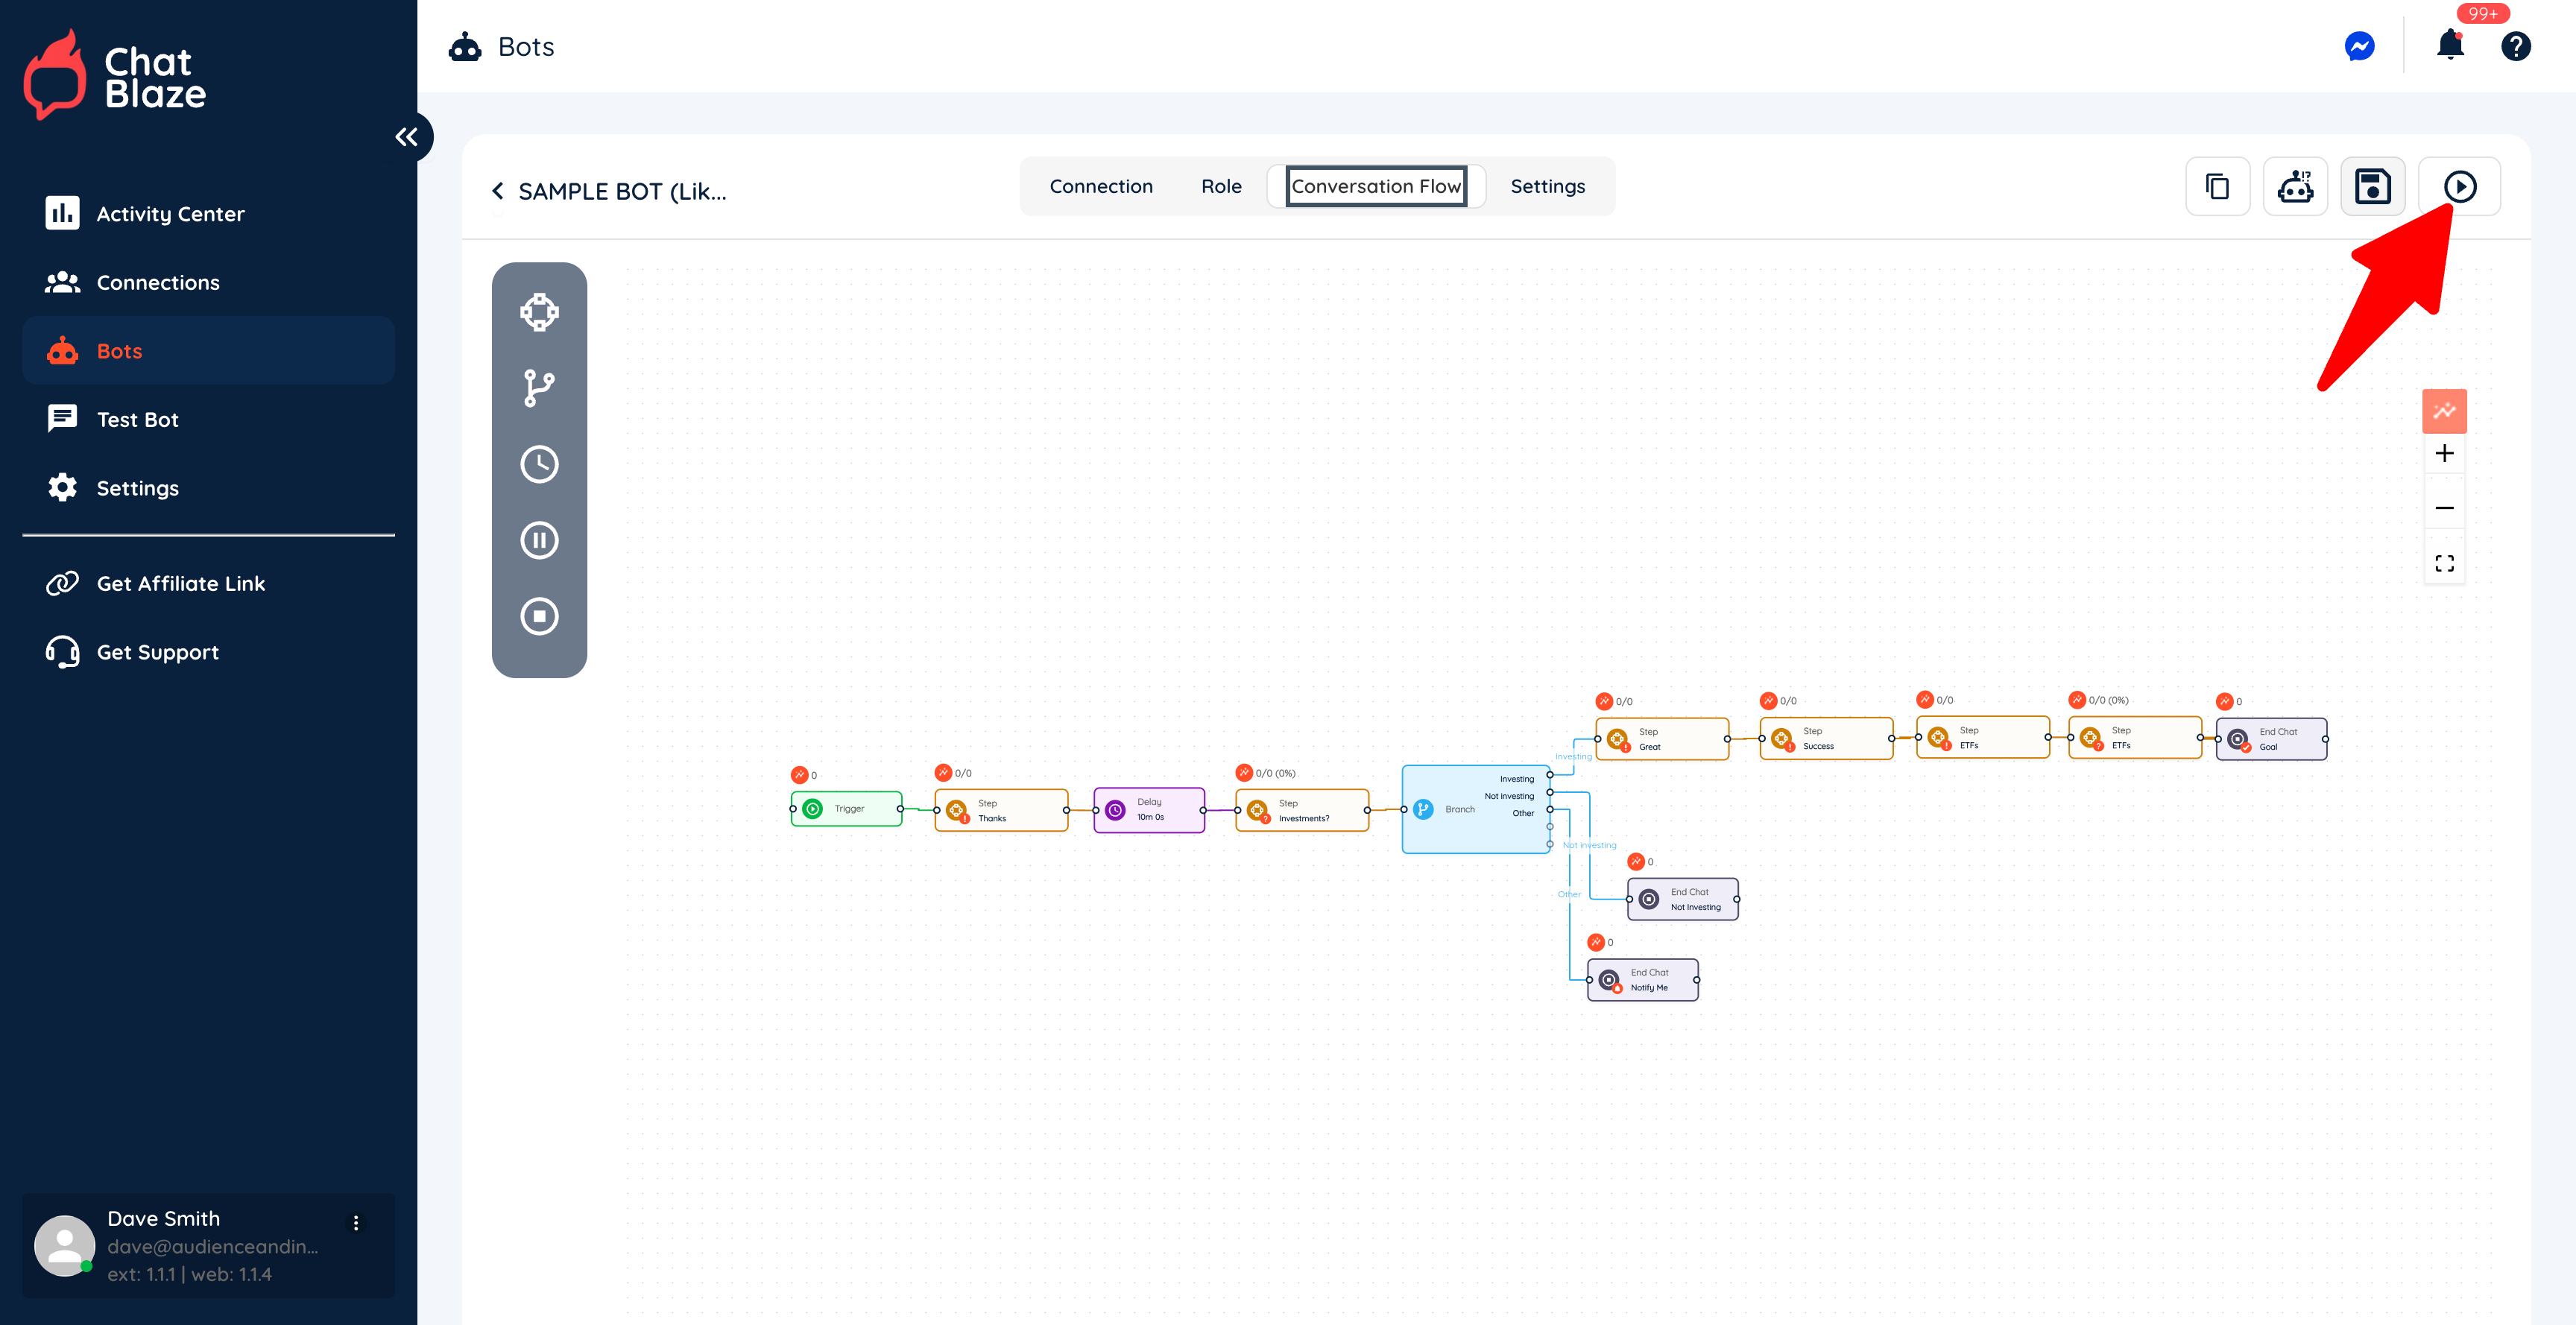
3) "Stopped"
Once your bot is stopped, it will finish conversations with any leads it's already chatting with, but will not start any new conversations. In the "stopped" status, your bot will count toward the bot limit in your account.
If you want to start your bot again so that it will begin conversations with new leads, you can click the play button:
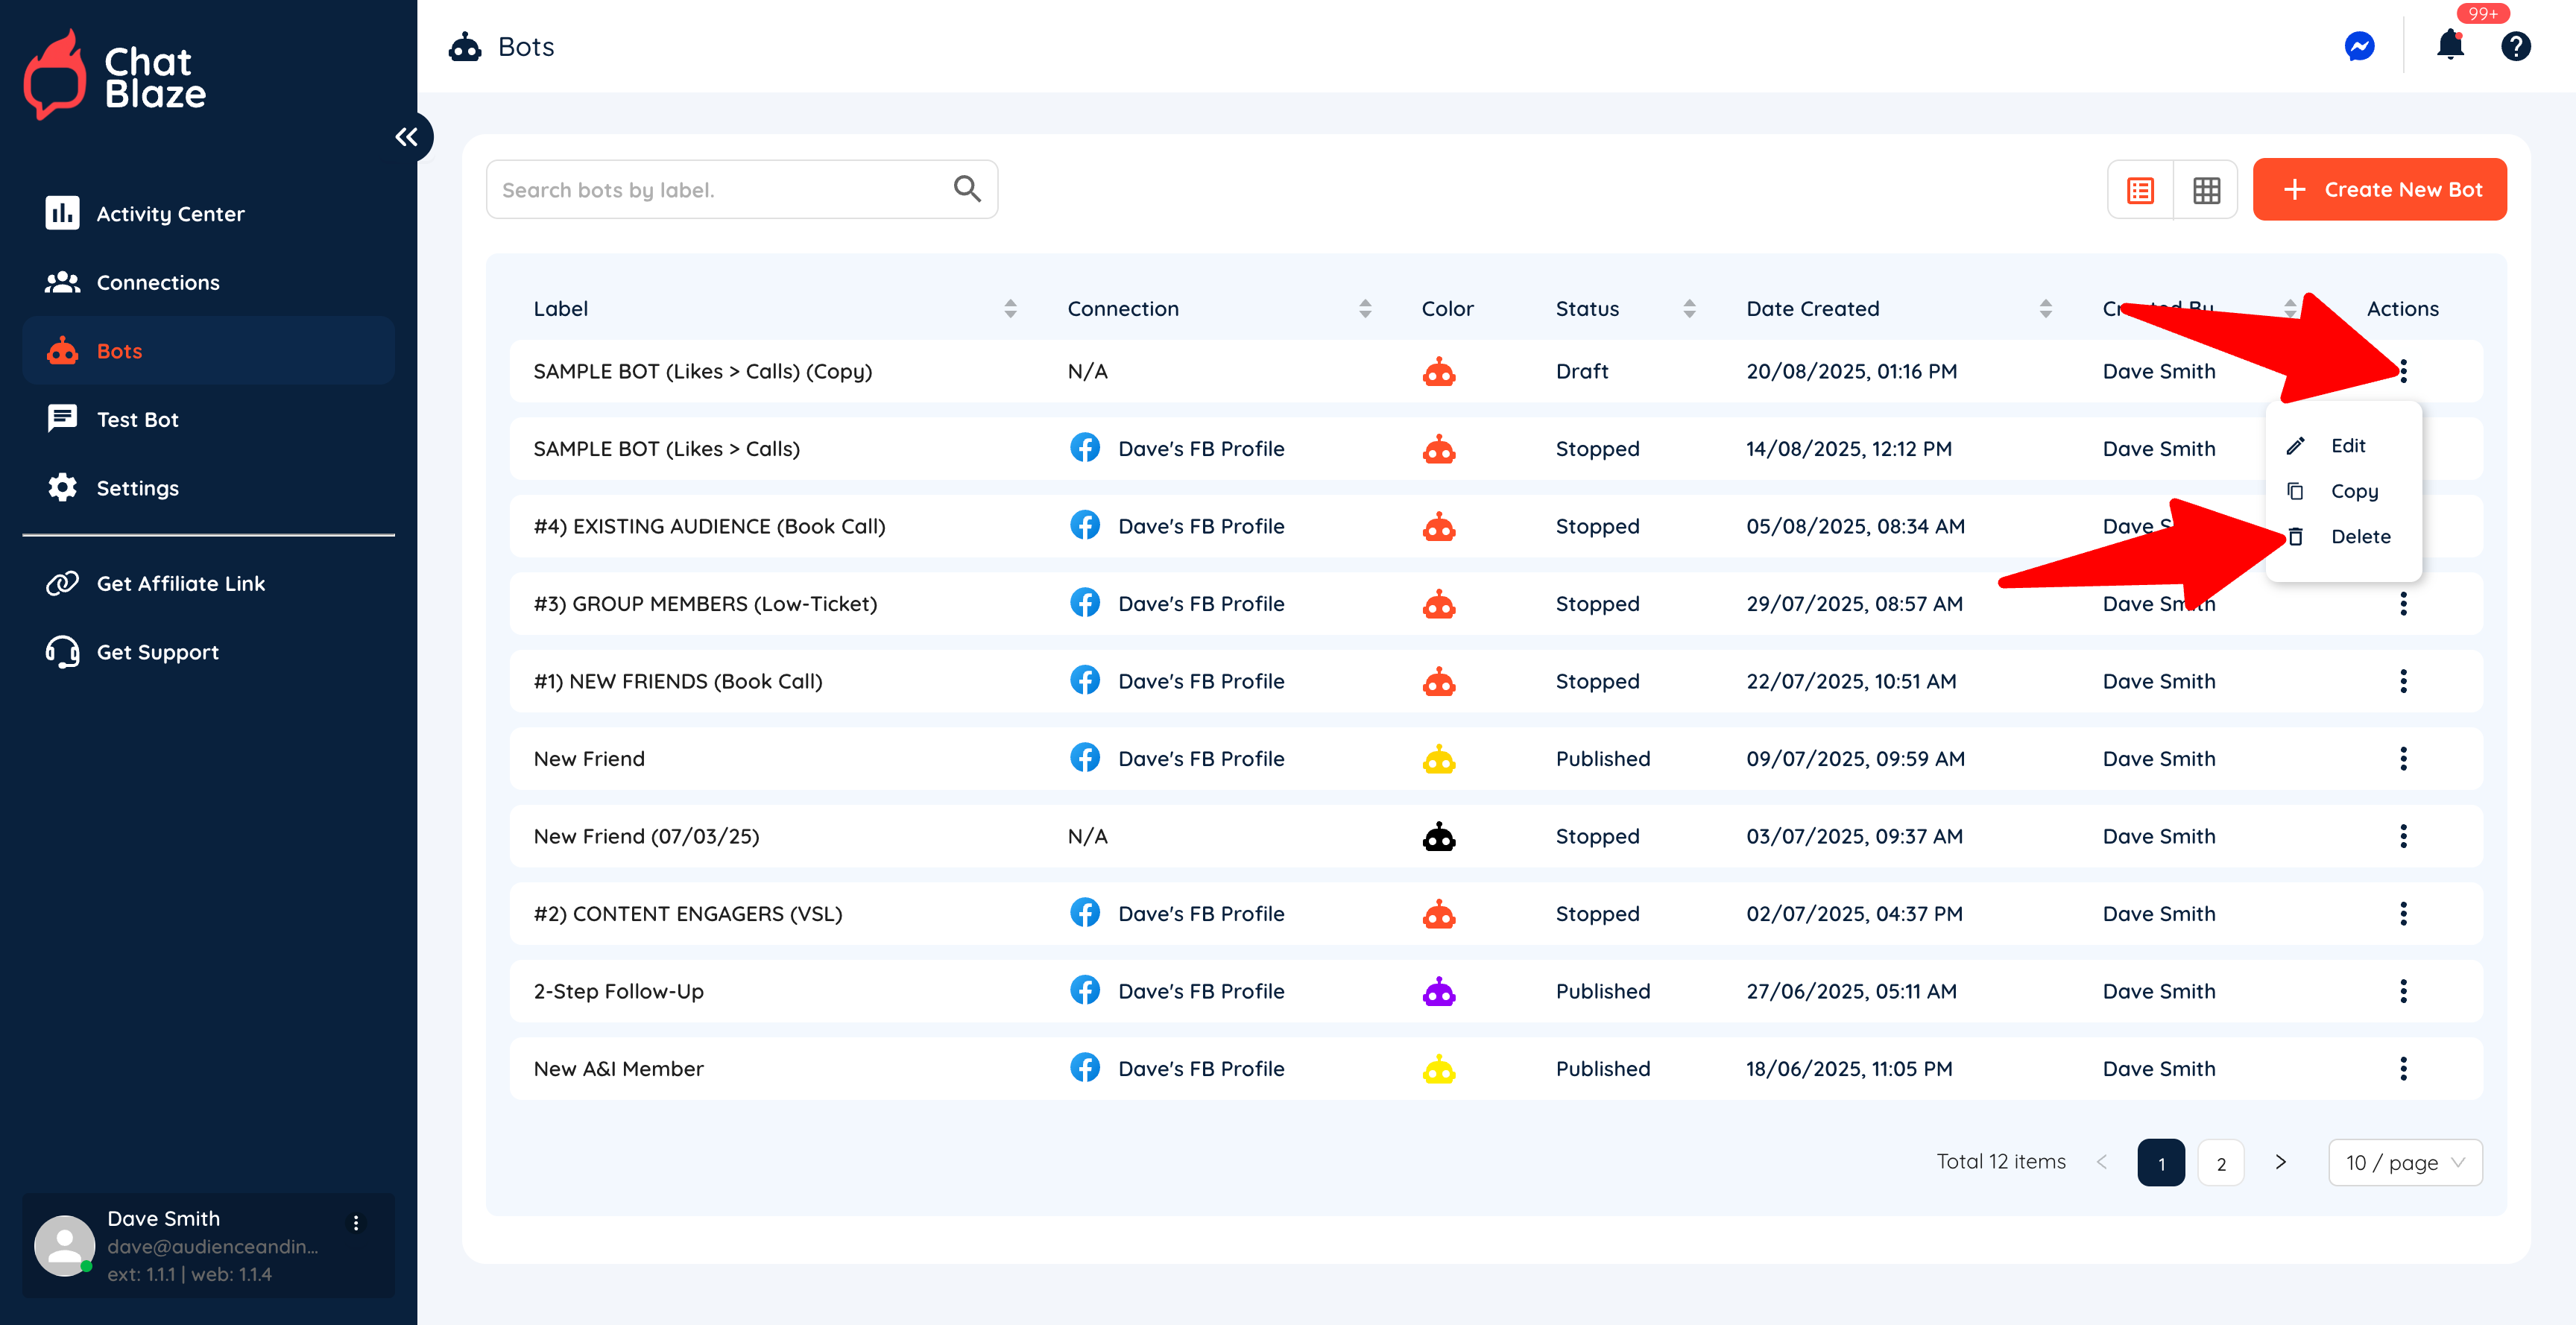
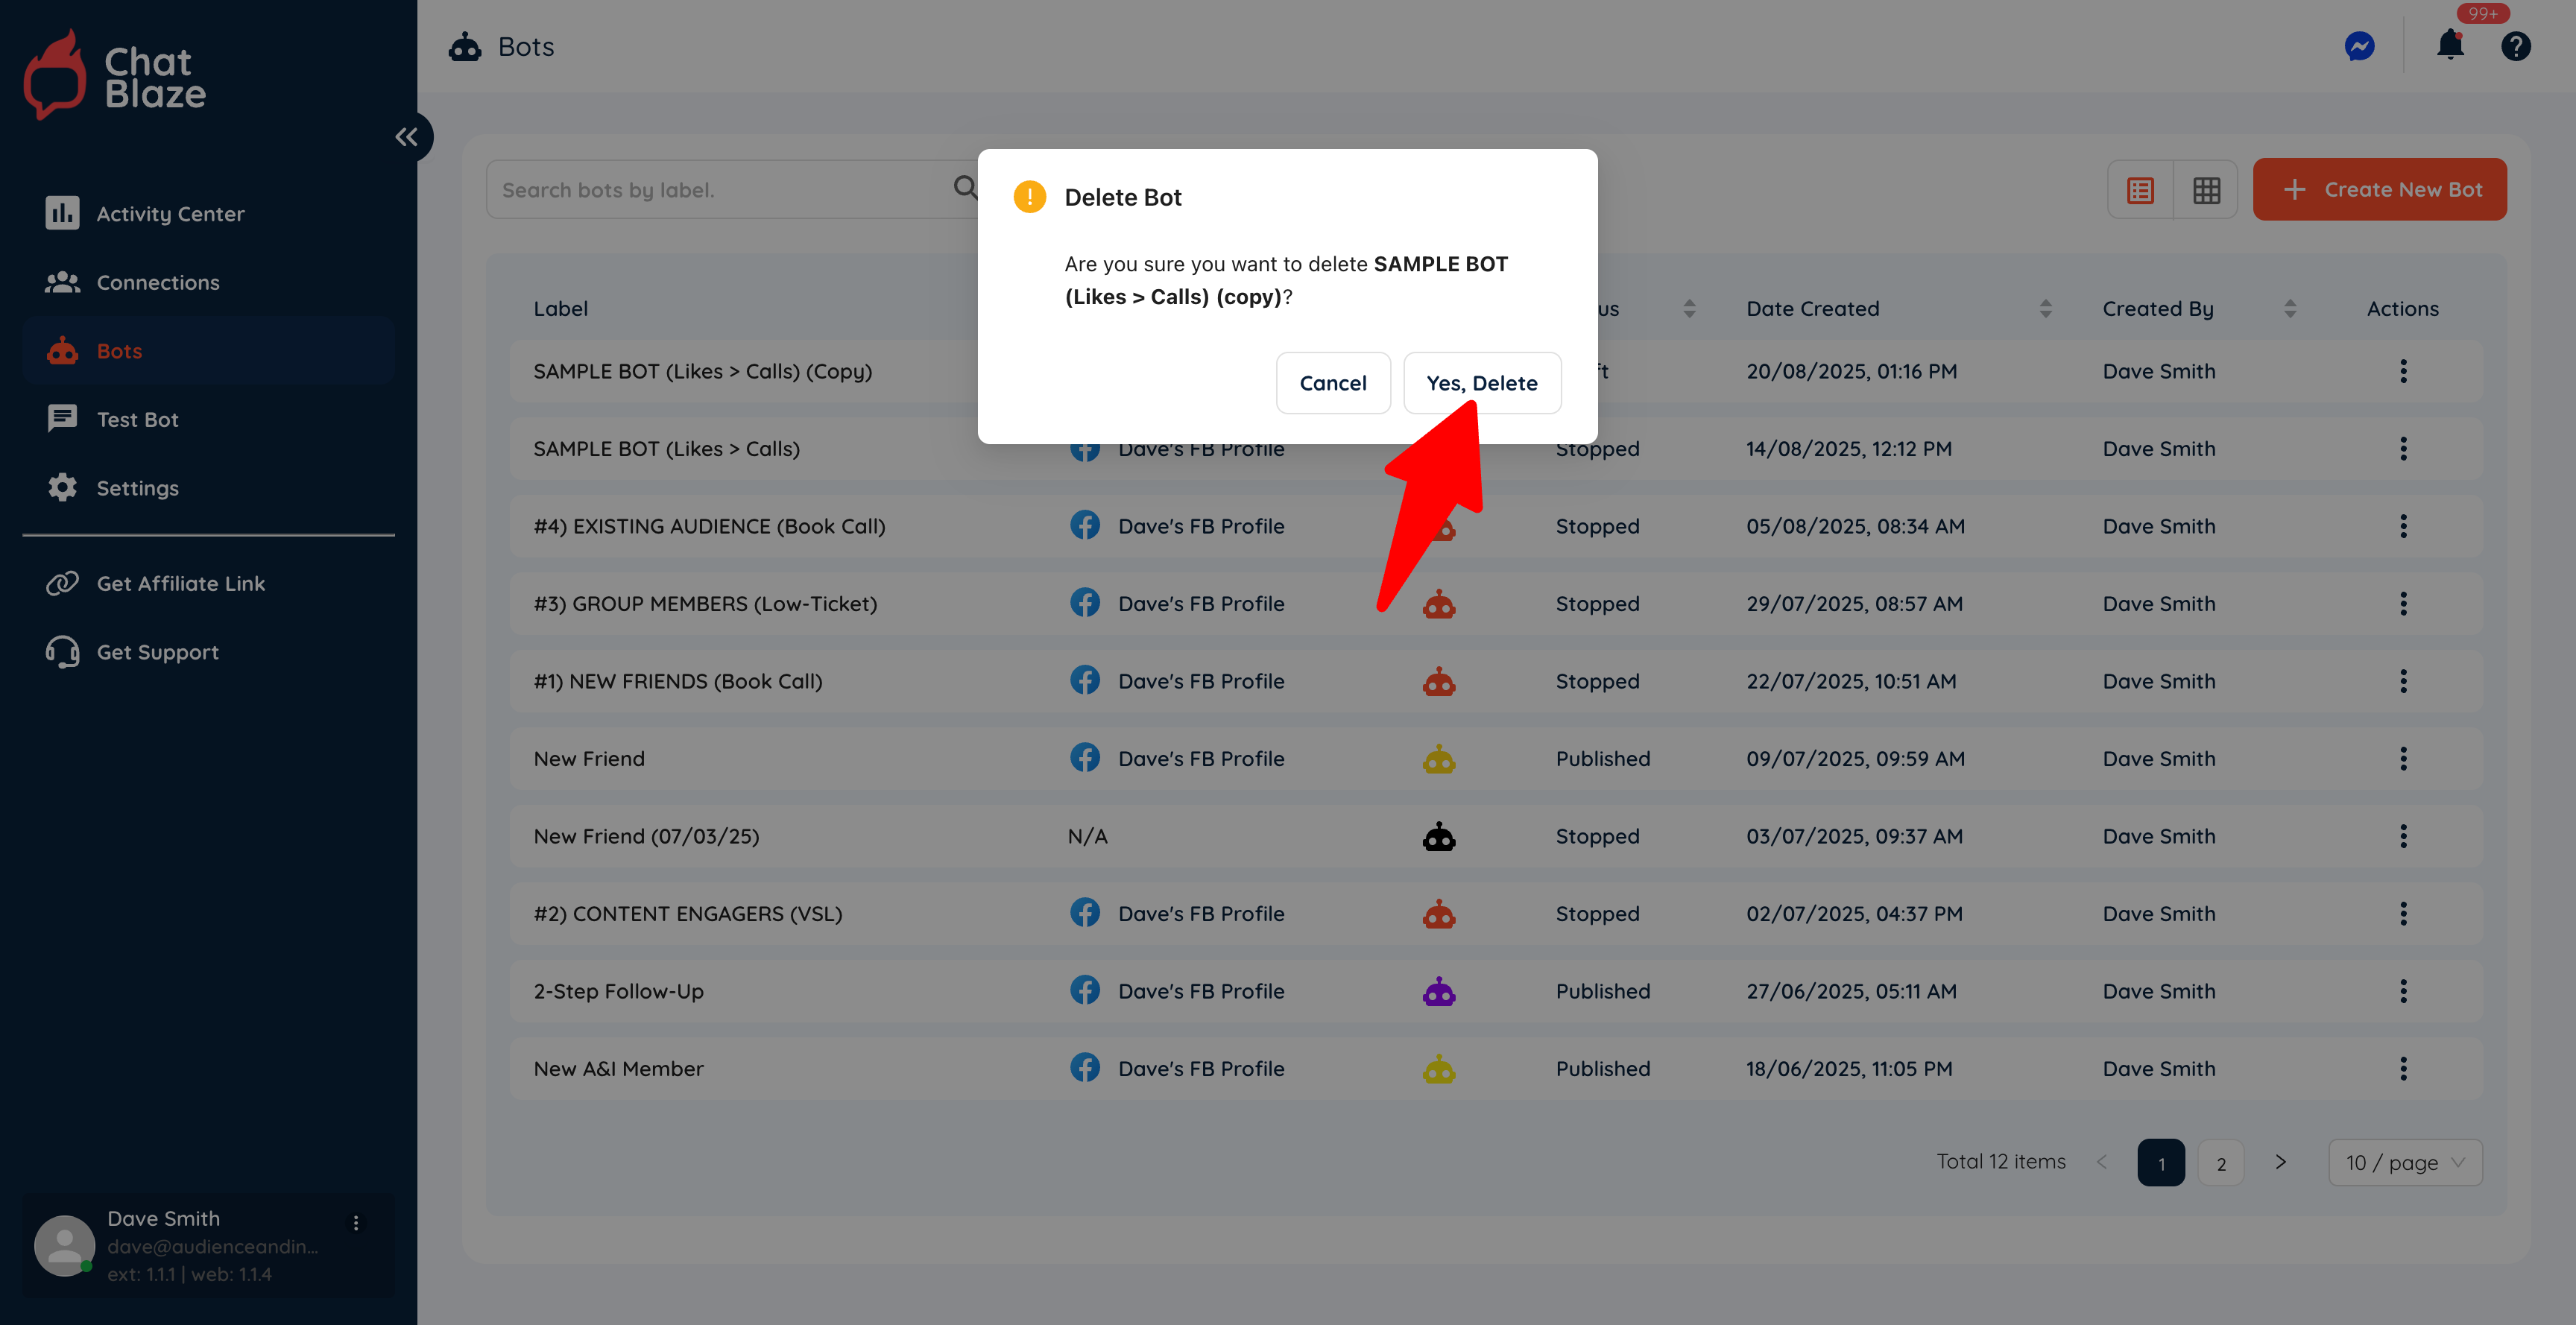
Deleting Bots
You can delete a bot in any status and it will instantly stop counting towards the bot limit for your account.
From the "Bots" tab, click the 3 dots beside the bot you'd like to delete, then click the "delete" button:
You will be asked to confirm before your bot is deleted:
Build Your First Bot (Sample Bot)
Let's walk through the setup steps for a new bot that is designed to nurture leads who "like" your content and eventually make them an offer to Category a sales call with you.
Watch A New Bot Being Built:
Bot-Building Steps:
1) Create a new bot by going to "Bots" and then clicking "Create New Bot".
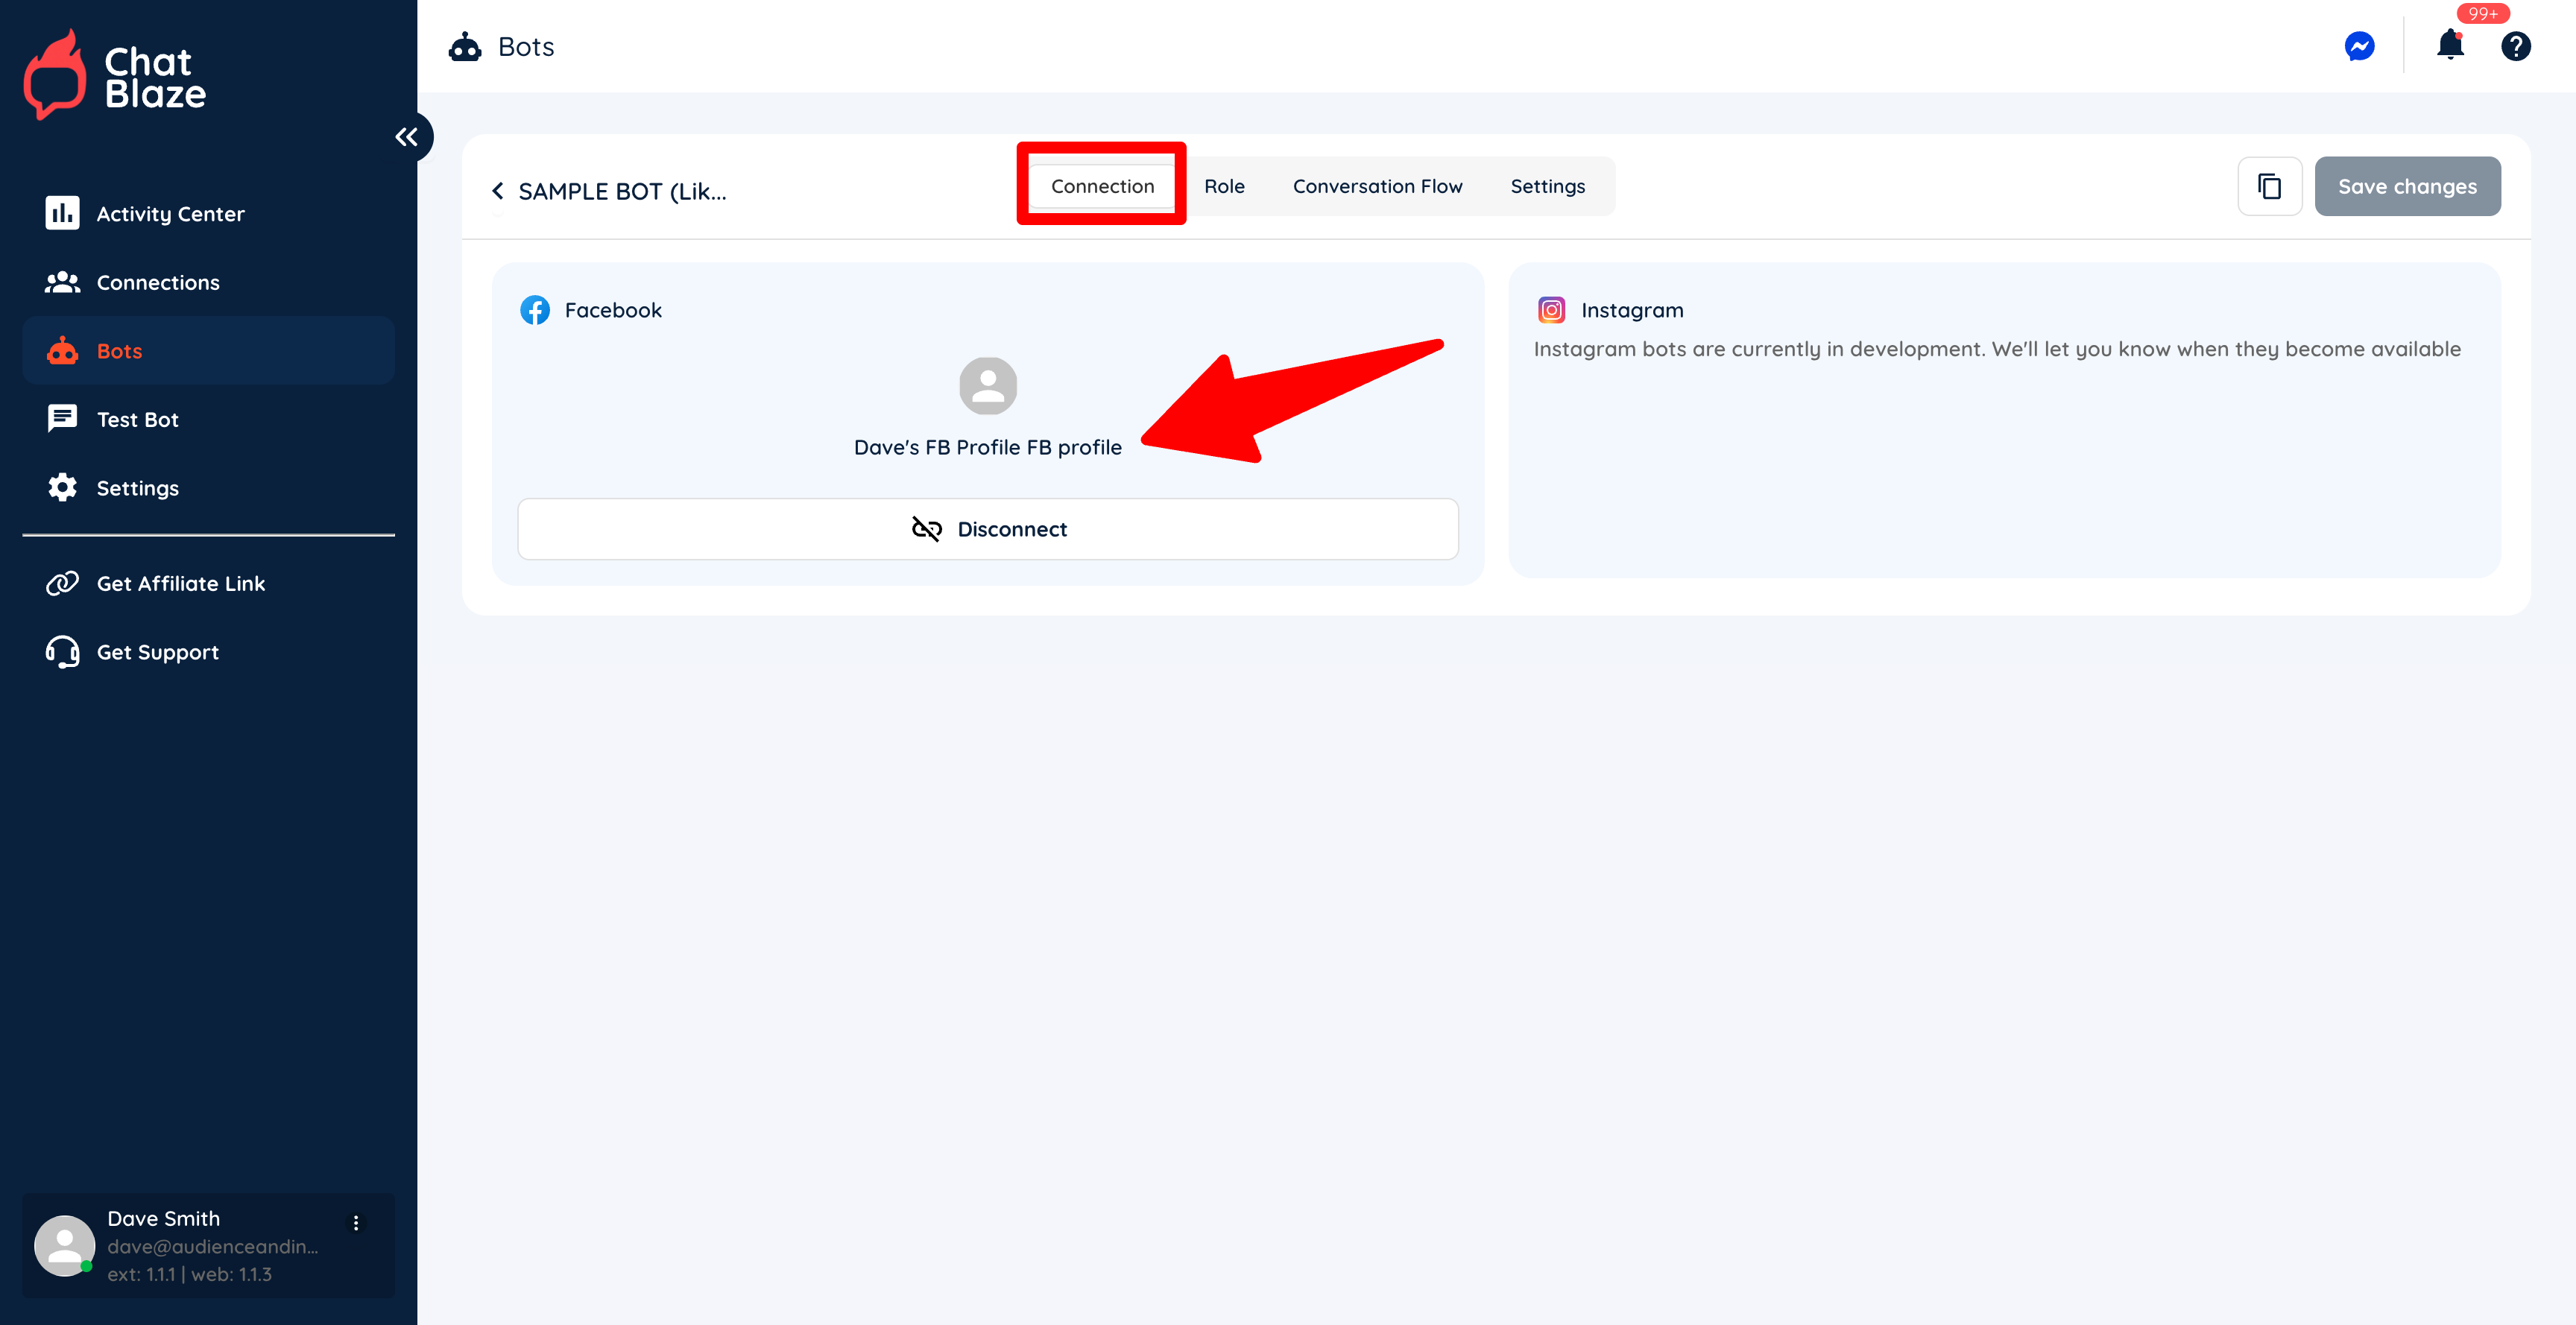
2) Connect your new bot to your social profile.
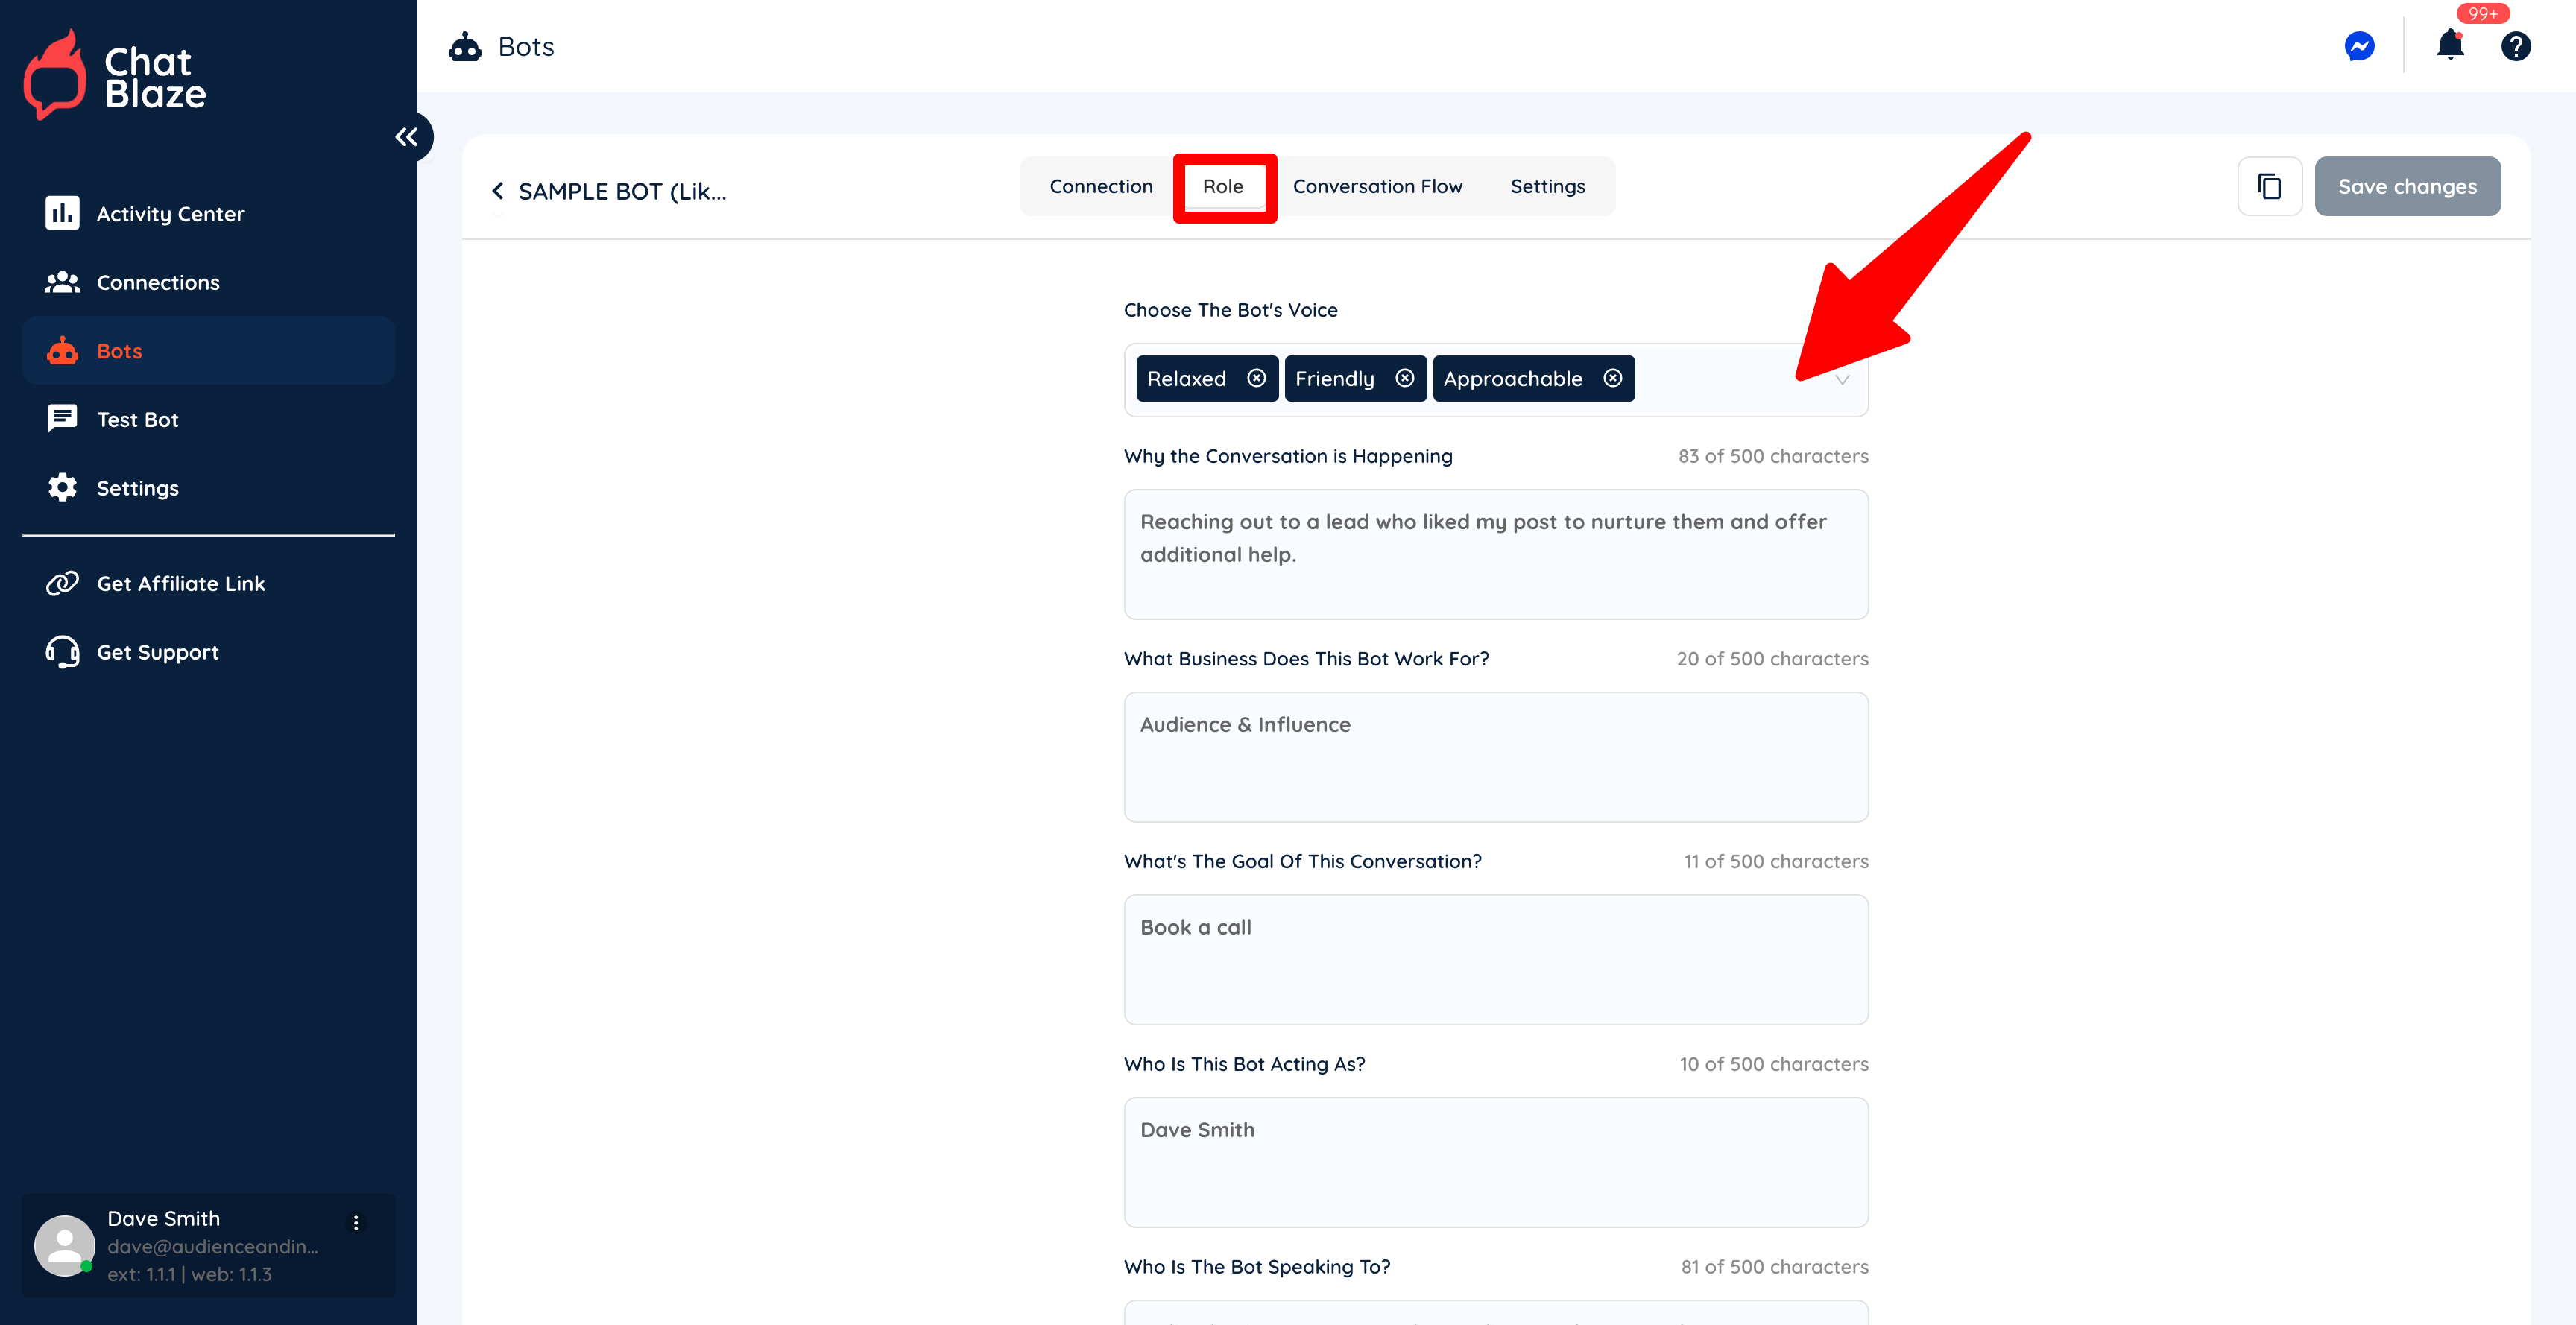
3) Fill in each section on the "Role" tab.
Save your changes.
It's important to choose a bot "Voice" that is similar to how you would personally chat with leads. If you describe the bot's voice as "funny", your bot will joke around during its conversations. Is that how you'd chat?
Your other inputs on this Article can be brief as they are just used to give your bot a little context regarding the chats it will be having with your leads.
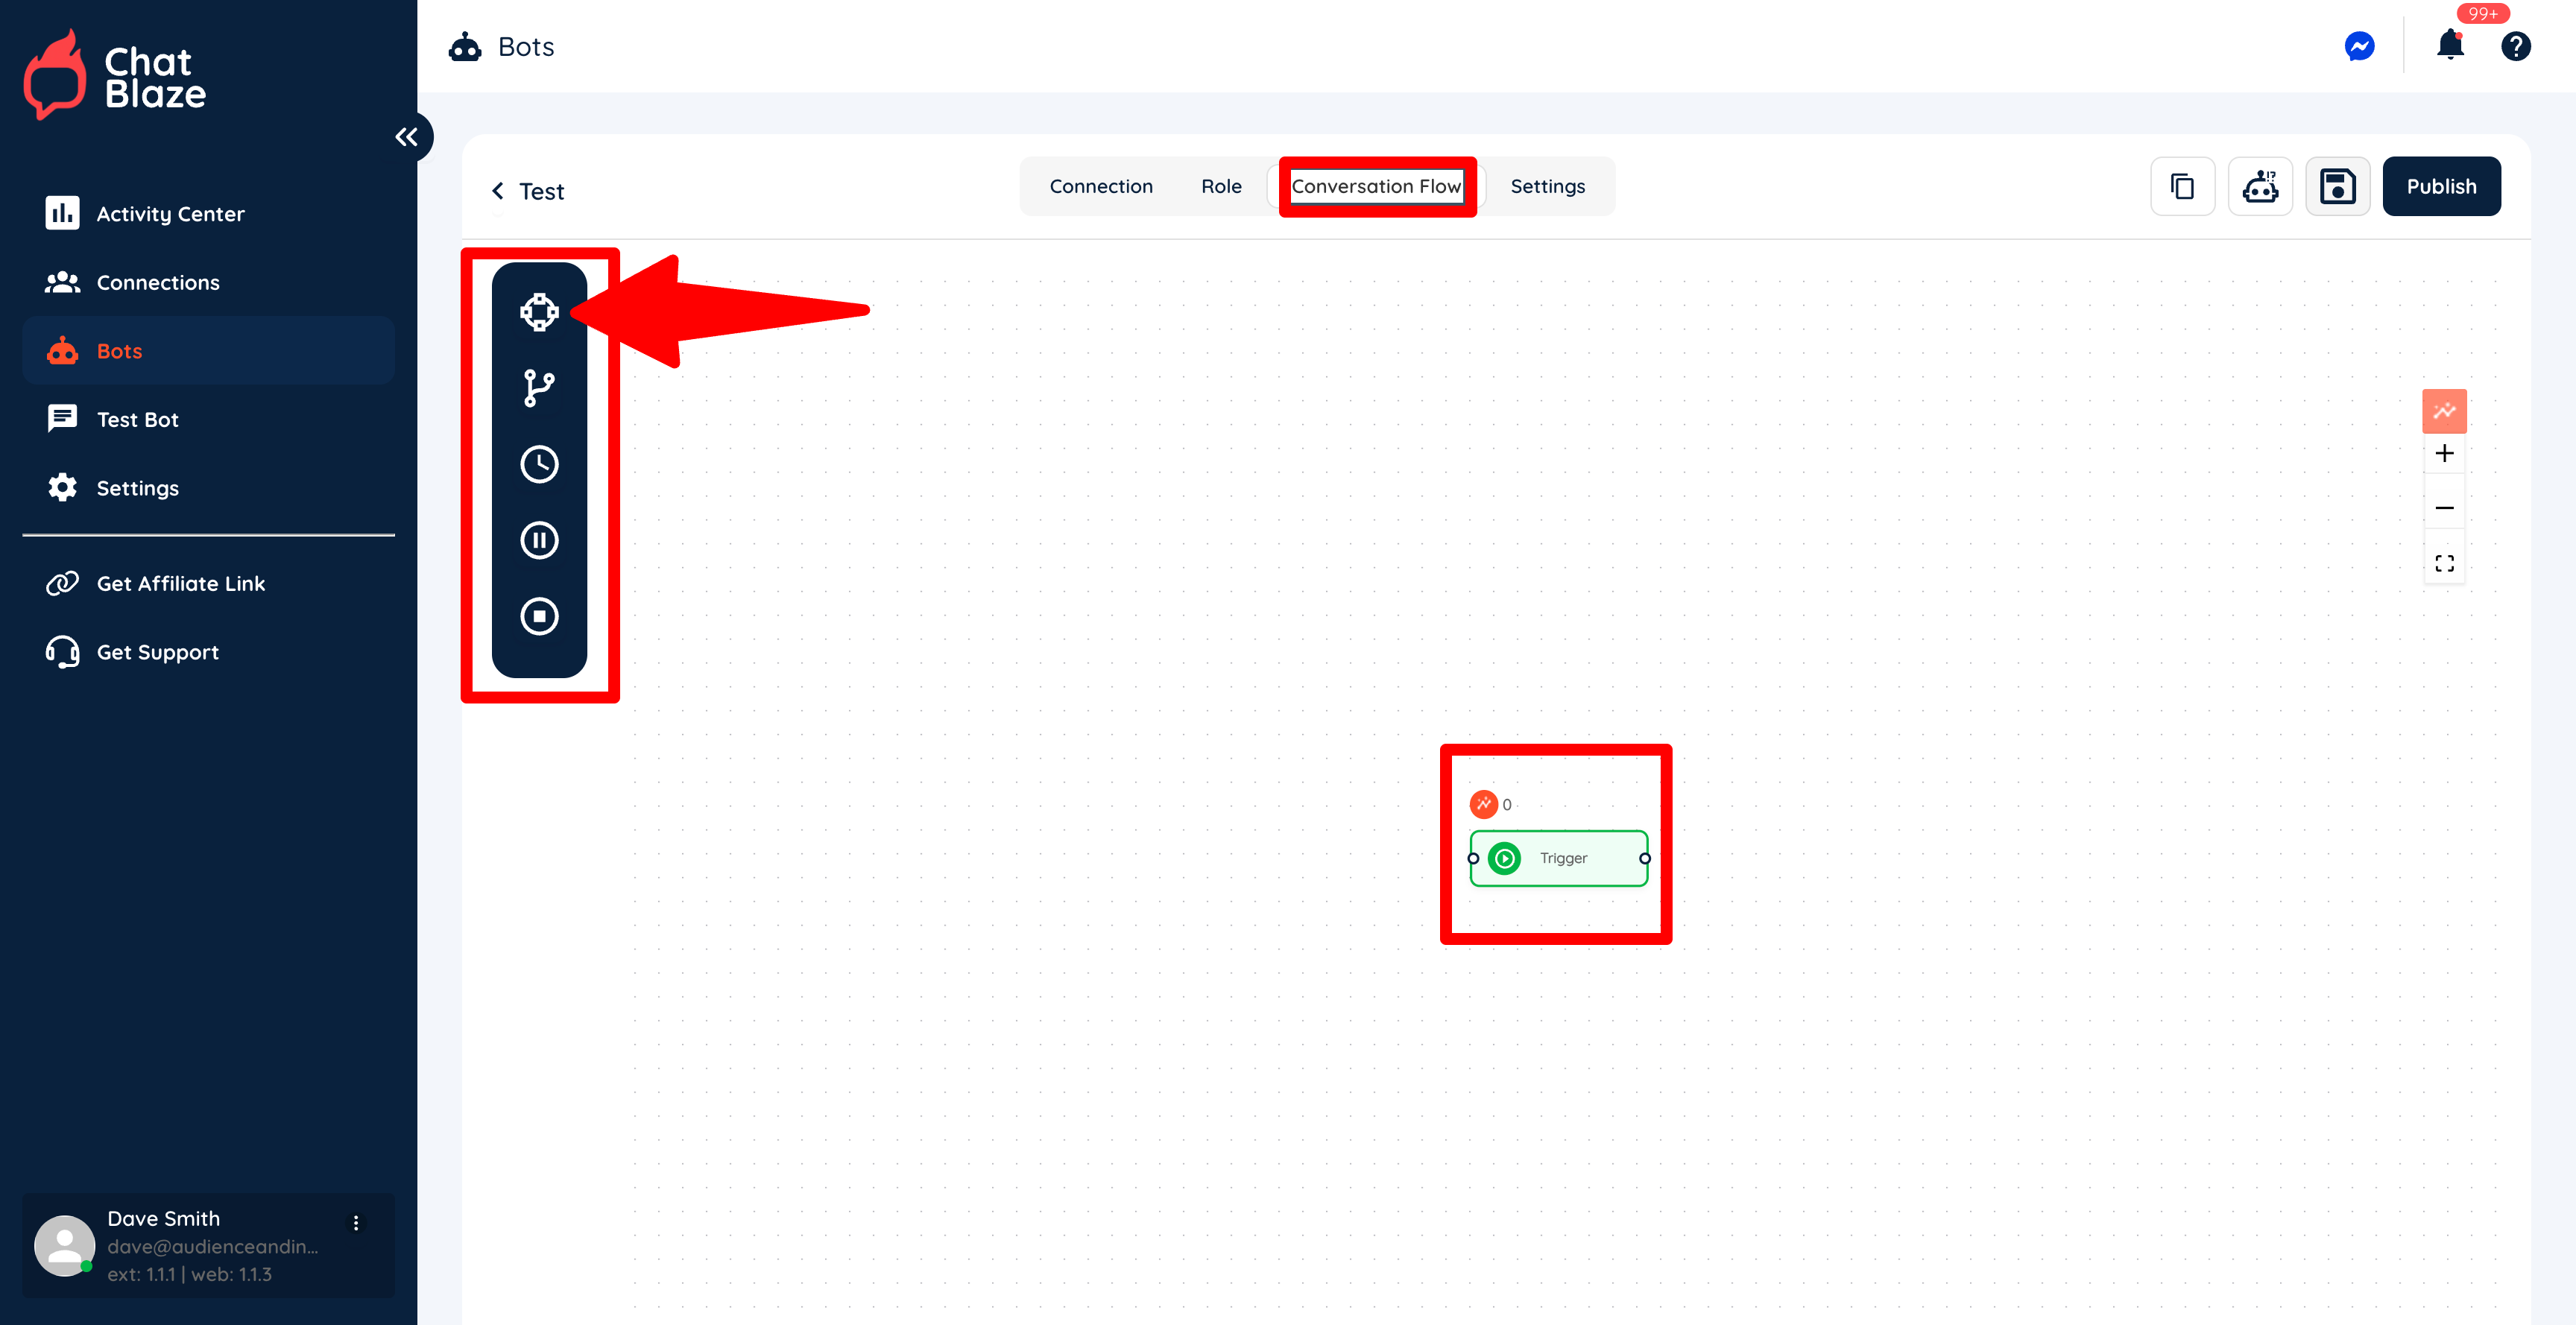
4) Now move onto the "Conversation Flow" where you will begin building your bot. Initially there will be a single "Node" on your canvas called a "Trigger", which tells ChatBlaze when to assign this specific bot to a lead.
There is also a list of other nodes on the left side of the canvas that you can drag after the "Trigger" node. These nodes can ask questions, segment leads, end conversations, etc.
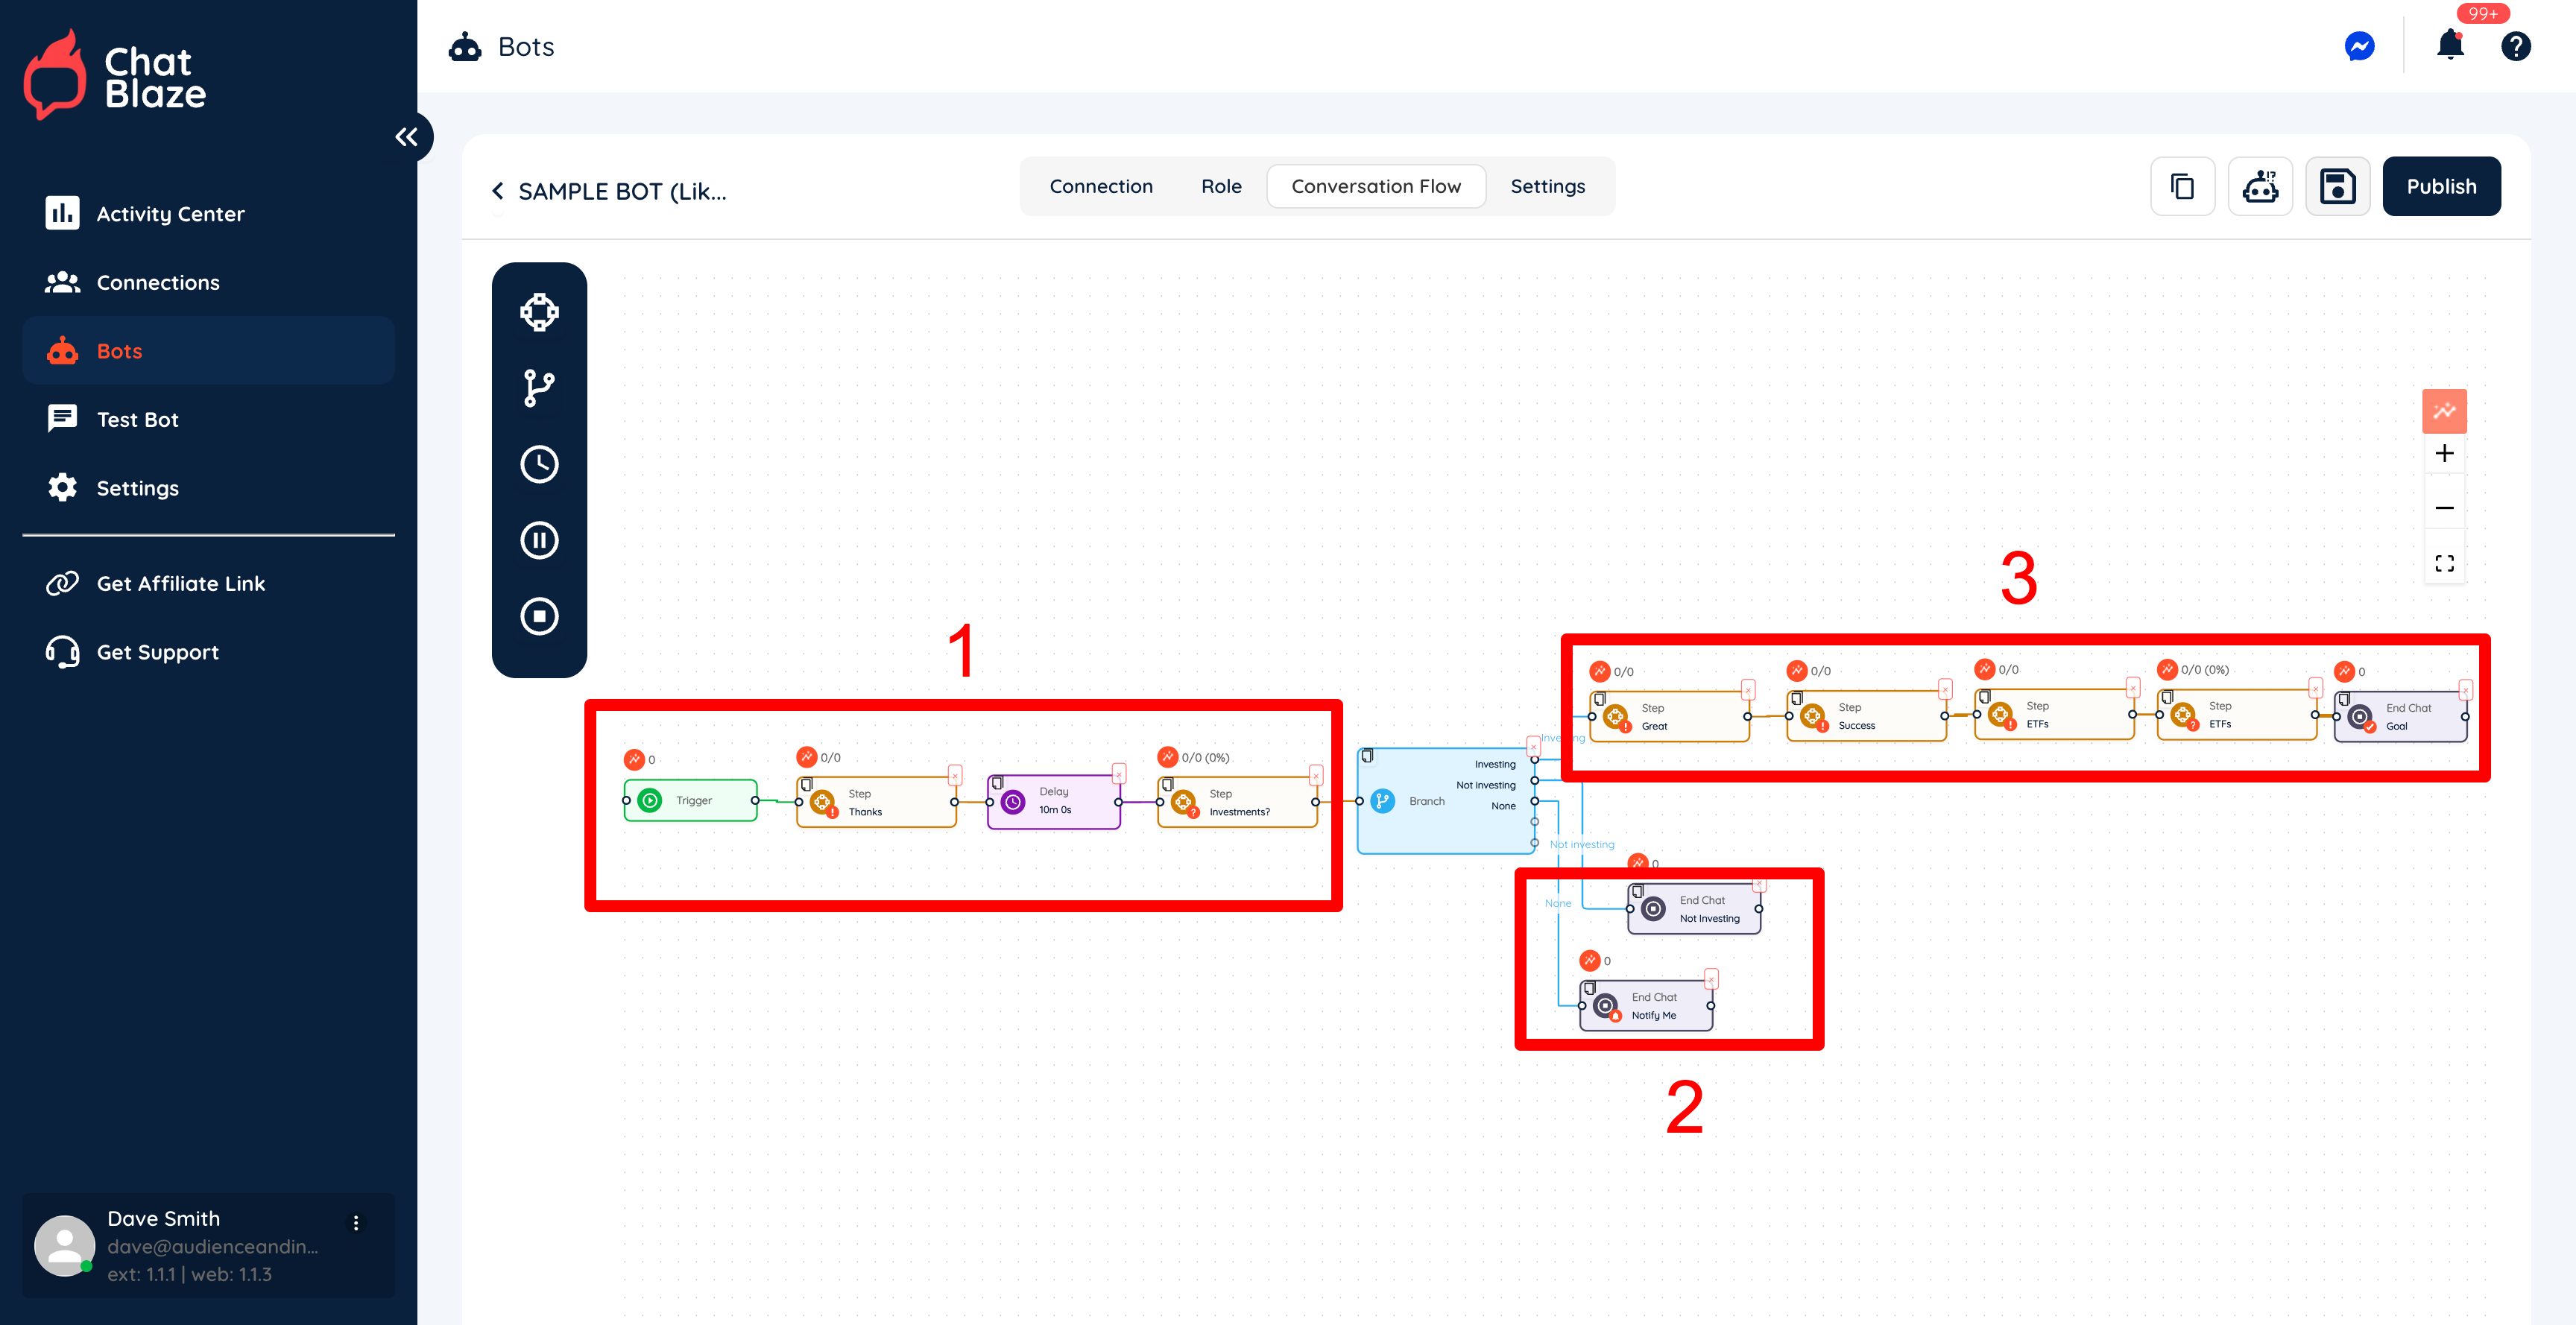
5) By adding various nodes to the canvas, this sample bot now has 3 distinct parts:
First, it greets the lead, does a bit of nurturing, and then asks a question.
Second, it segments leads based on their response to the question. Those who aren't likely ready to buy anything have their conversation ended. Those leads can now be assigned a new bot when they show that they are more interested in receiving an offer in the future.
Third, those leads who do show interest are moved towards receiving an offer, which in this case is Categorying a sales call with you.
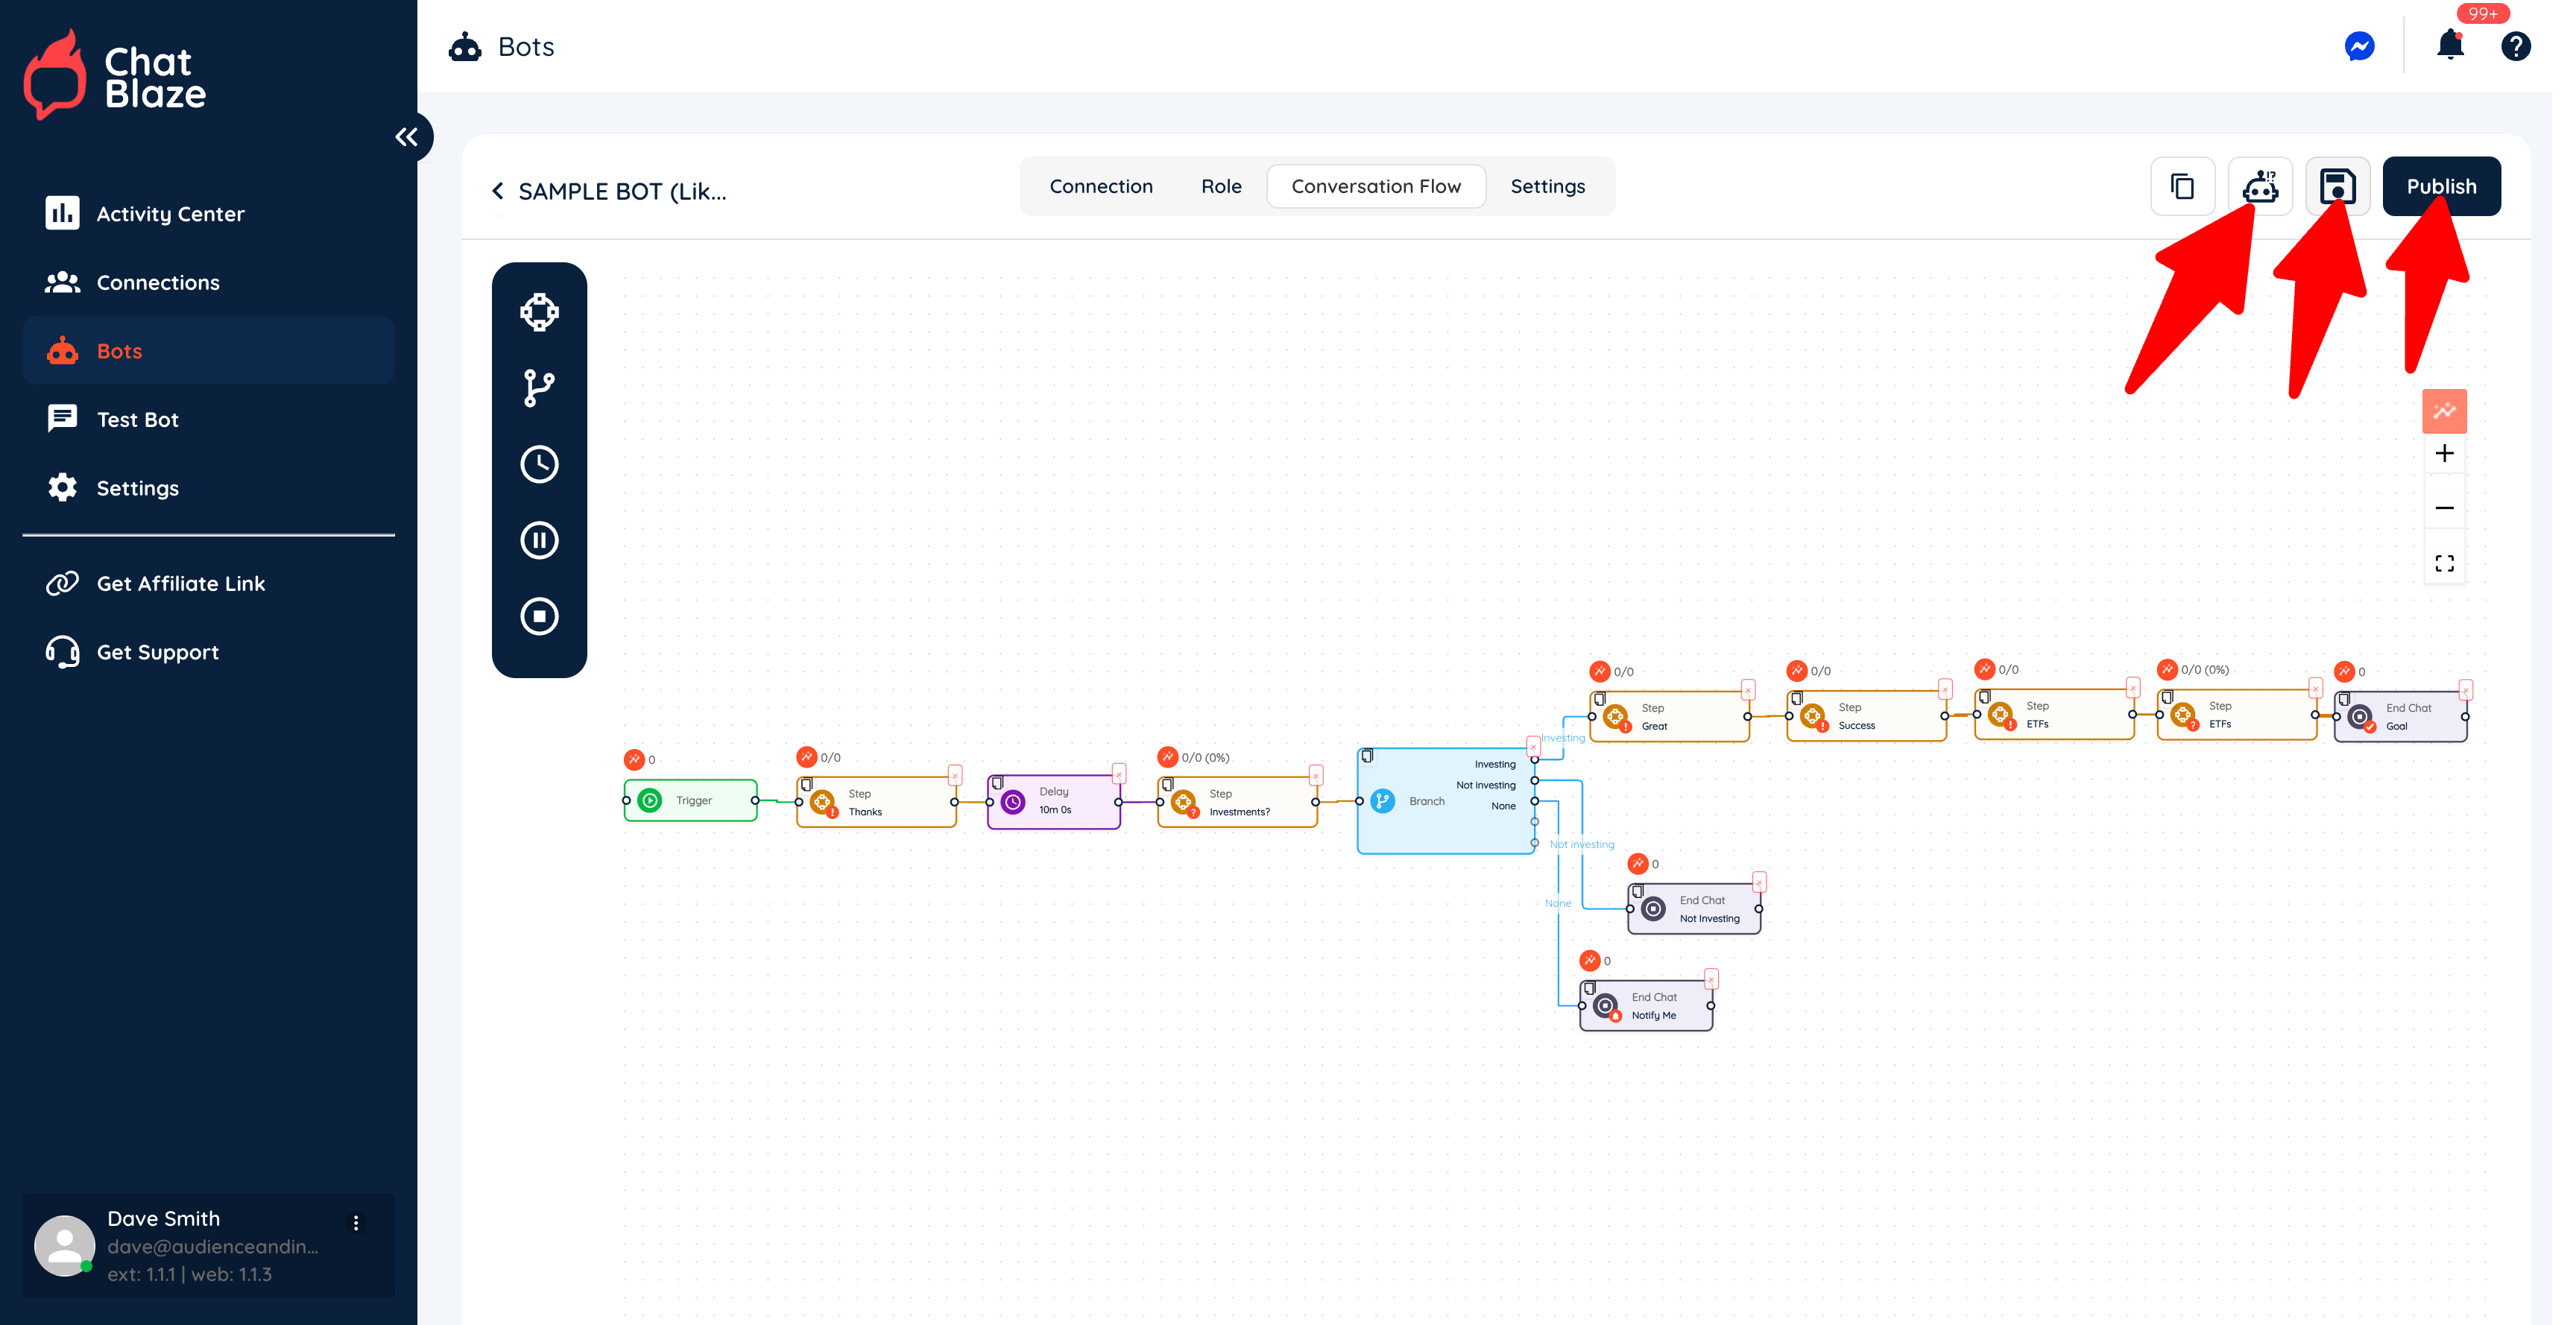
6) Save your bot, test it, then publish it when it's working exactly as you'd like.
Once it's published, your bot will begin chatting with leads any time you have your ChatBlaze Messenger window open and the trigger you set for this bot is activated.
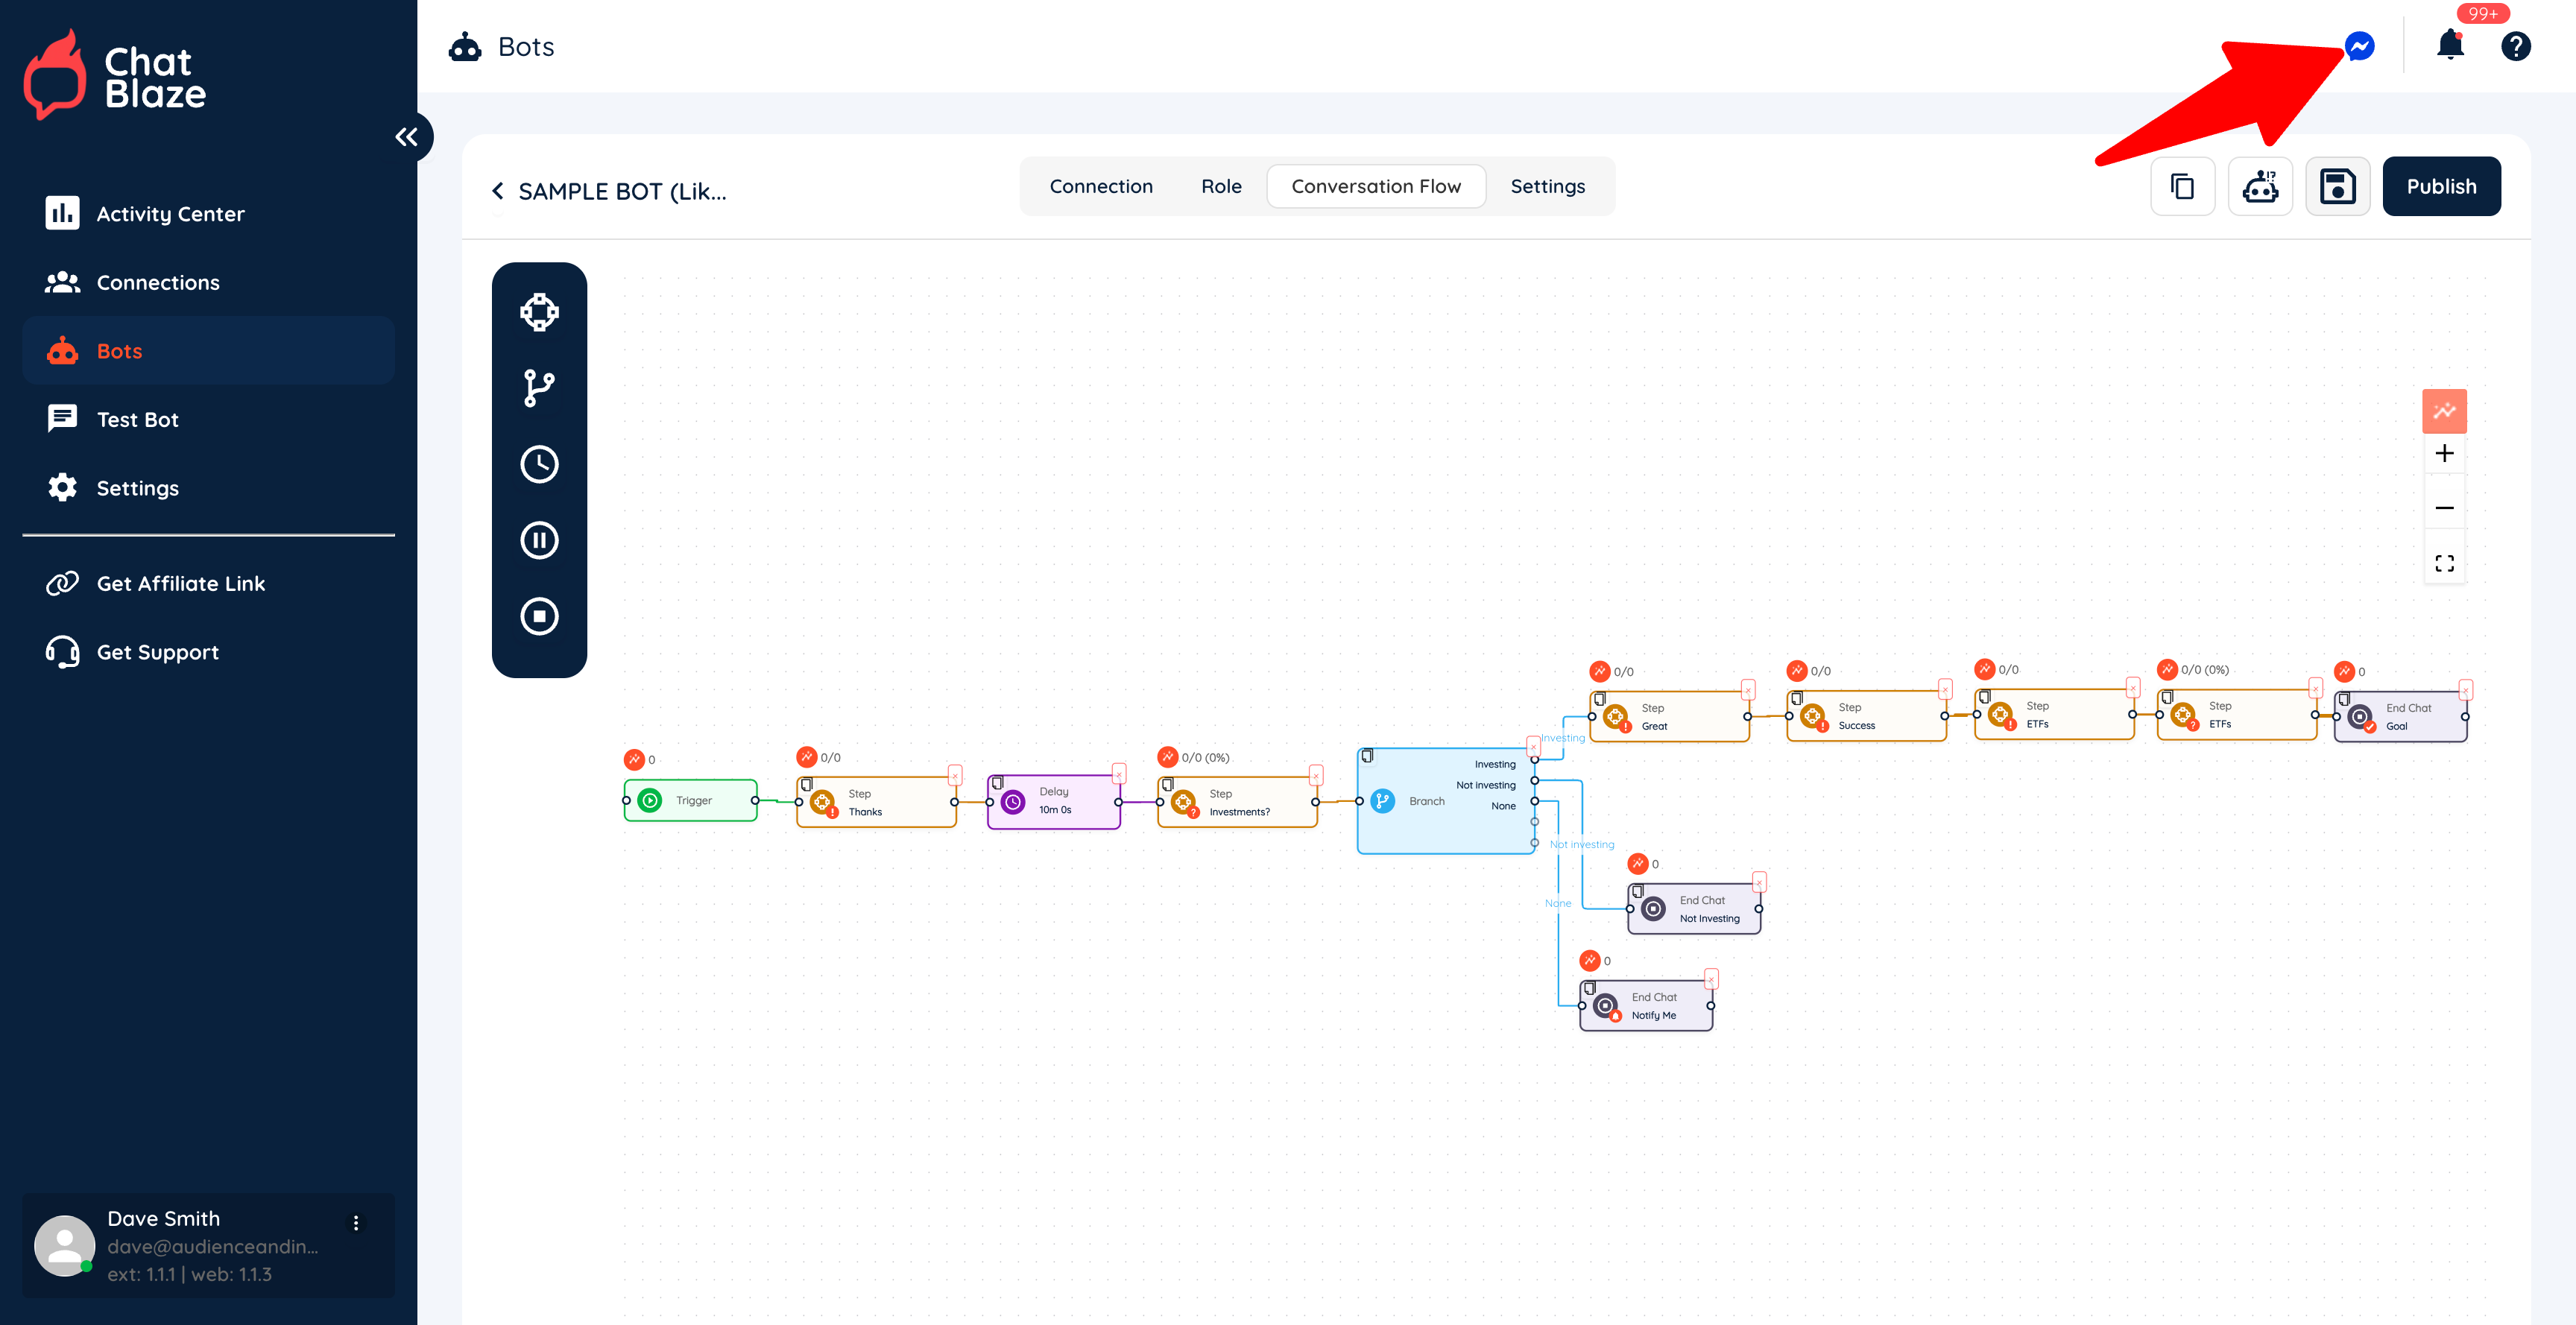
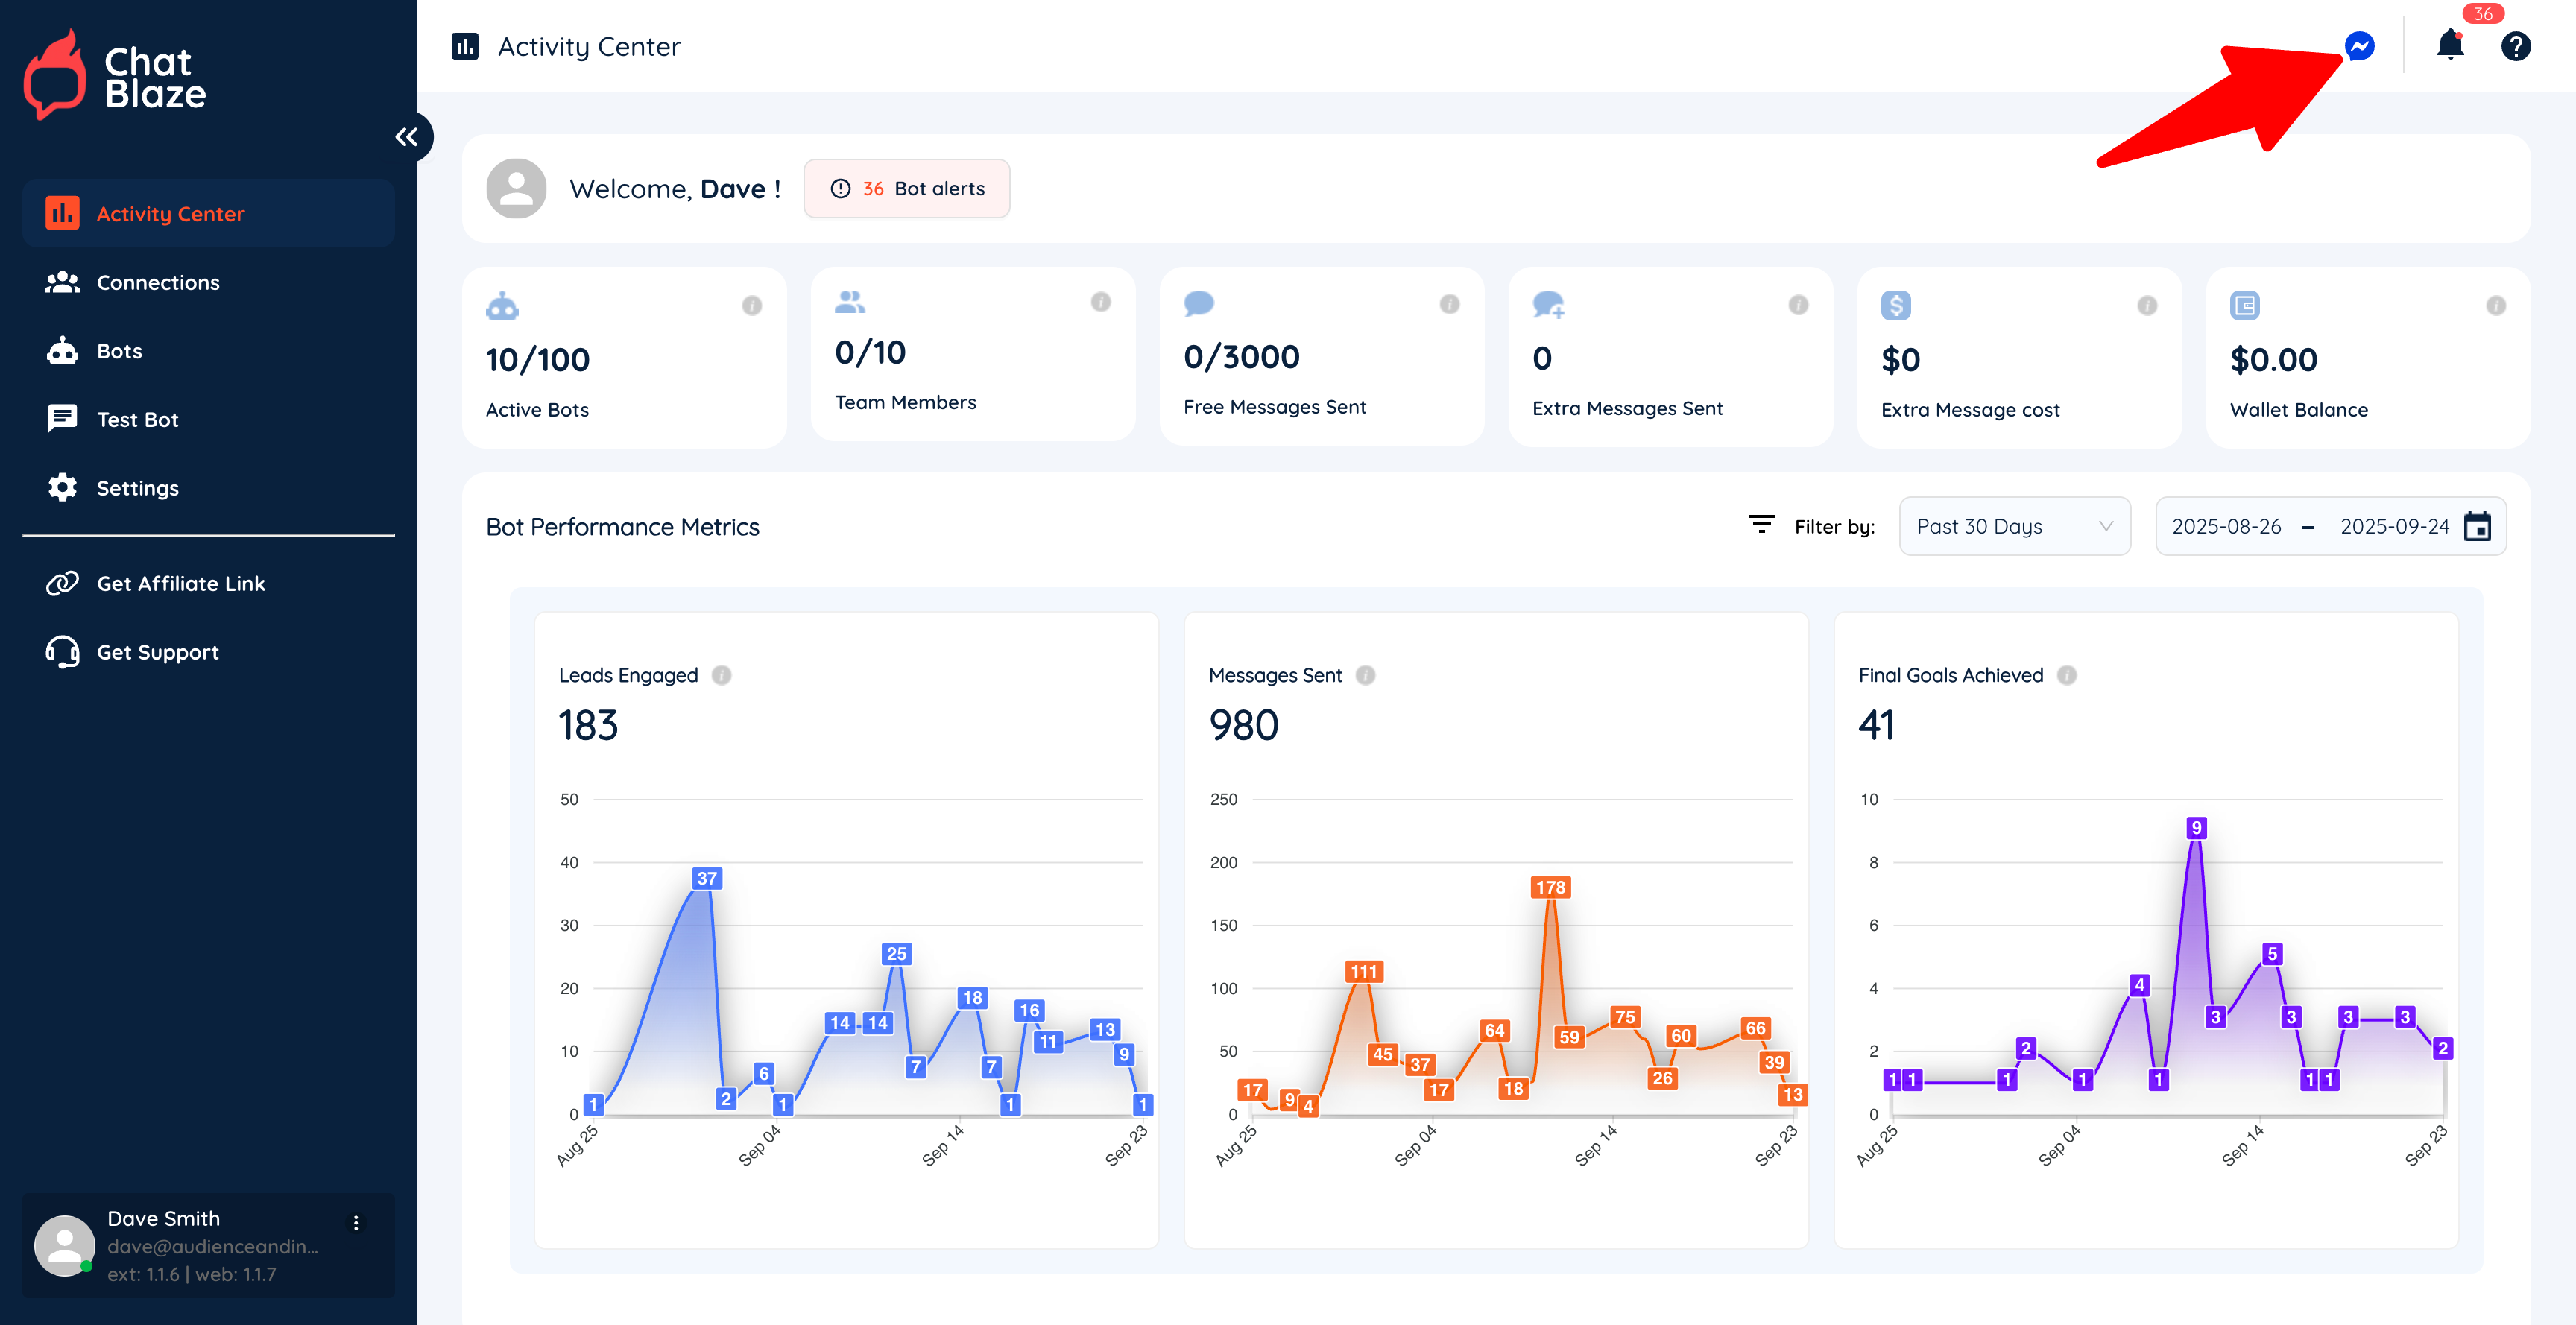
7) To open your ChatBlaze Messenger window, click on the Messenger icon. Again, as soon as your bot is published and you open this window, your bots will be able to chat with leads.
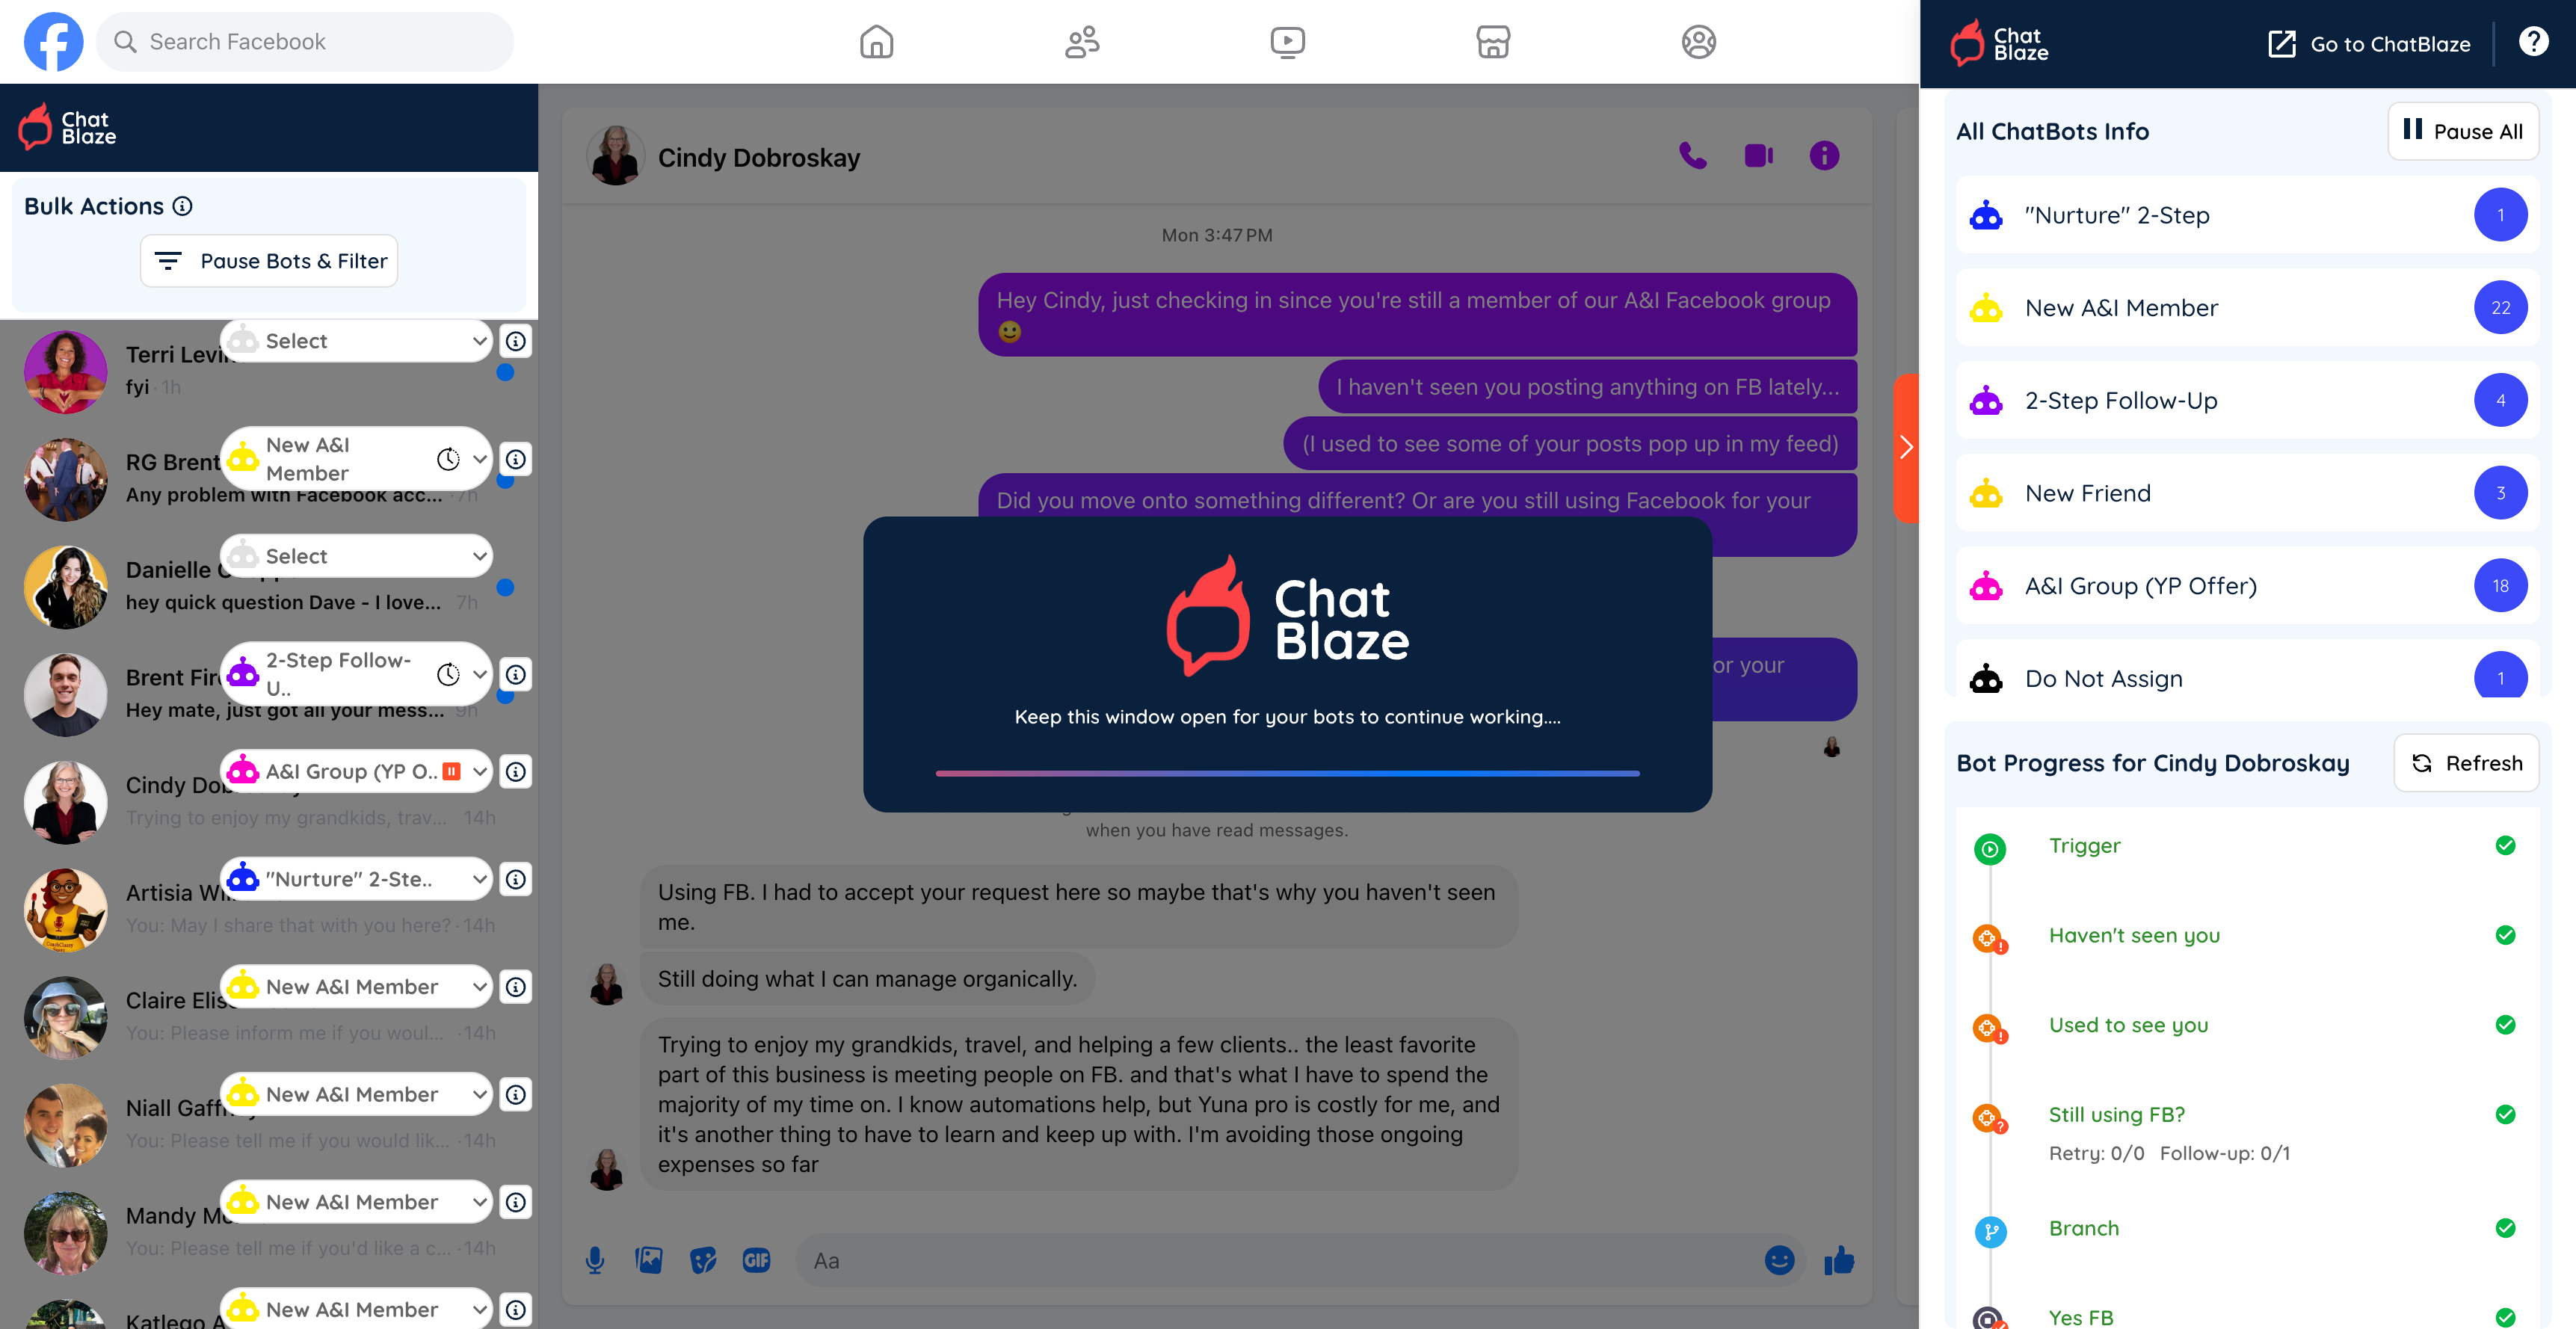
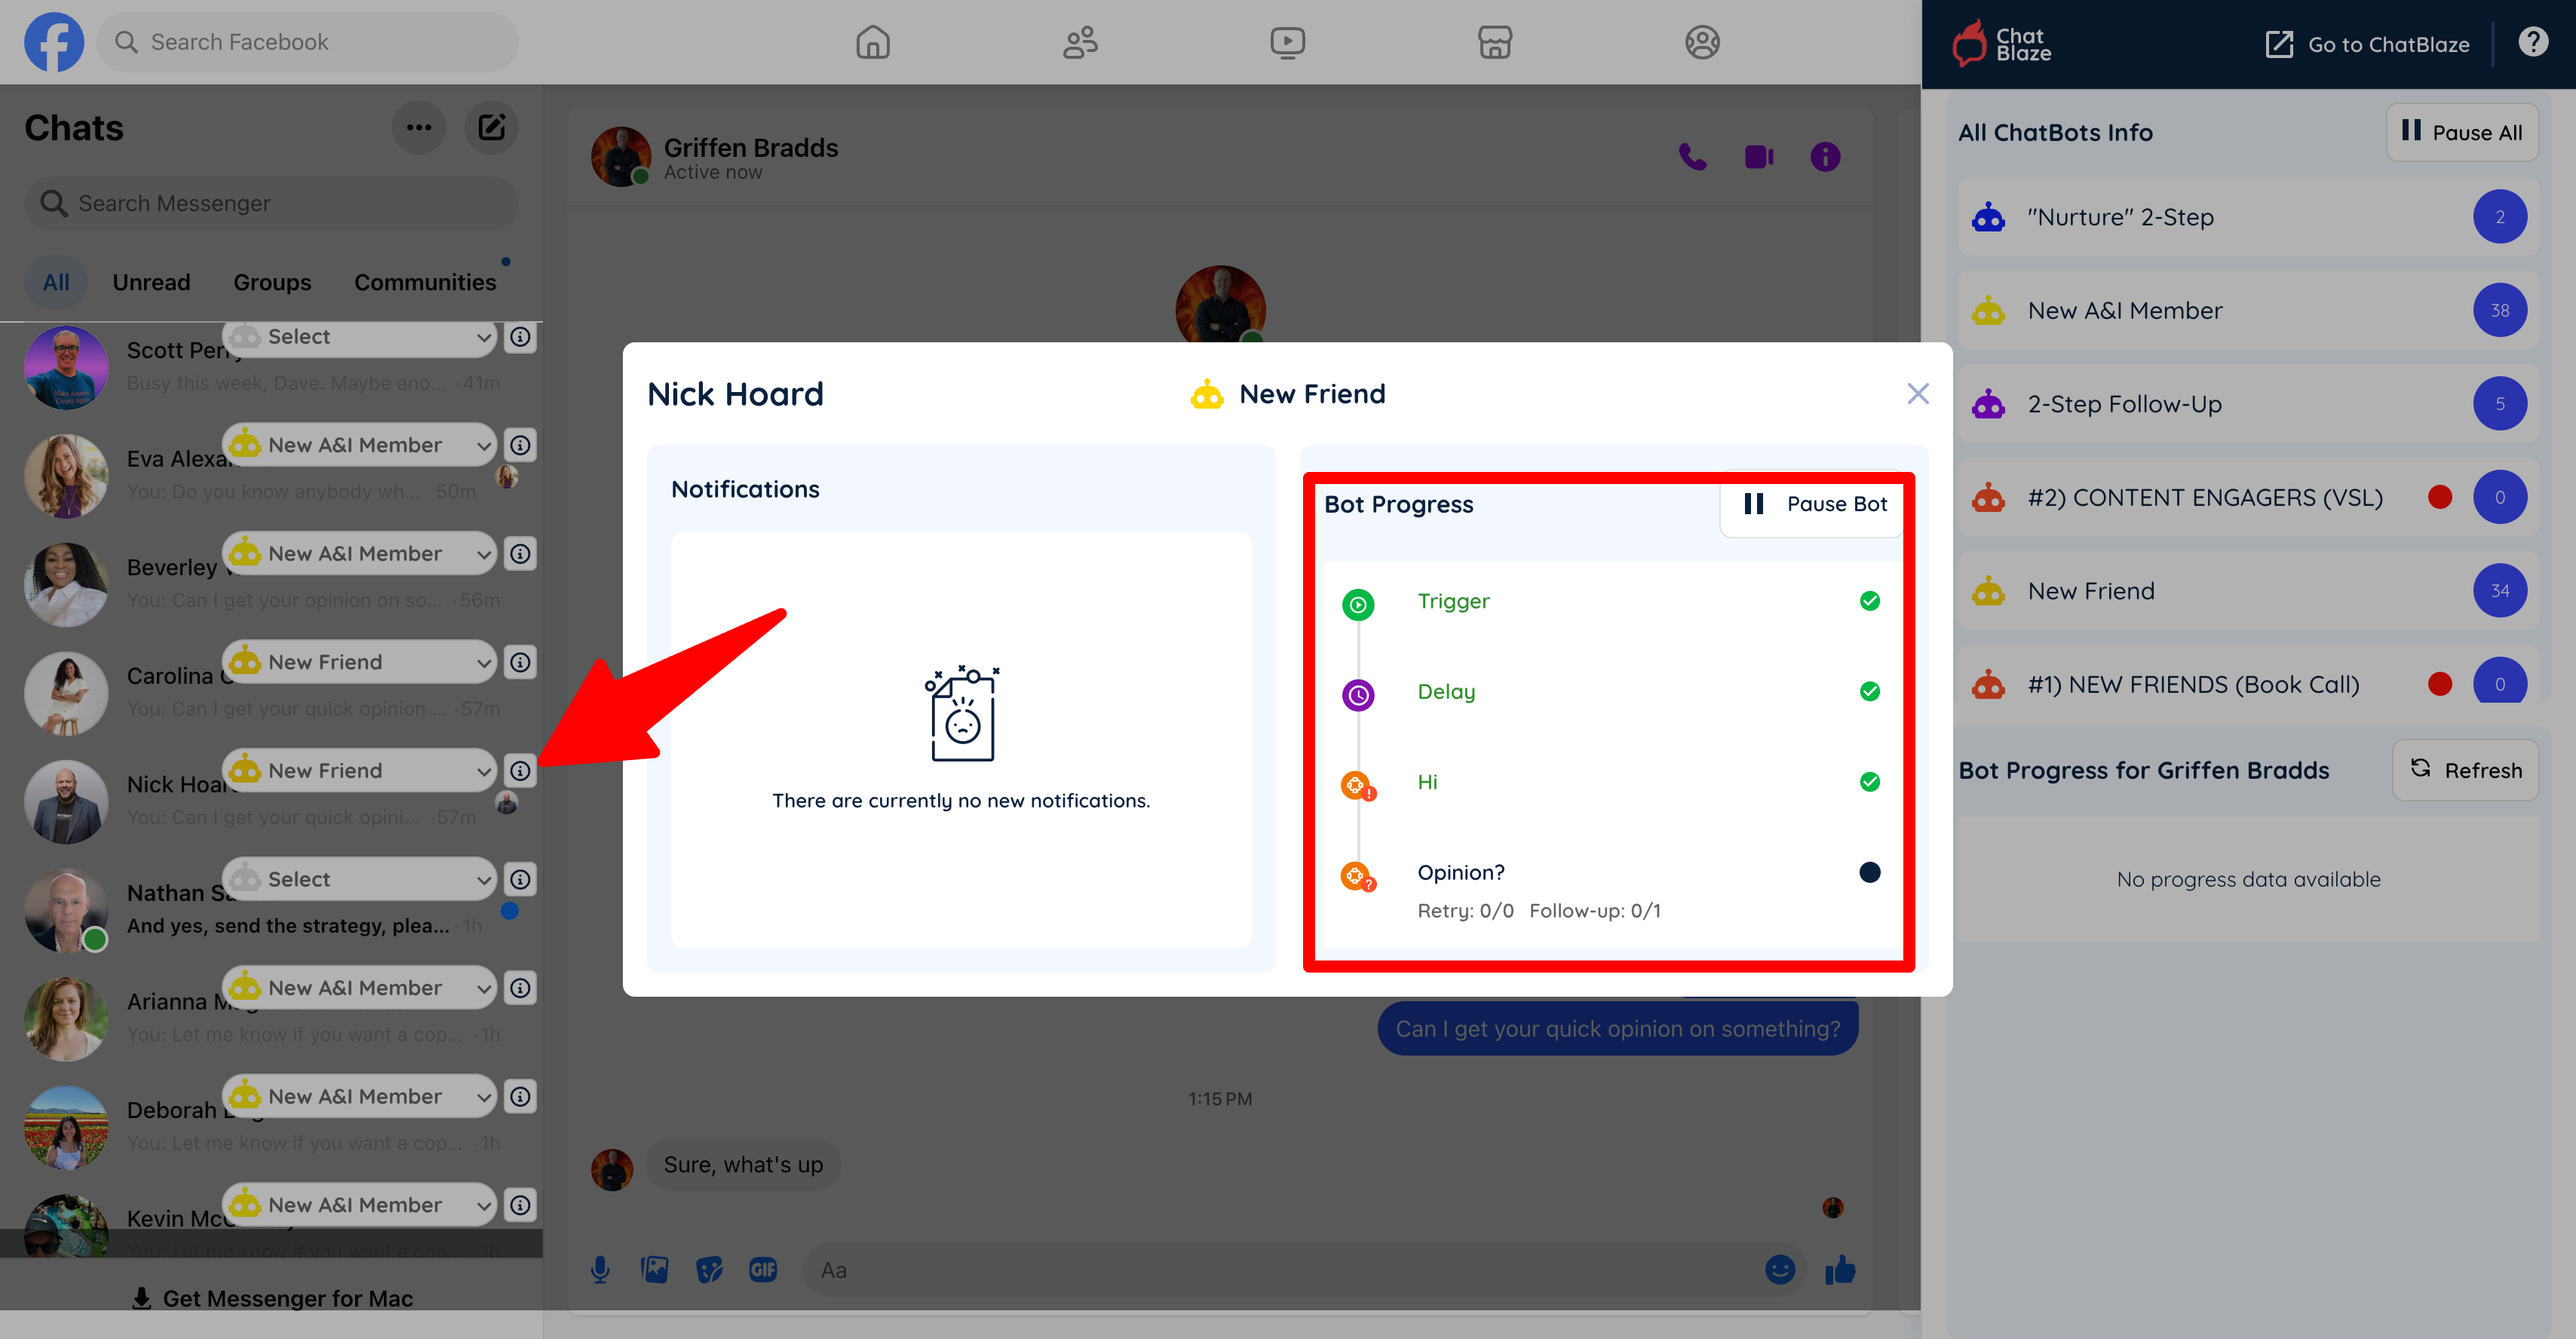
8) In the ChatBlaze Messenger window you'll be able to see which bot is assigned to each lead.
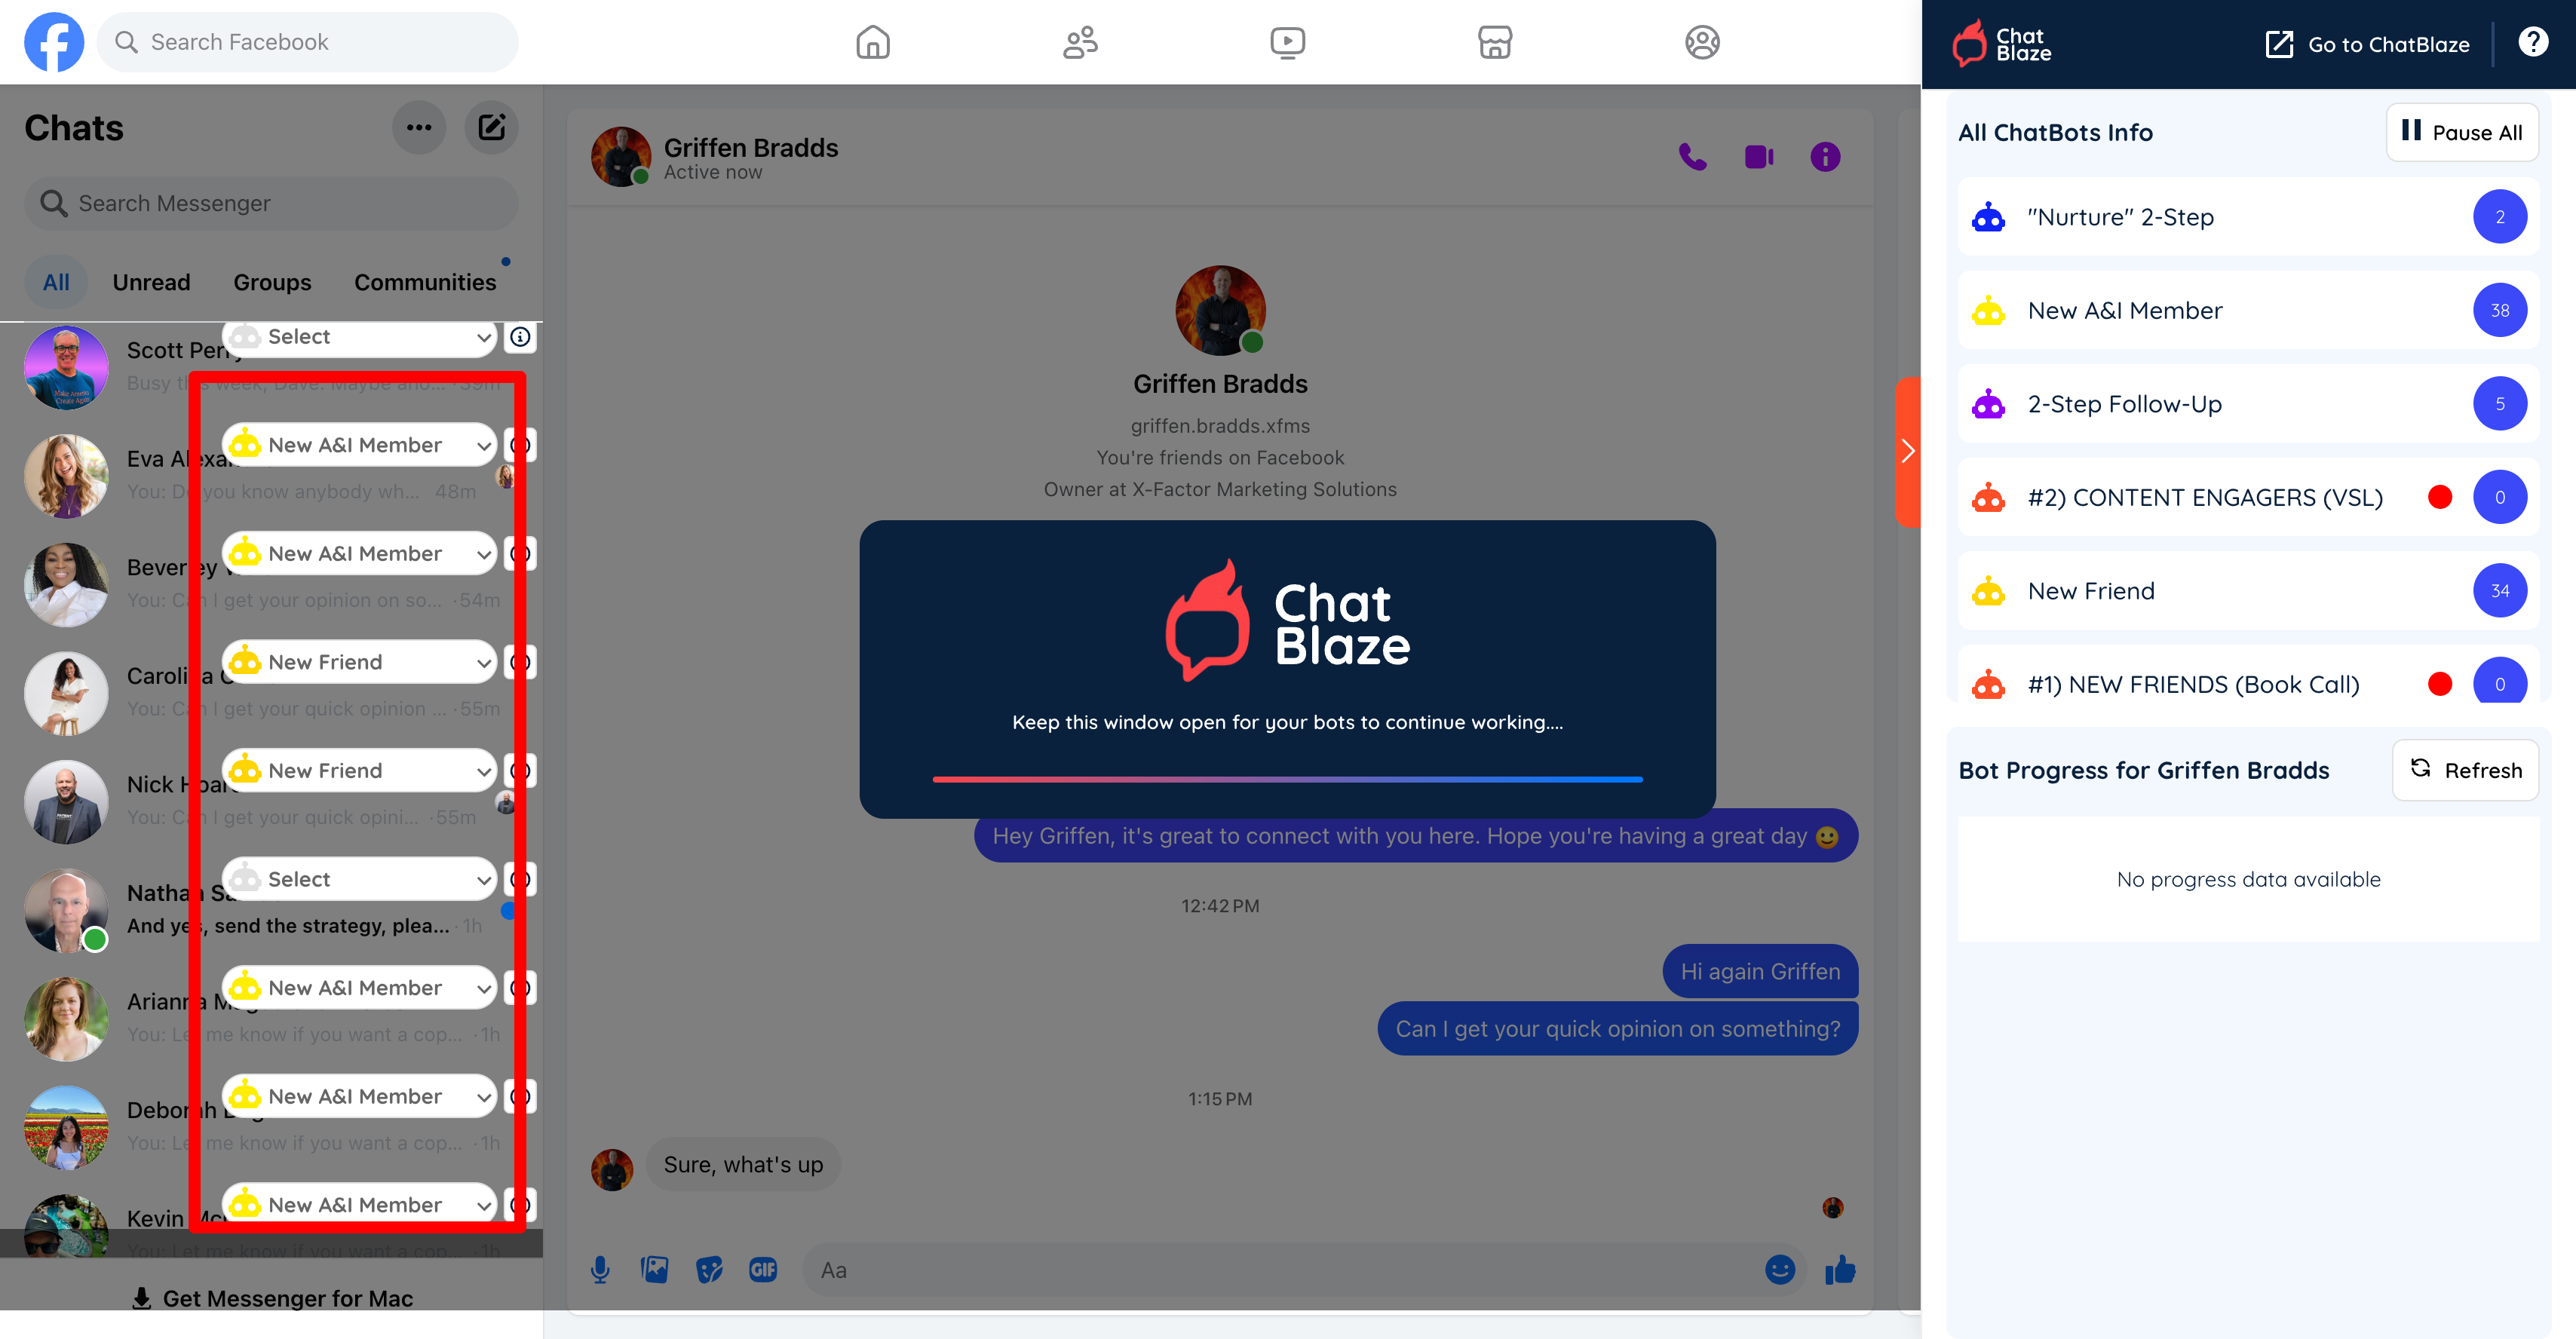
9) And clicking on the "i" icon beside each lead will show you the bot's progress with that lead so far.
Your bot will follow the conversation flow you built until a lead is disqualified (i.e. conversation ends) or your final goal is reached (e.g. an offer is made or a call is Categoryed).
Affiliates
How To Earn Affiliate Commissions
Did you know that you can get paid every time you tell someone about ChatBlaze?
It's simple to get started and the recurring commissions payments can add up quickly.
Here are the 4 steps to get paid:
1) Click "Get Affiliate Link" inside ChatBlaze: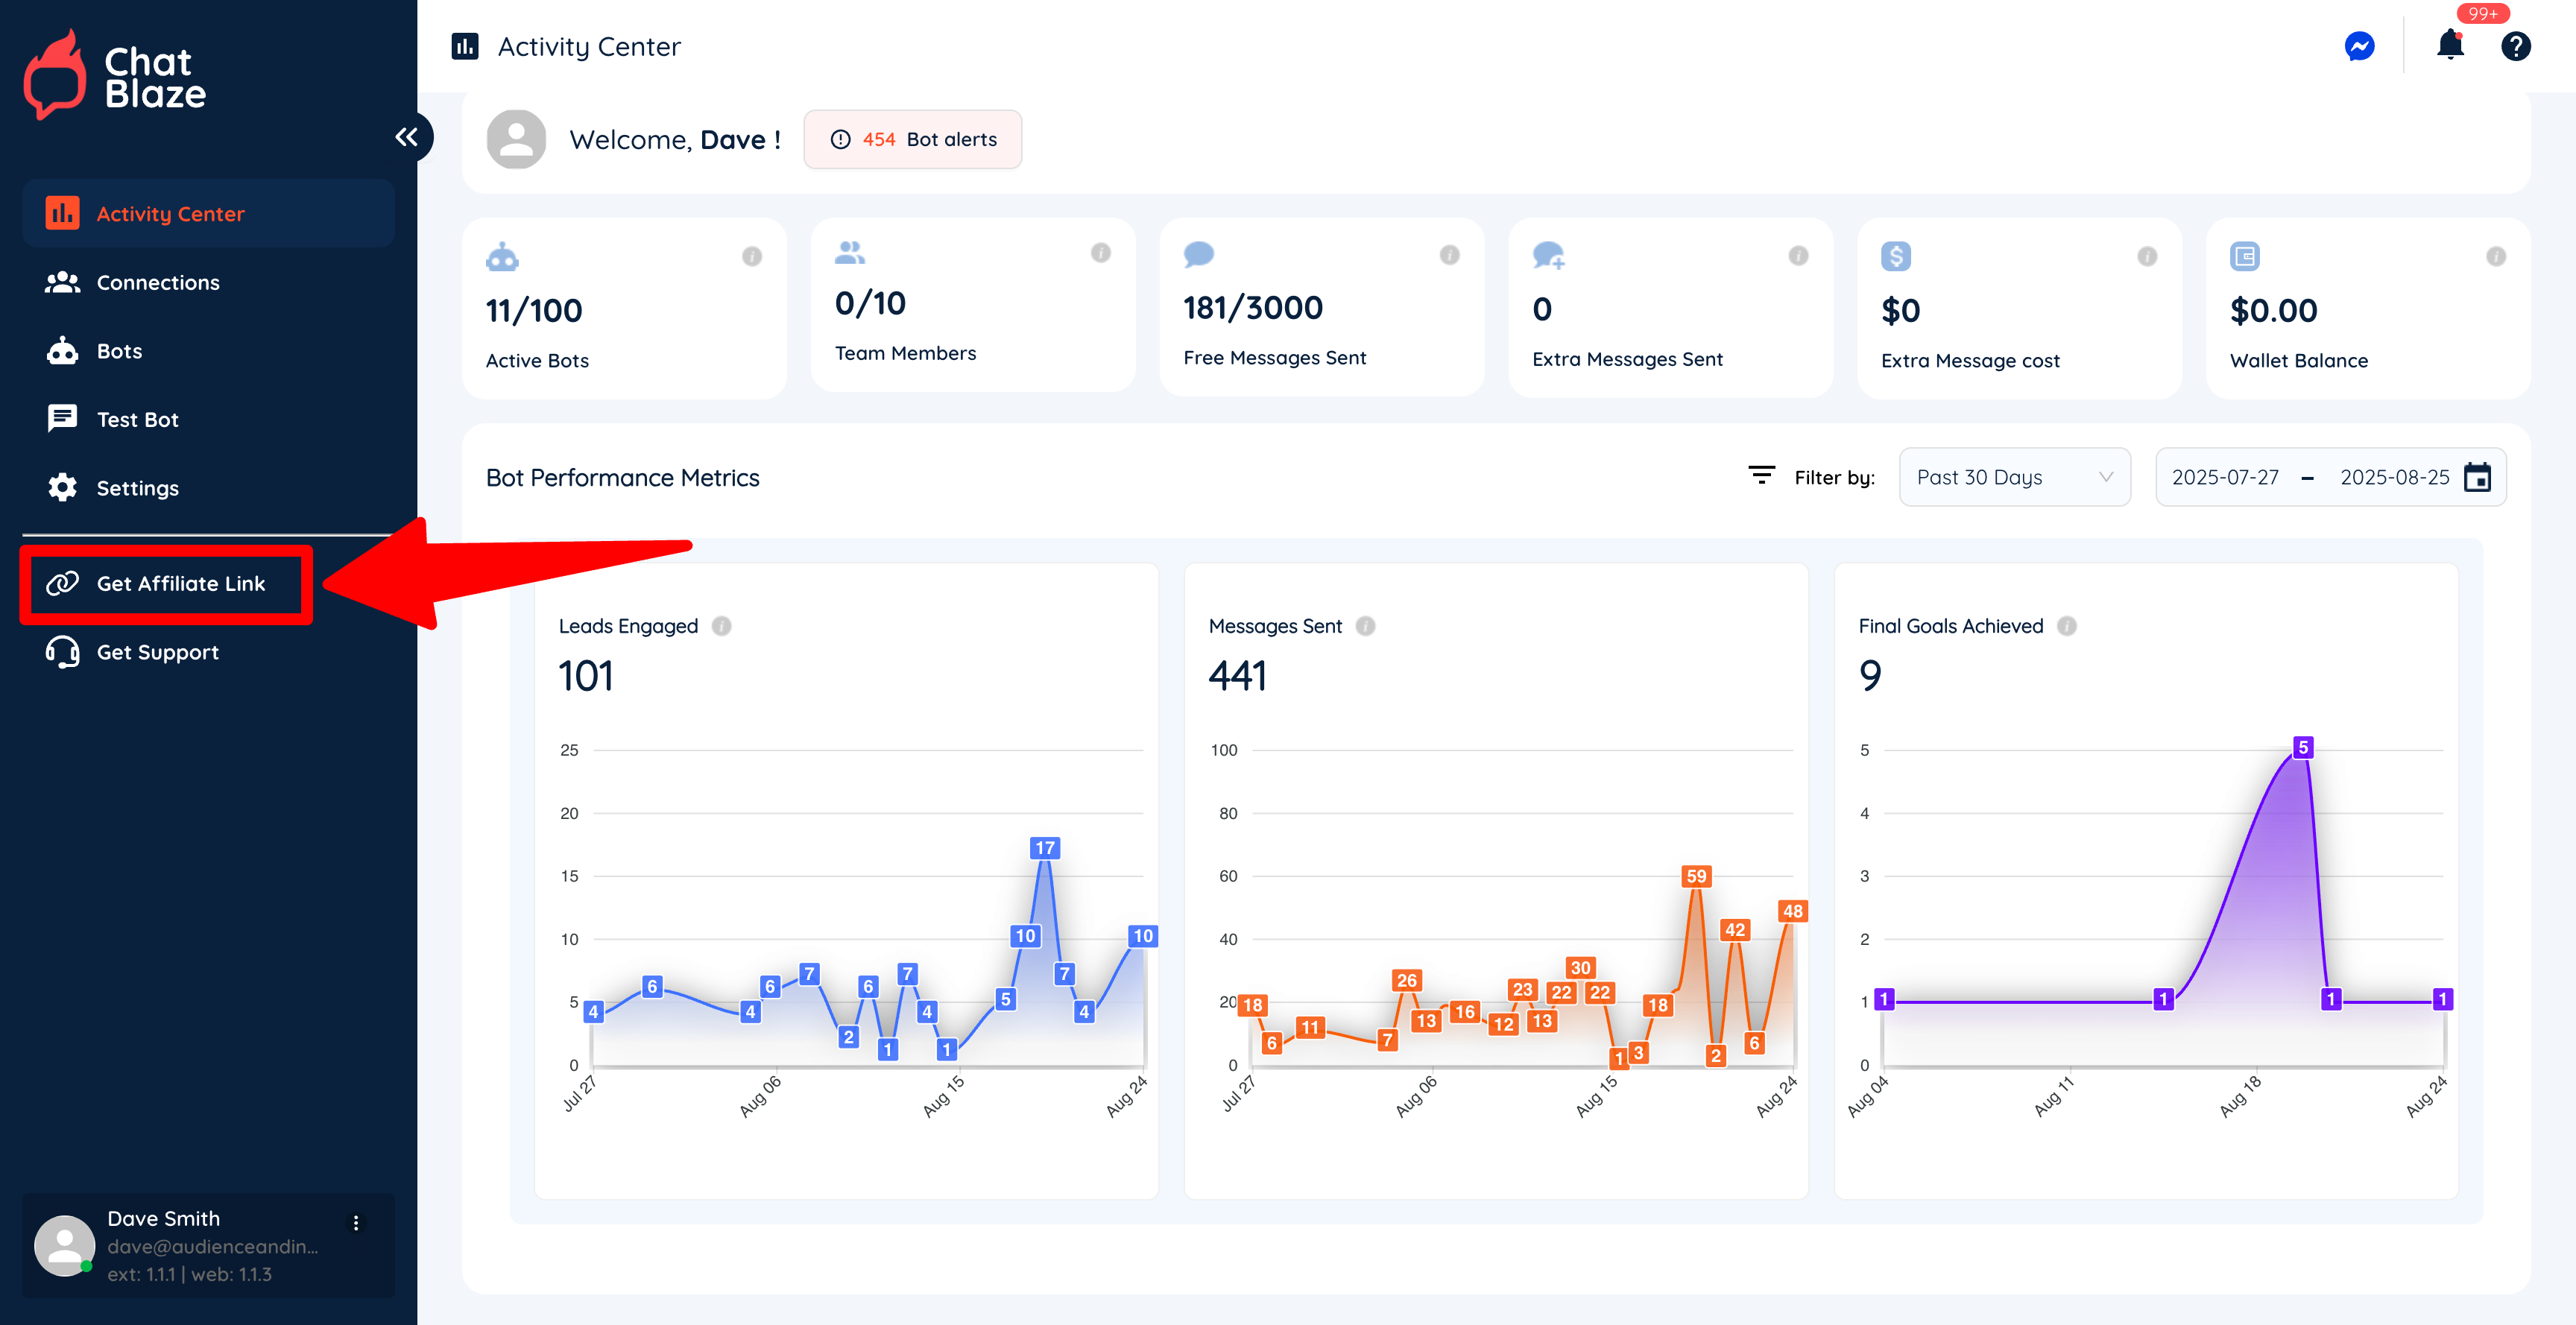
2) Create your affiliate account:
3) Tell us where to send your commission payments to: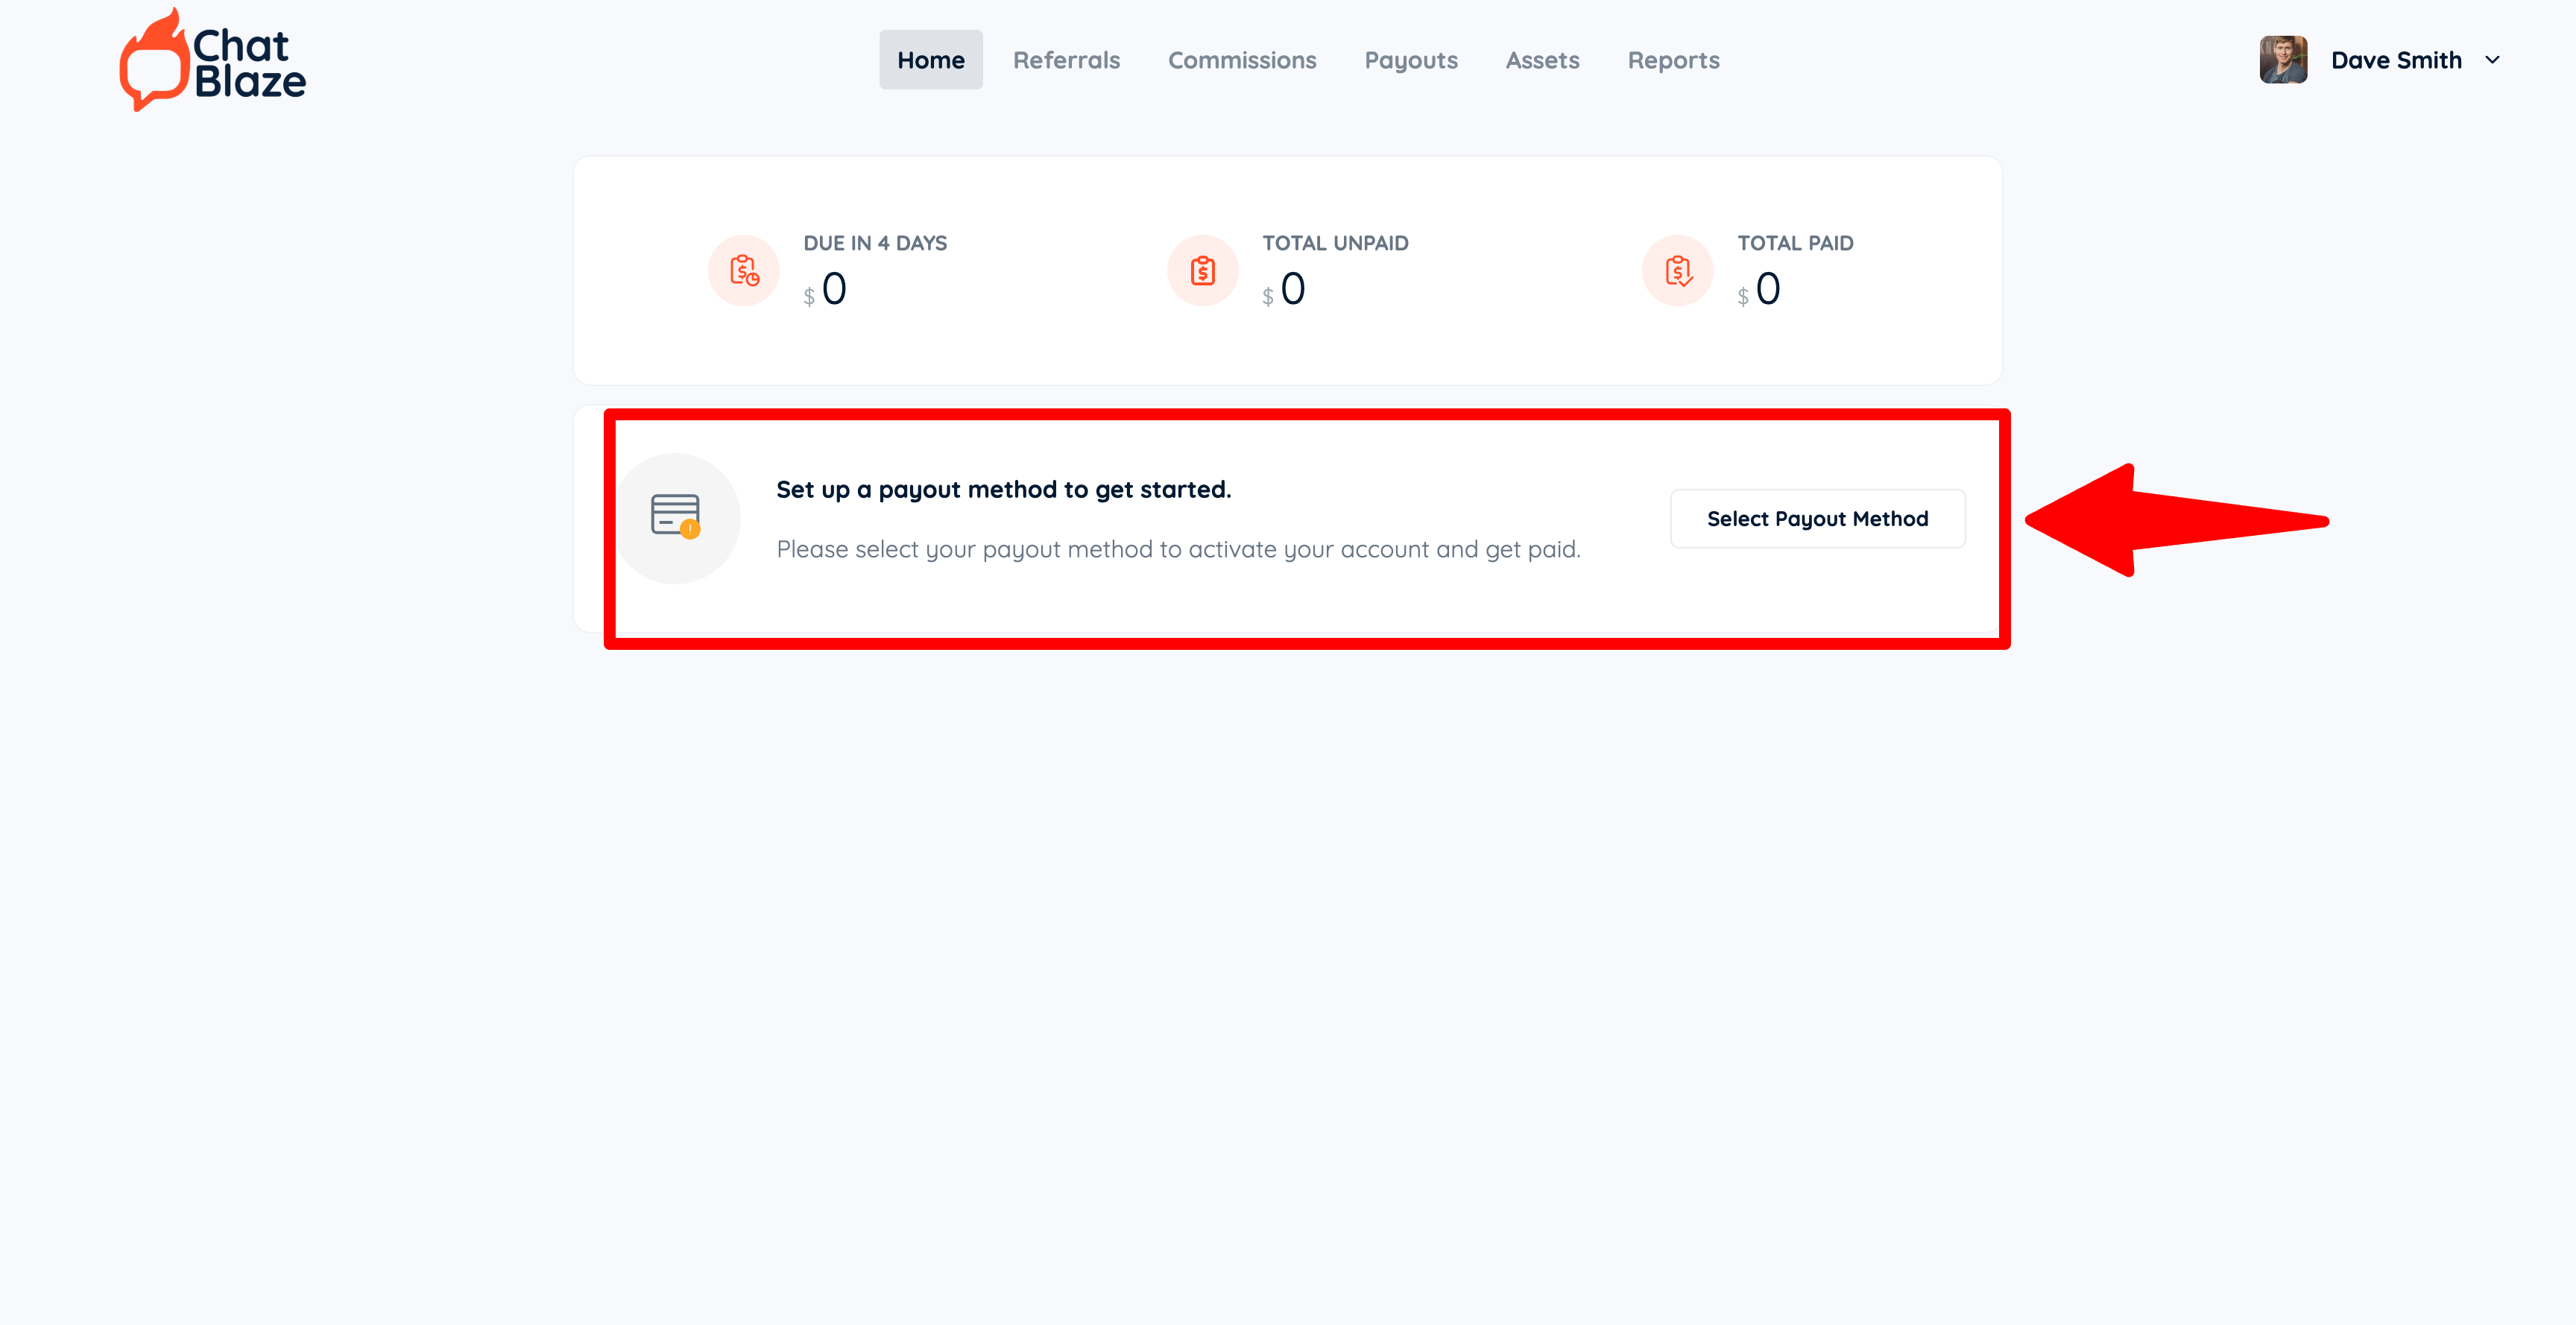
4) Share your unique affiliate link with anyone who would benefit from using ChatBlaze: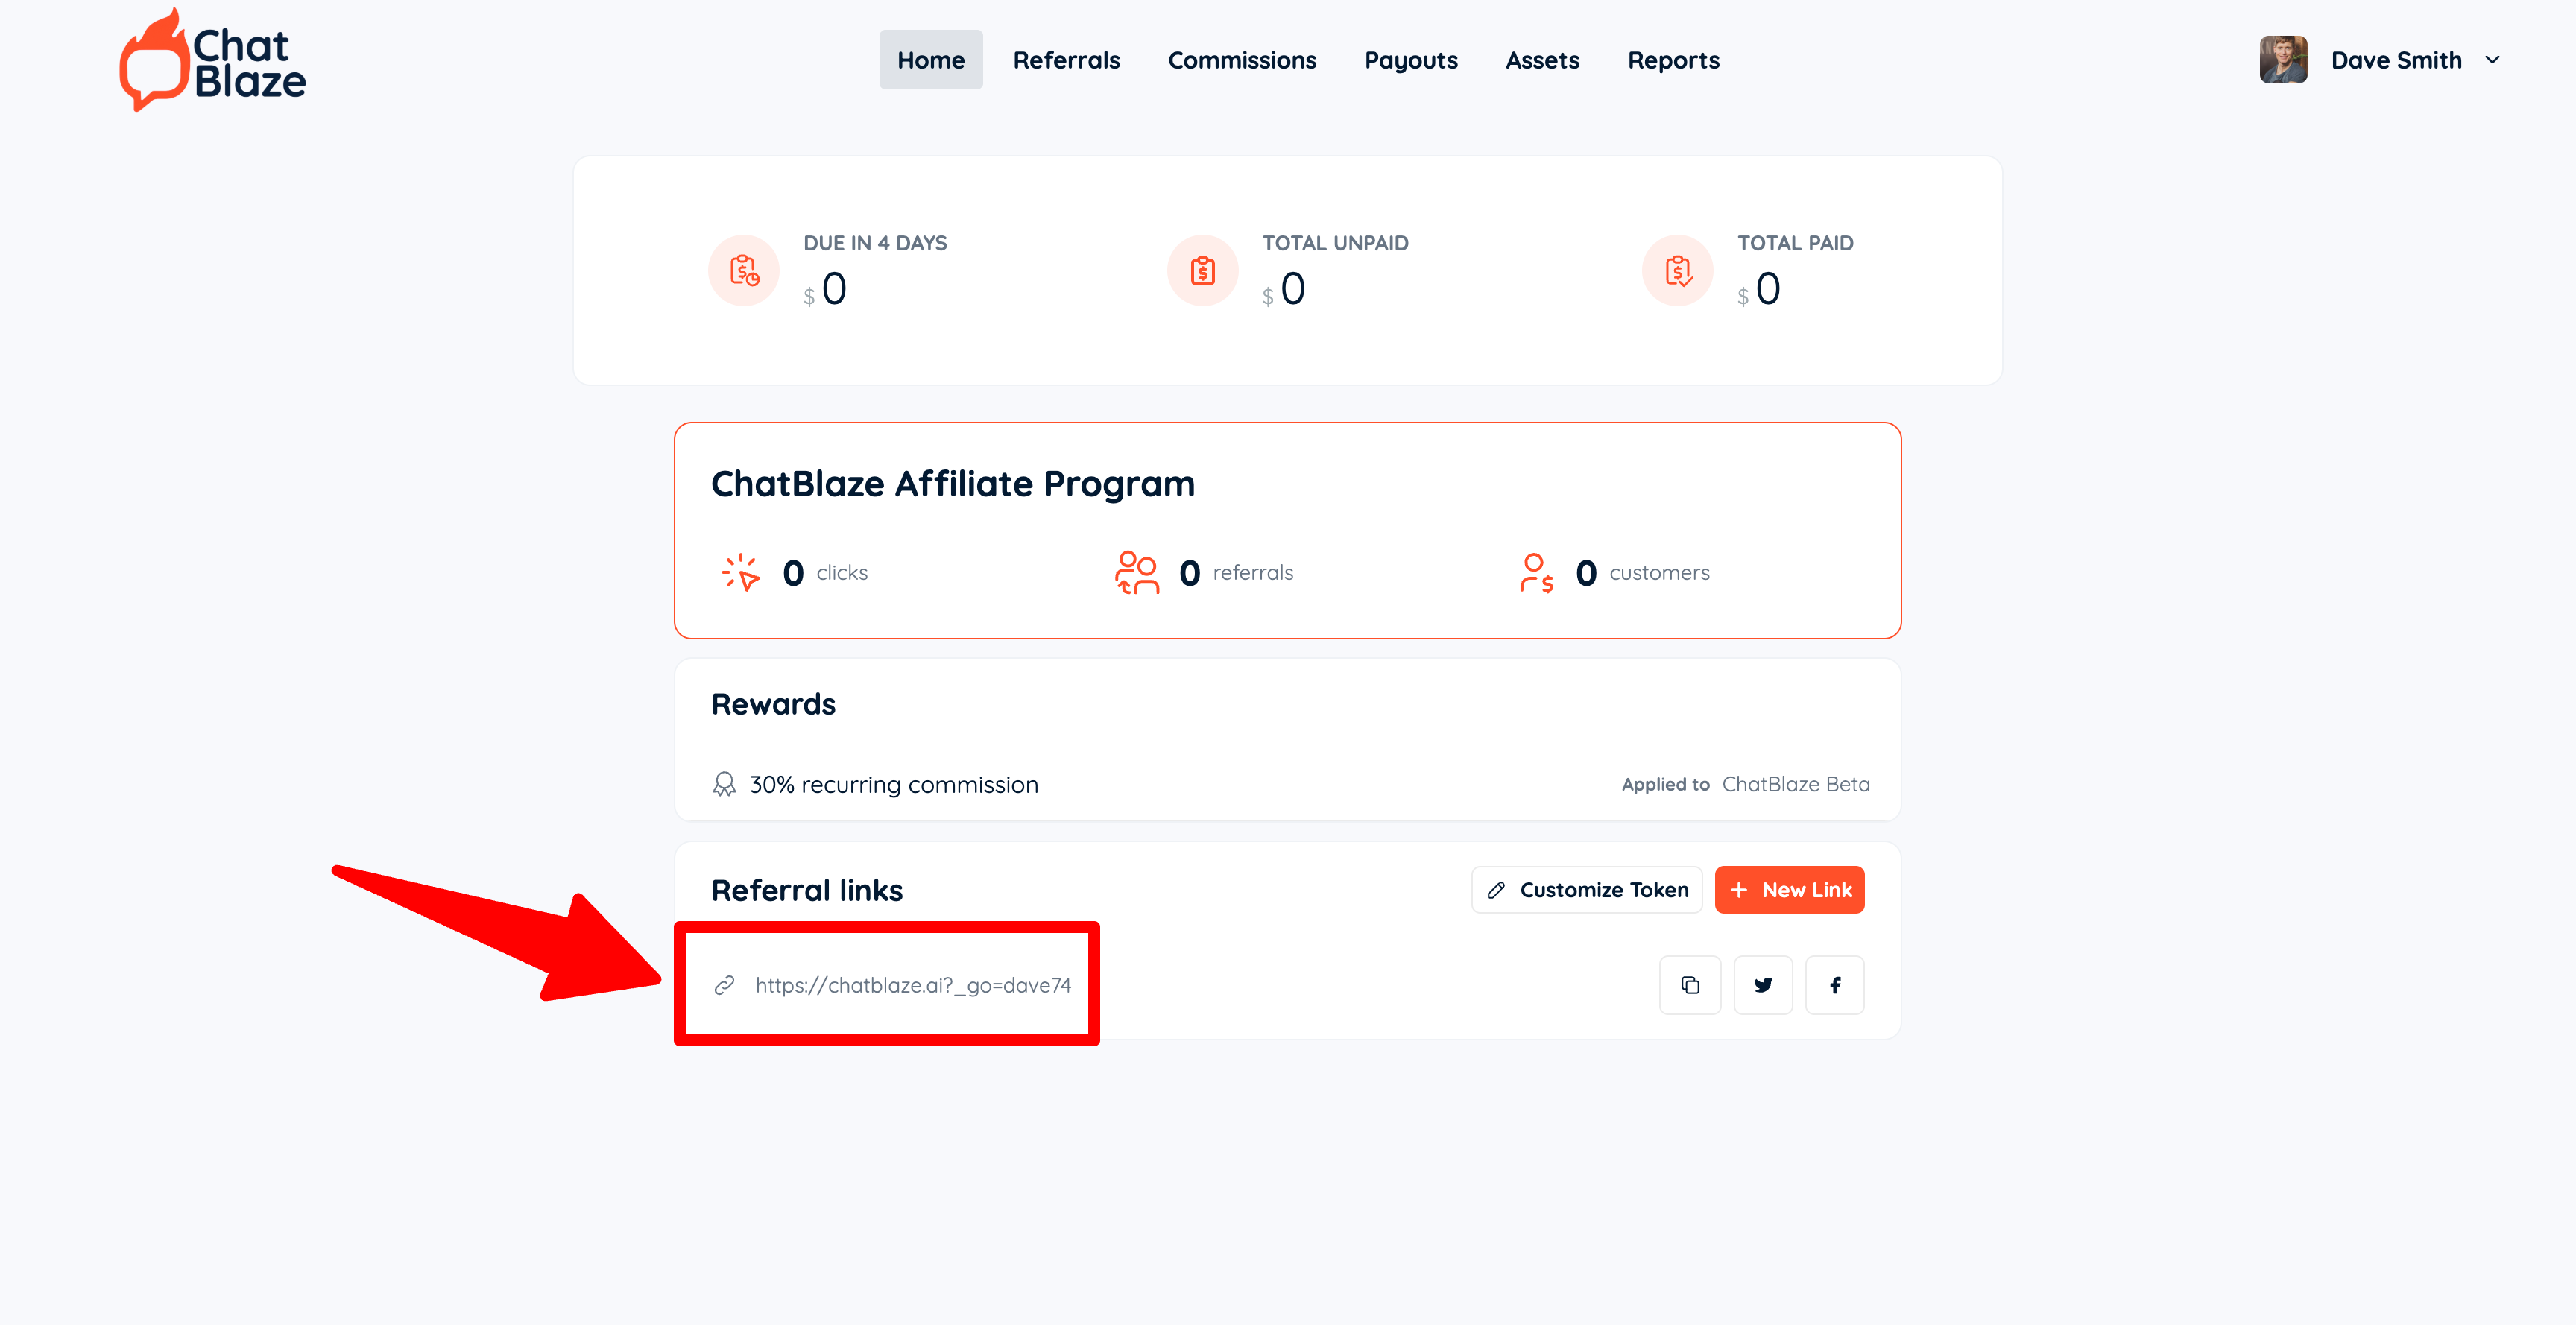
That's it!
Each time someone clicks your link and joins ChatBlaze you'll get a 30% commission payment (either monthly or annually, depending on which subscription your referral chooses).
Your commission will be eligible after 30 days and will be paid on the first Monday of the month. For example, if you refer someone on Tuesday, August 19th, then your first commission will be paid on Monday, October 6th (i.e. wait 30 days, then on the first Monday of the month).
We're excited to partner with you and to start sending you those monthly affiliate commissions.
Sample Bot (Booking Calls From "Likes")
In your ChatBlaze account you will find a "Sample" bot that illustrates an easy way to turn post "likes" into booked sales calls.
While that sample bot is set up for a business that provides investment products/services, it can work for any niche. The steps, scripts, and even the offer can quickly be modified to suit your business.
Watch the video below to see how the sample bot was built, how its scripts work, how it segments leads, and how it makes an offer to schedule a sales call.
Most importantly, notice how simple this bot is. When it comes to building bots that actually achieve their intended goal (i.e. booking sales calls in this case), simpler is almost always best.
Using Messenger Filters
One powerful way to make sales using ChatBlaze is by using the lead "filters" that are built into your ChatBlaze Messenger window. Here's how they work:
Using Messenger Filters:
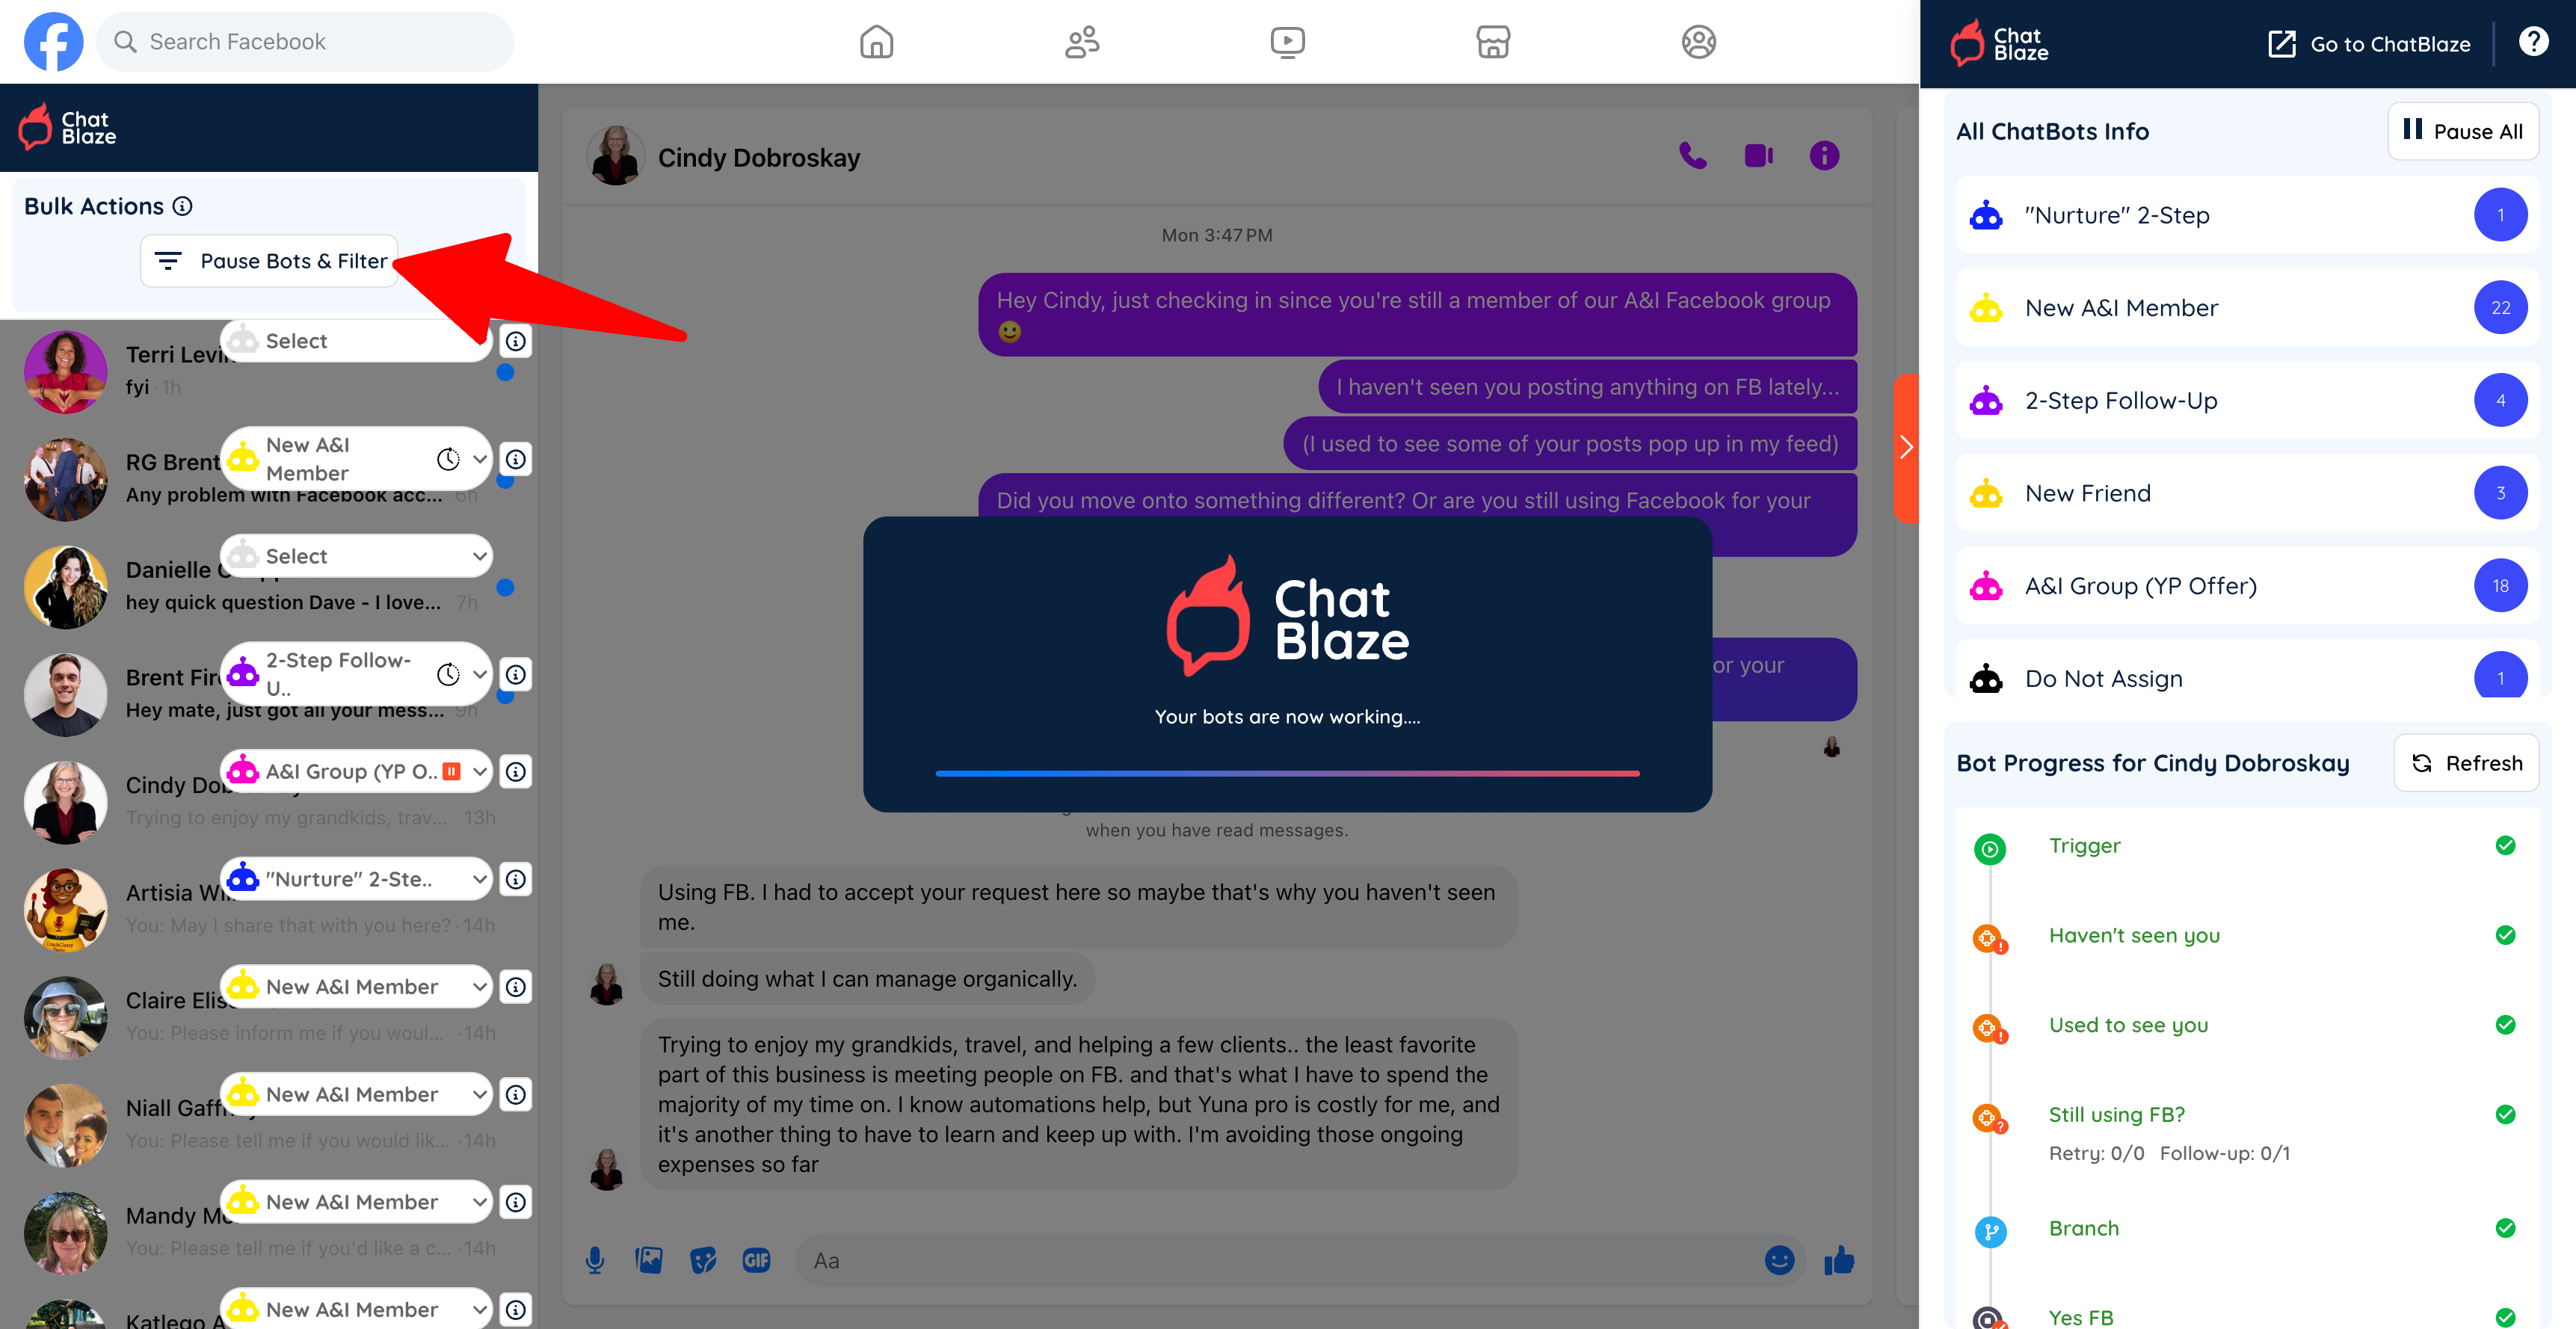
1) Open your ChatBlaze Messenger window.
2) Click the "Pause Bots & Filter" button.
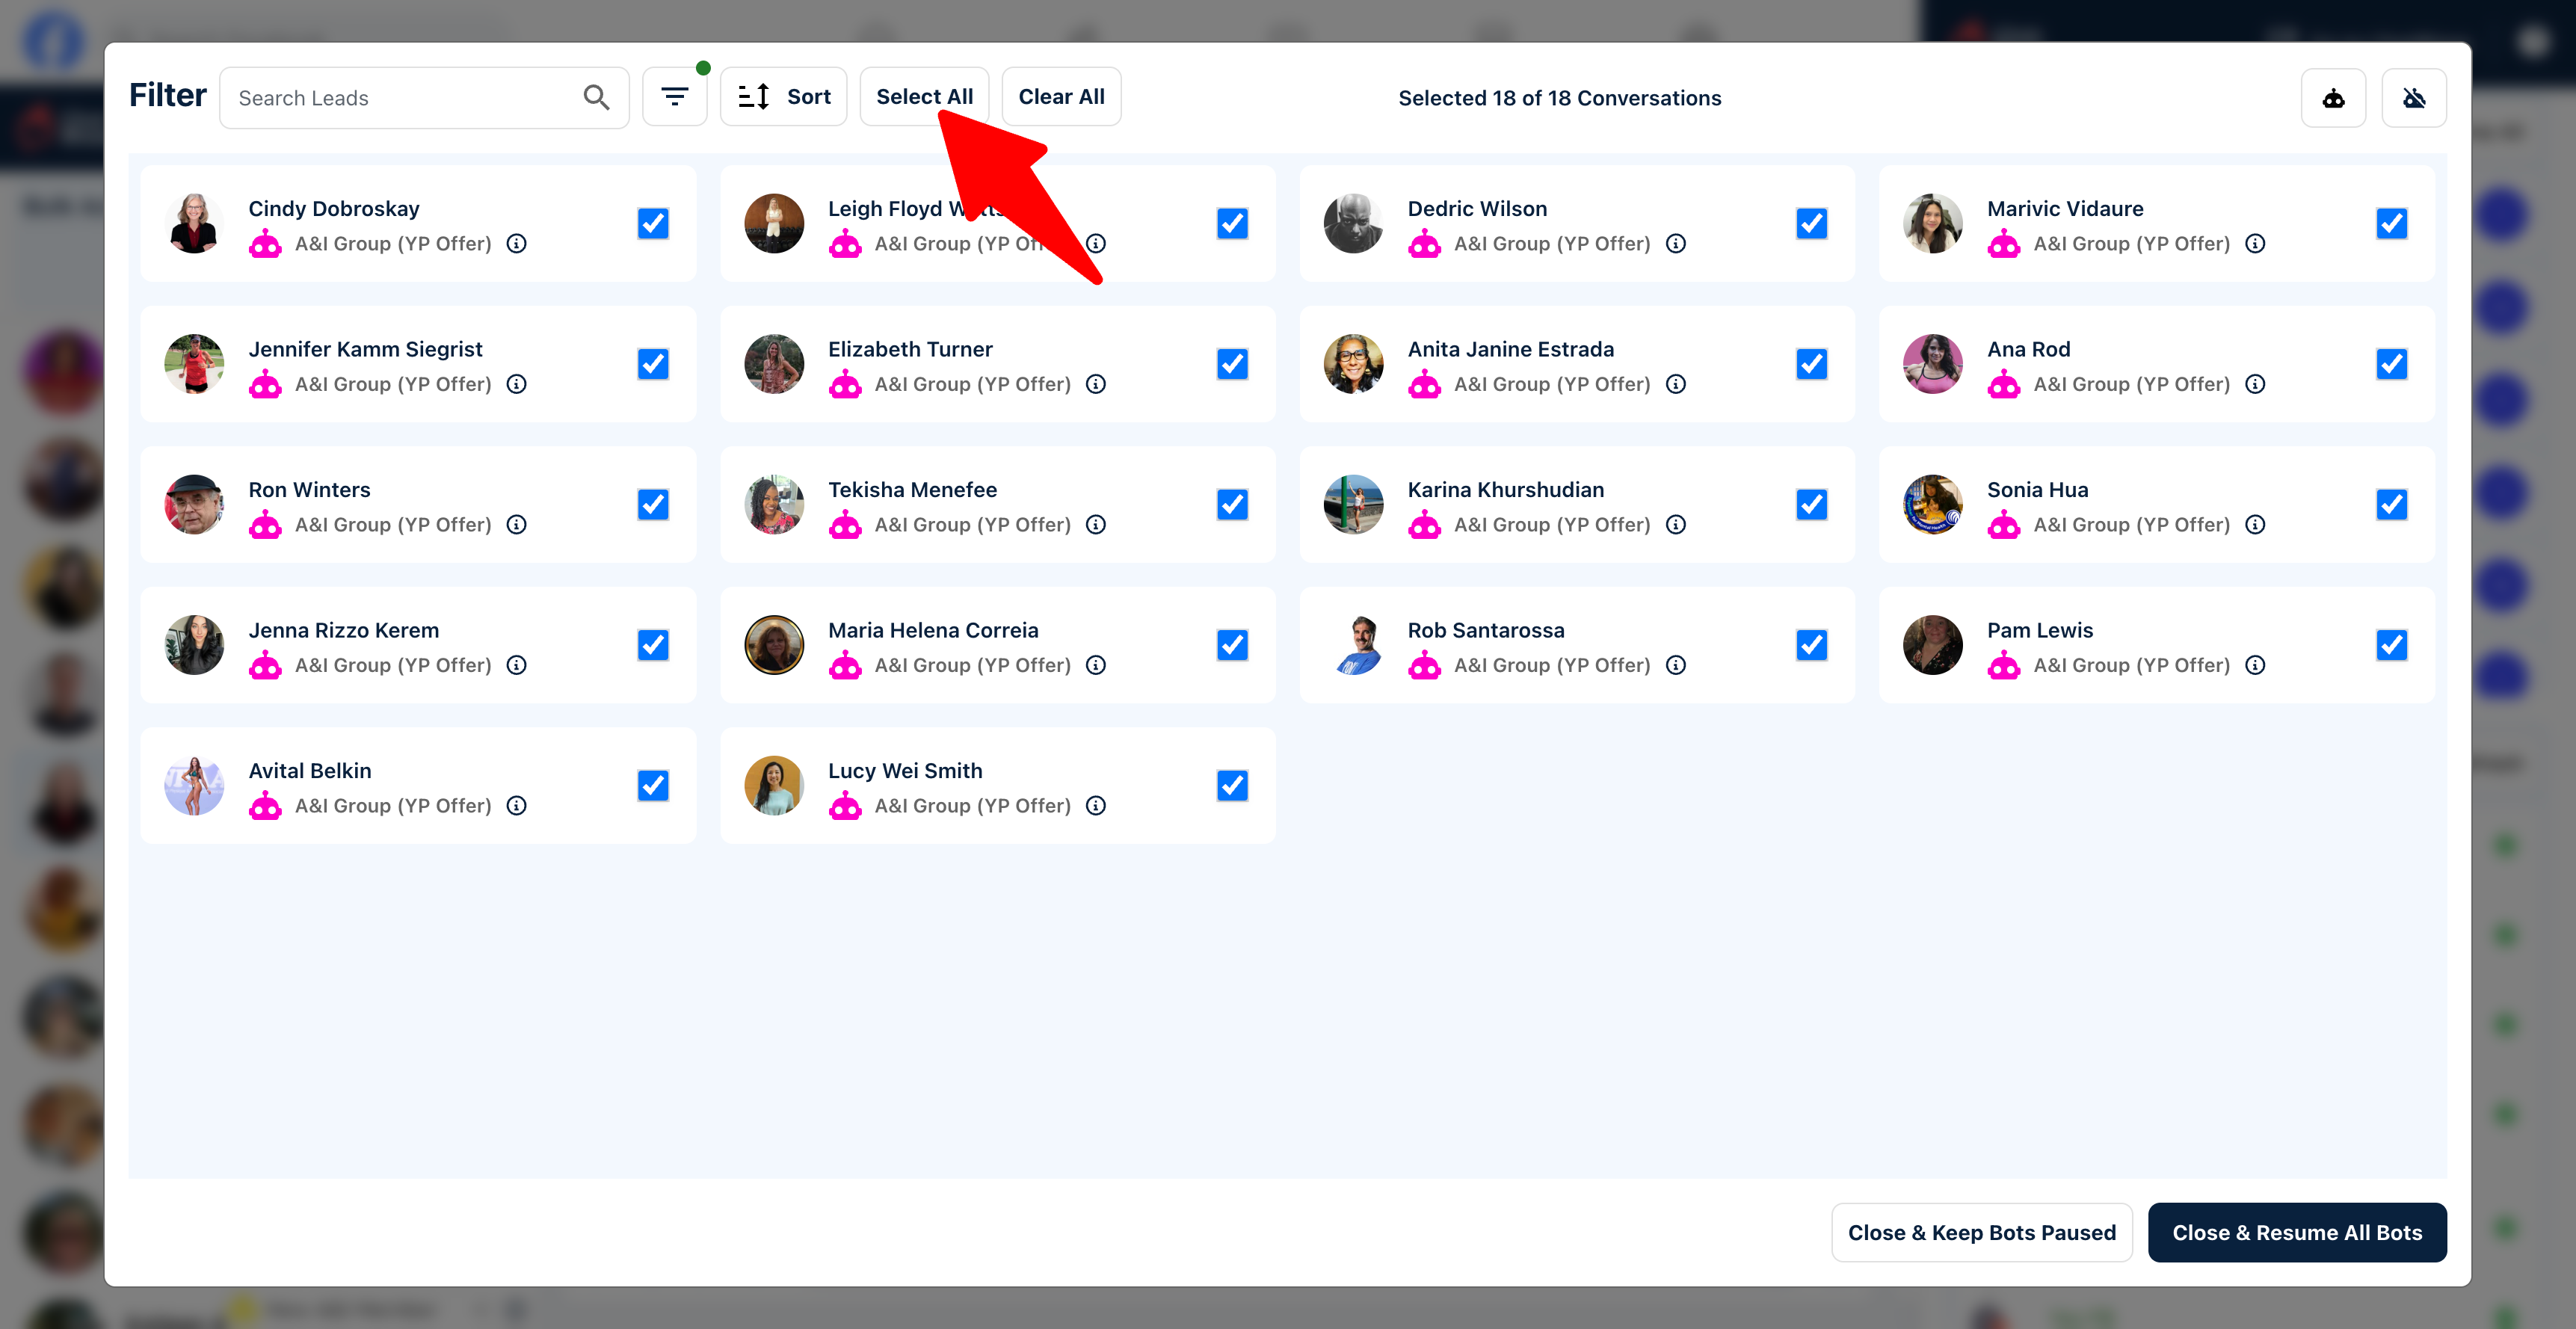
3) Click the Filter icon and then choose up to 3 filters to apply to your leads.
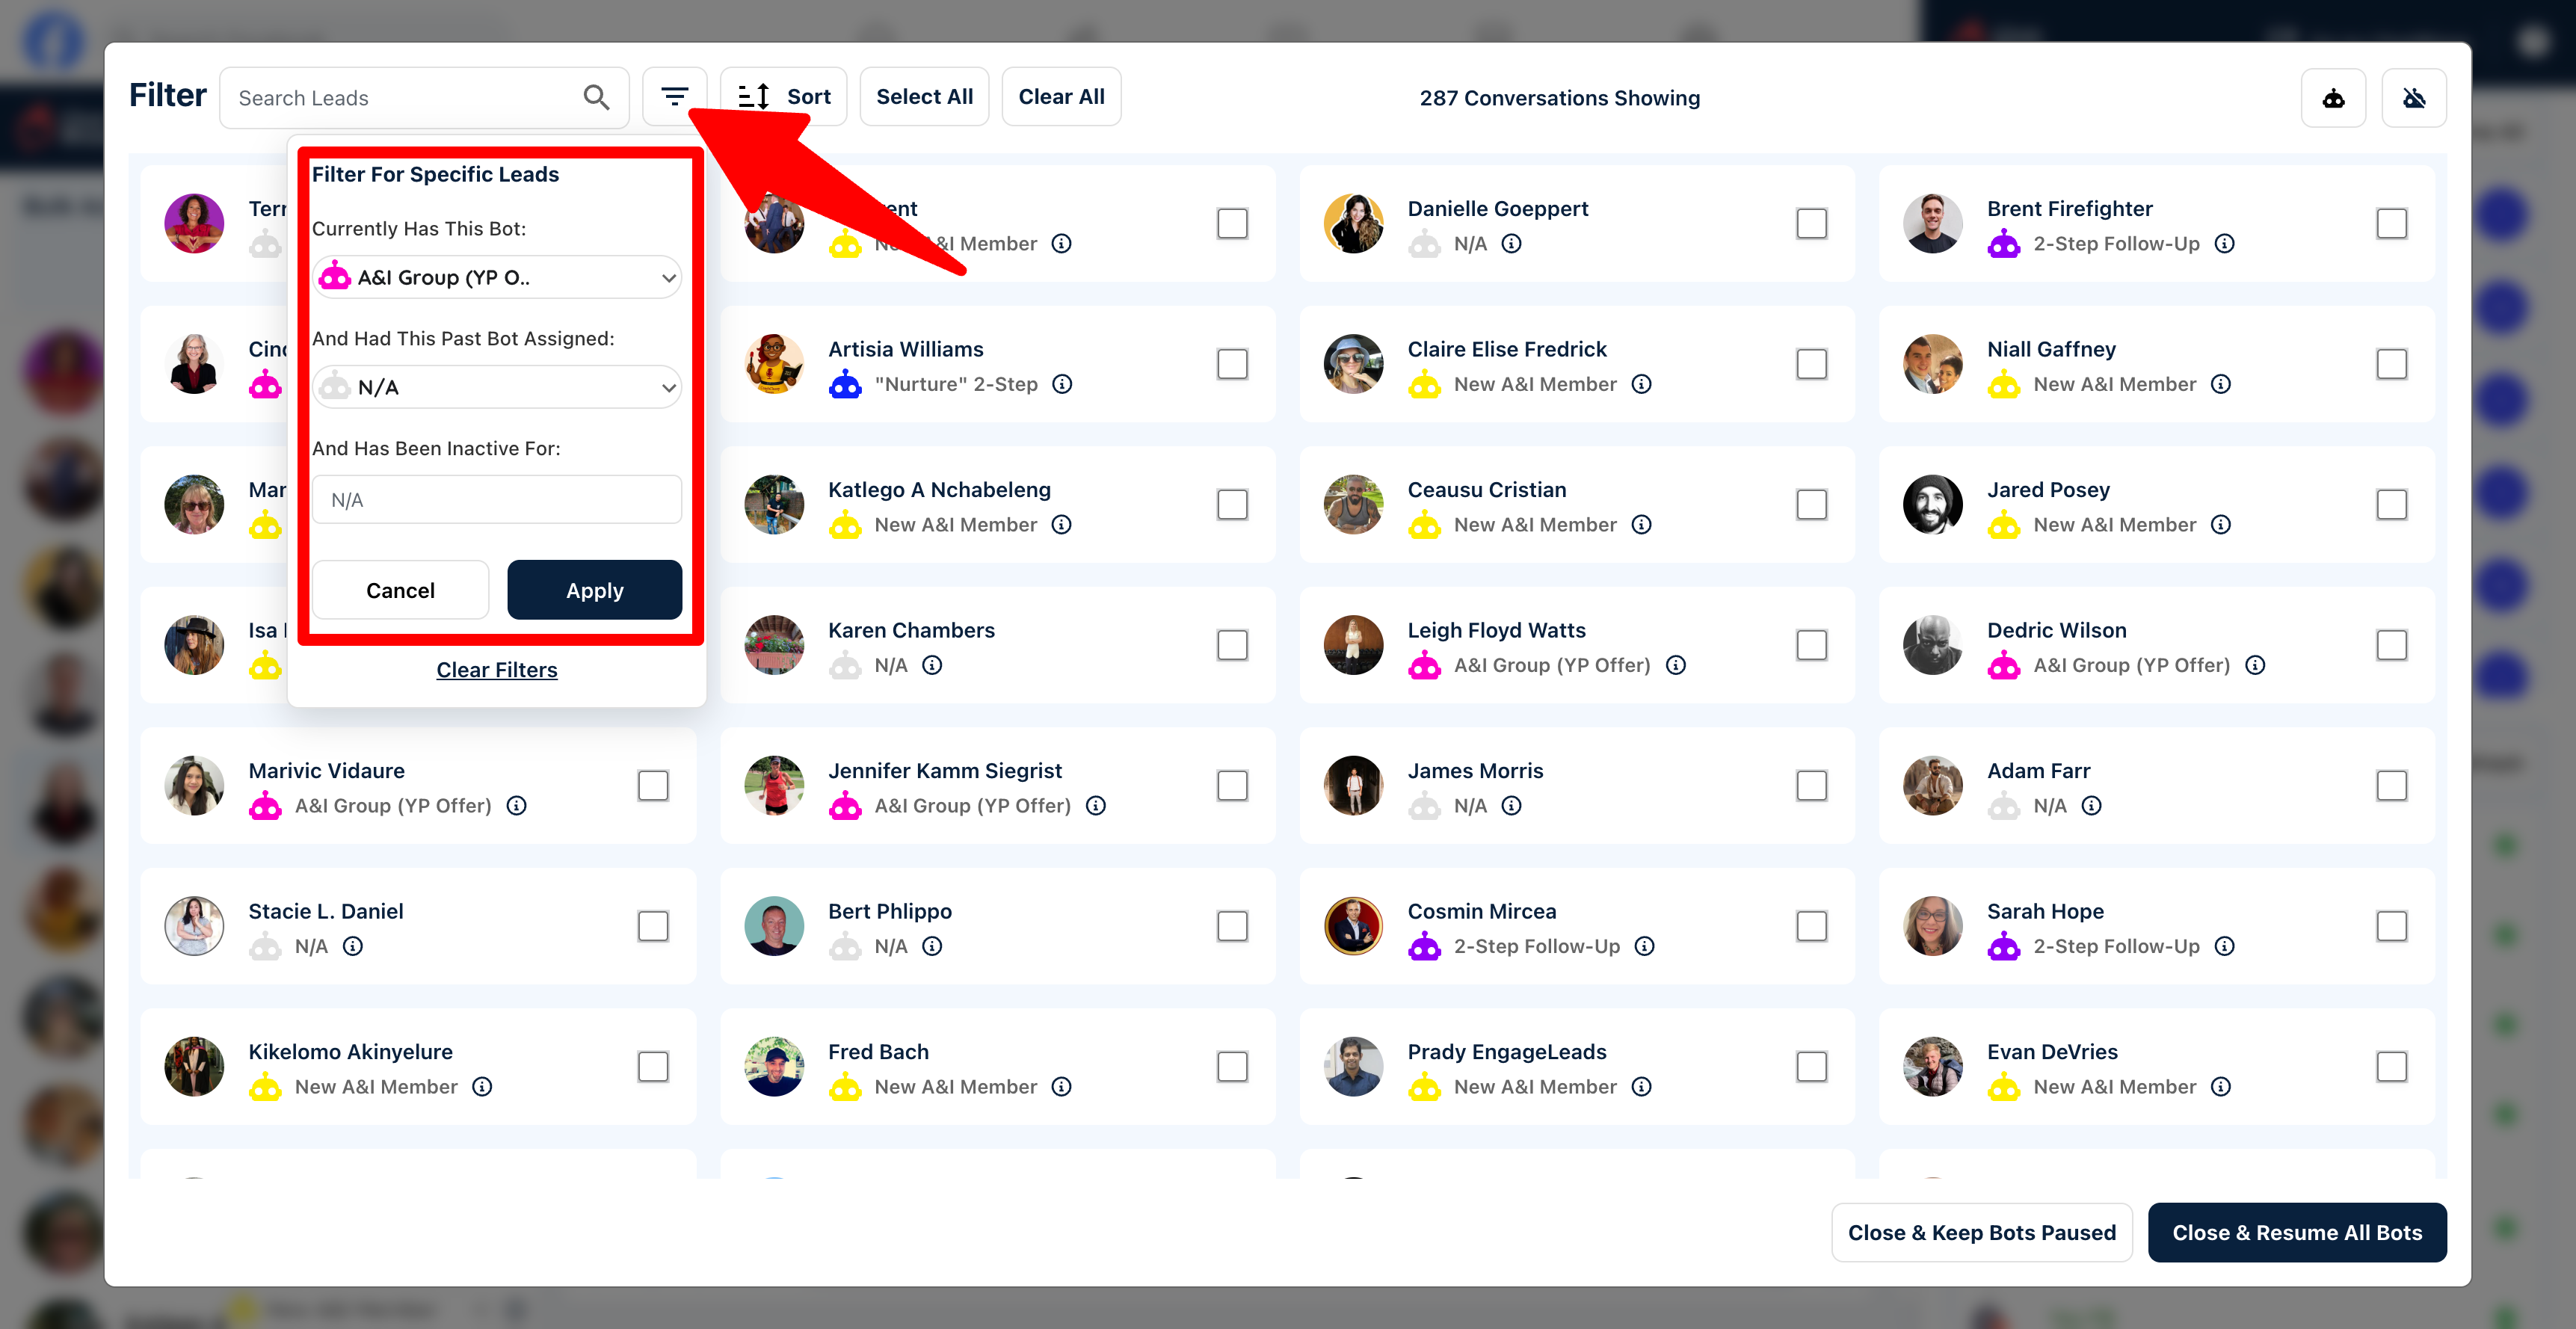
4) Select your leads manually by clicking the box next to their photo or use "Select All" to select every lead.
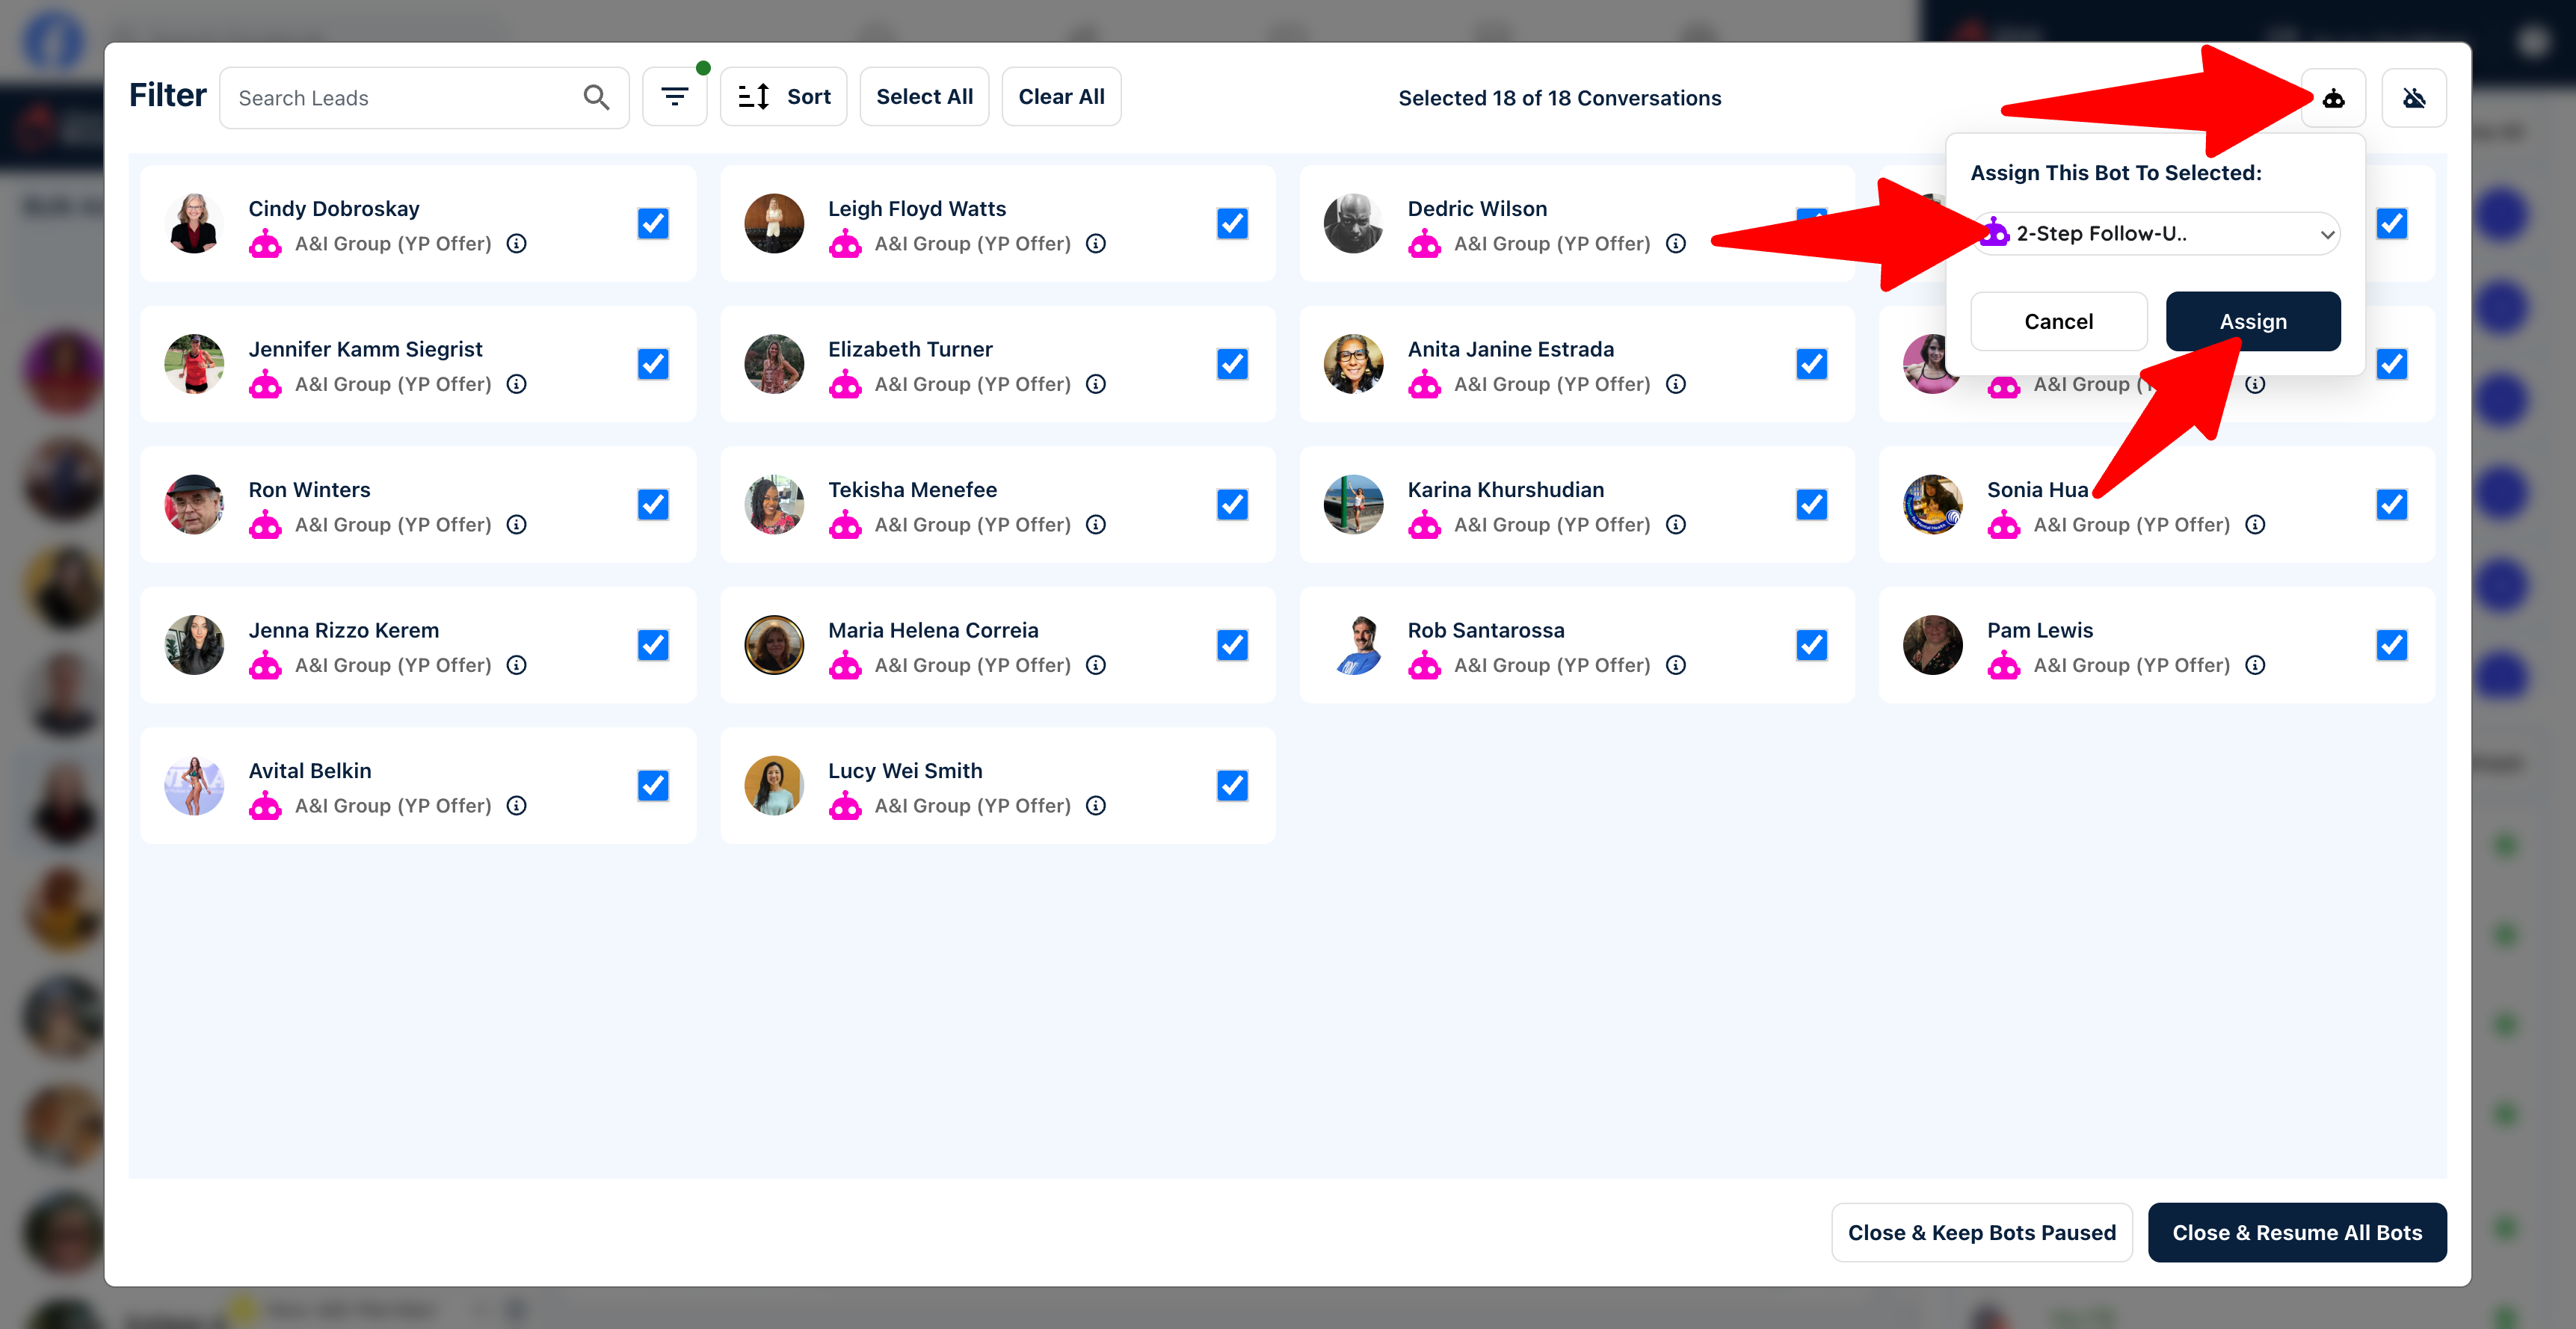
5) Click the icon to assign a bot to these leads, then choose the bot you want to assign from the drop-down menu. Note: As soon as you click "Assign" the bots will be assigned, so make sure you've chosen the correct bot.
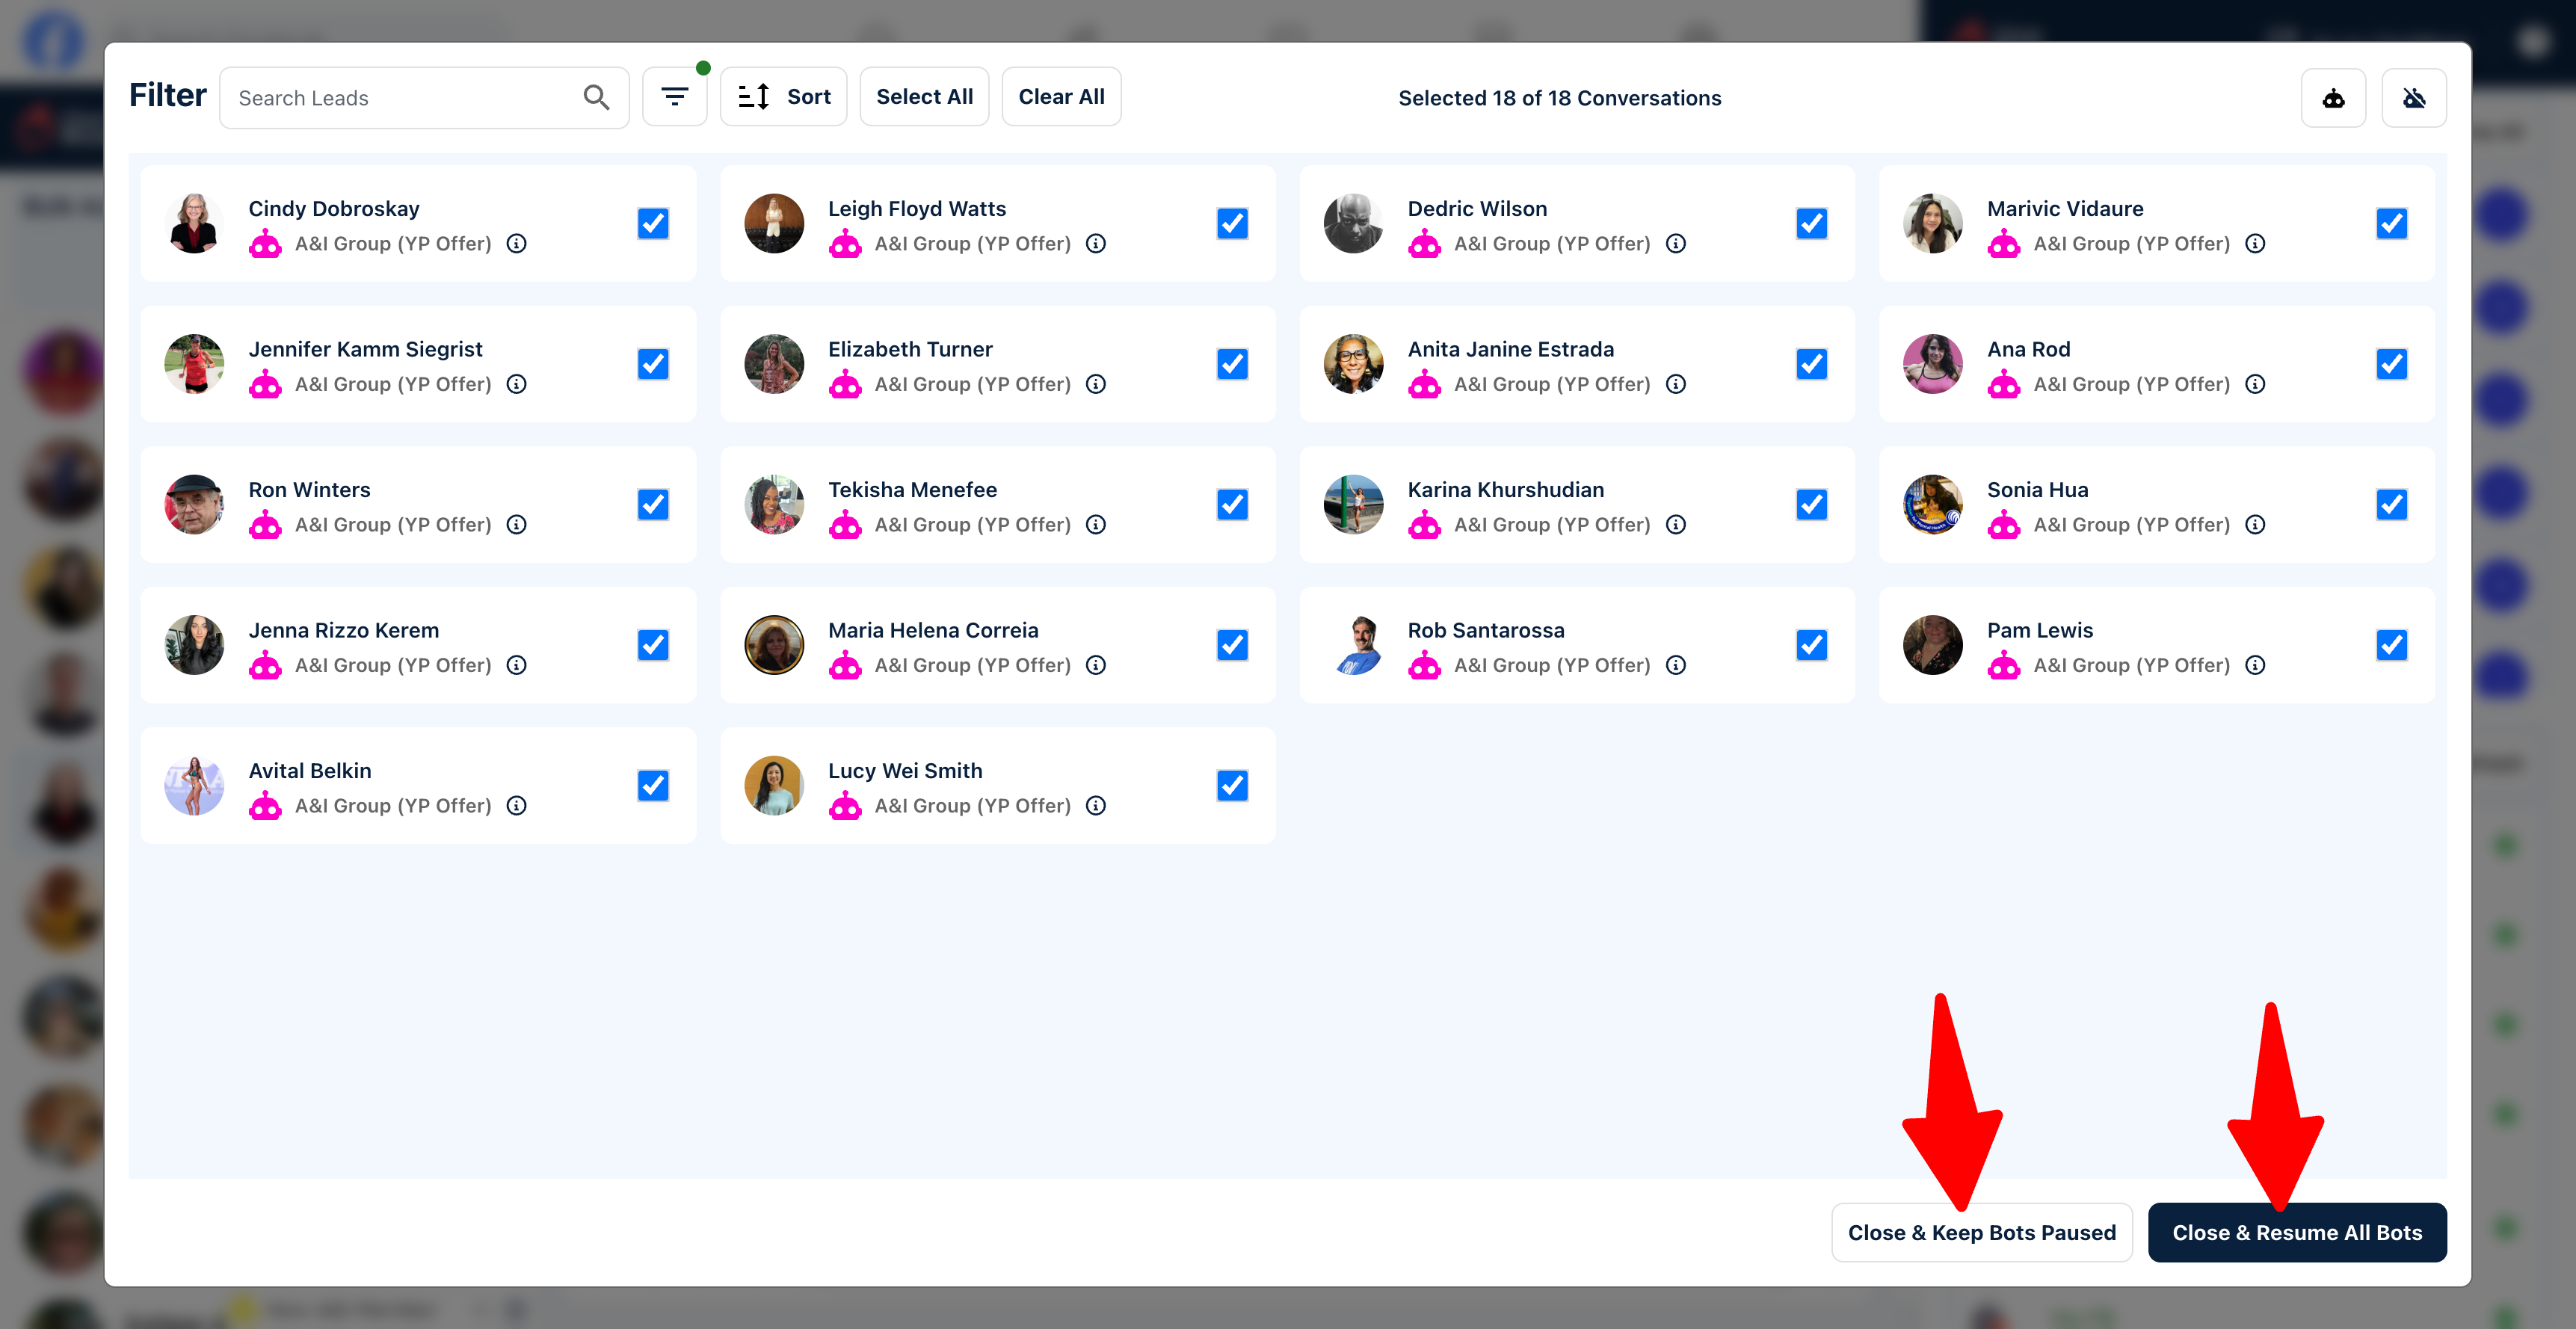
6) After assigning your bots, either close the pop-up window and keep your bots paused, or close and resume all bots.
7) If you chose to keep your bots paused, you can resume them at any time by clicking the "Resume All" button inside Messenger.
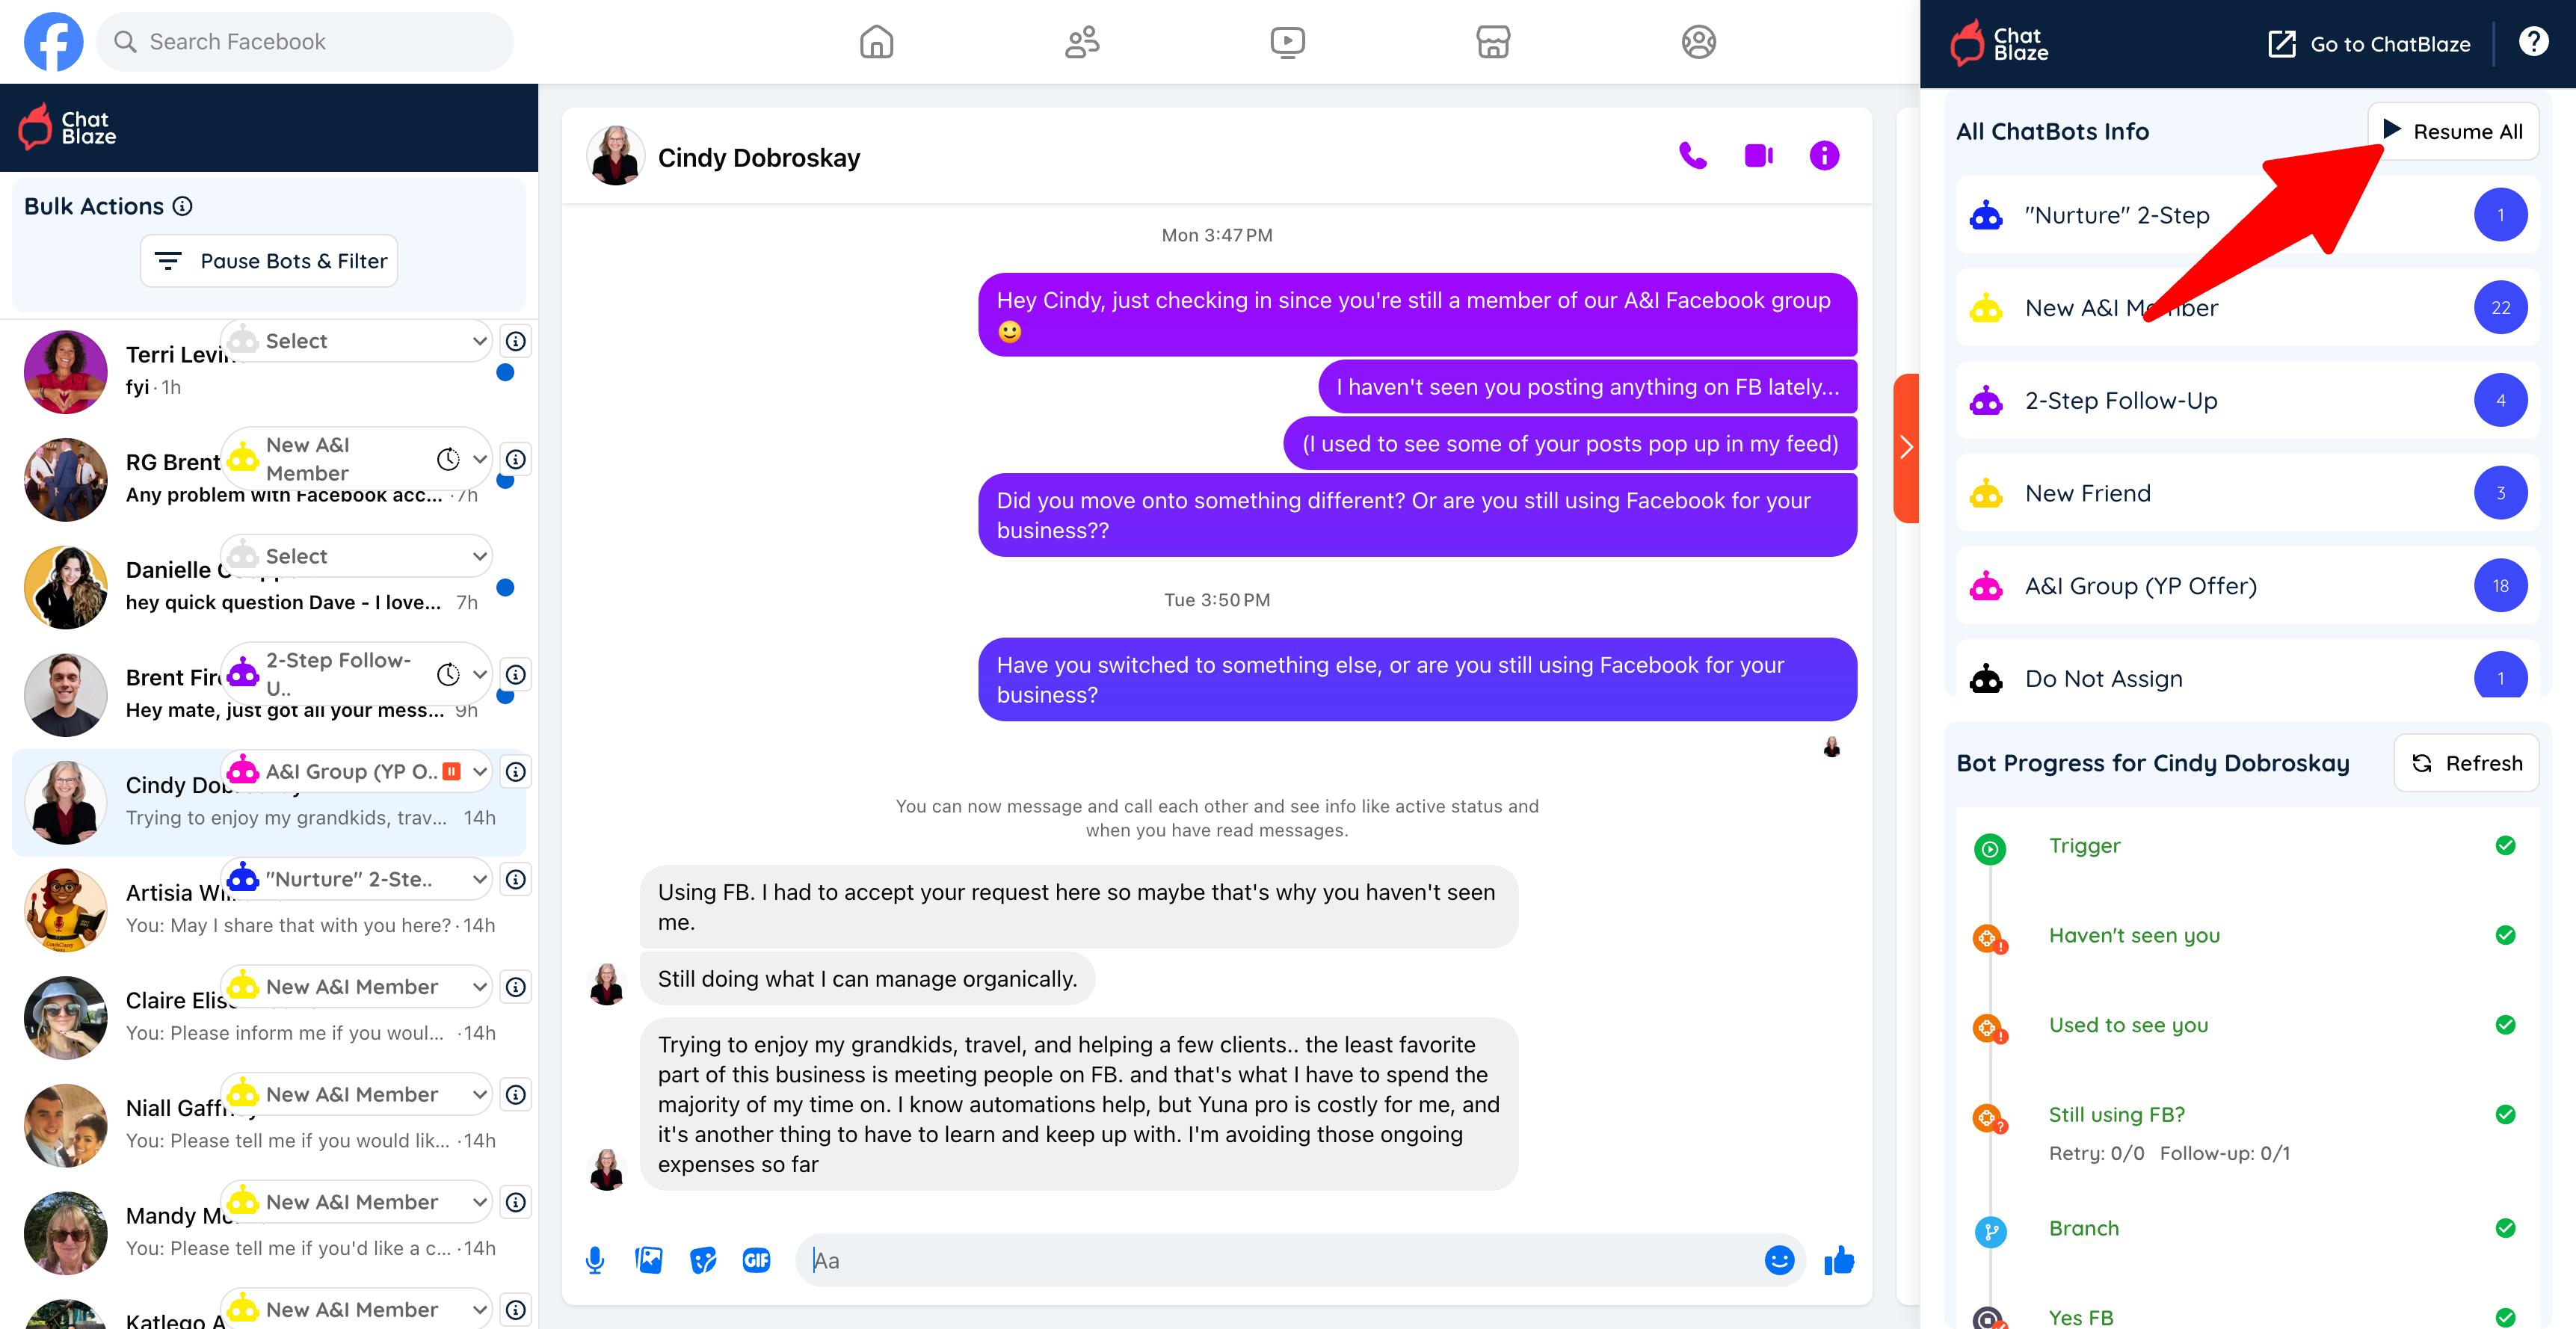
8) Once resumed, your bots will begin chatting with the leads they are assigned to.